In this 15-minute tutorial, you'll create a Wallet and then link it to OpenSea to create your first NFT. Finally, we'll learn how to price and sell your NFT.
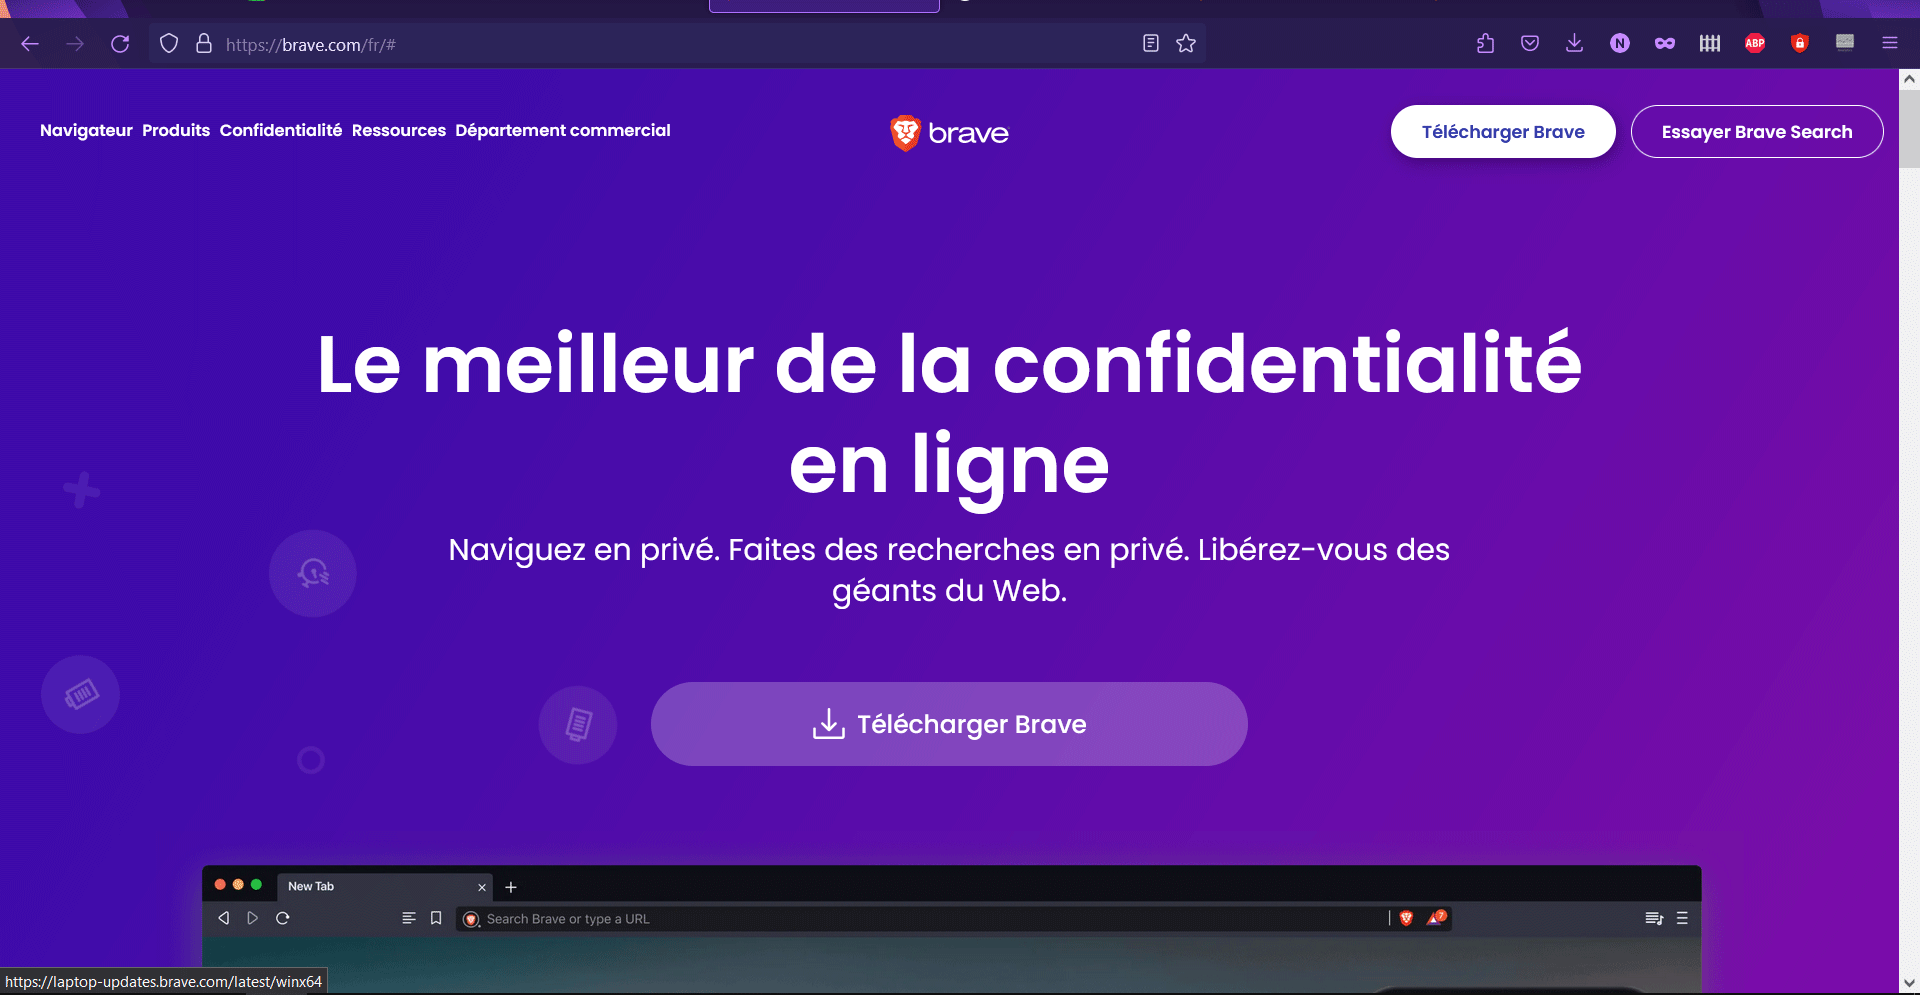
Click on "Download Brave".Follow the installation steps.Double-click on the program and install it.You've installed Brave correctly.
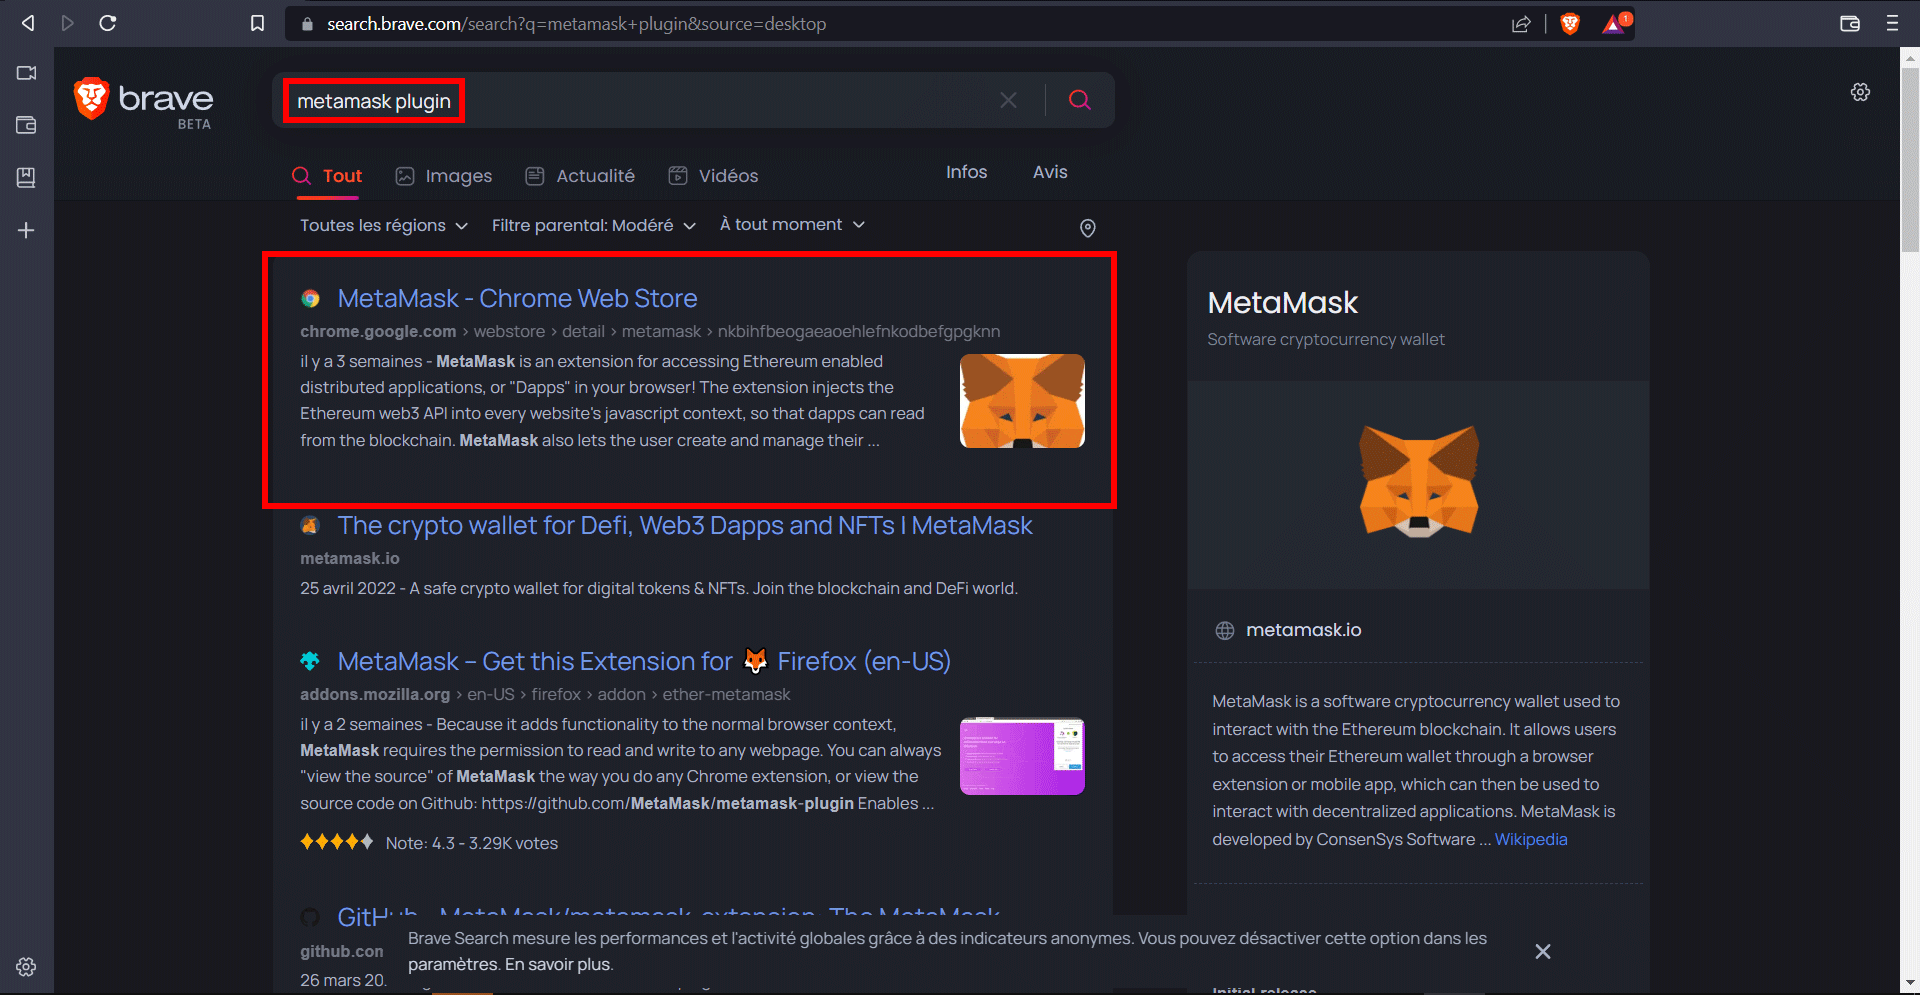
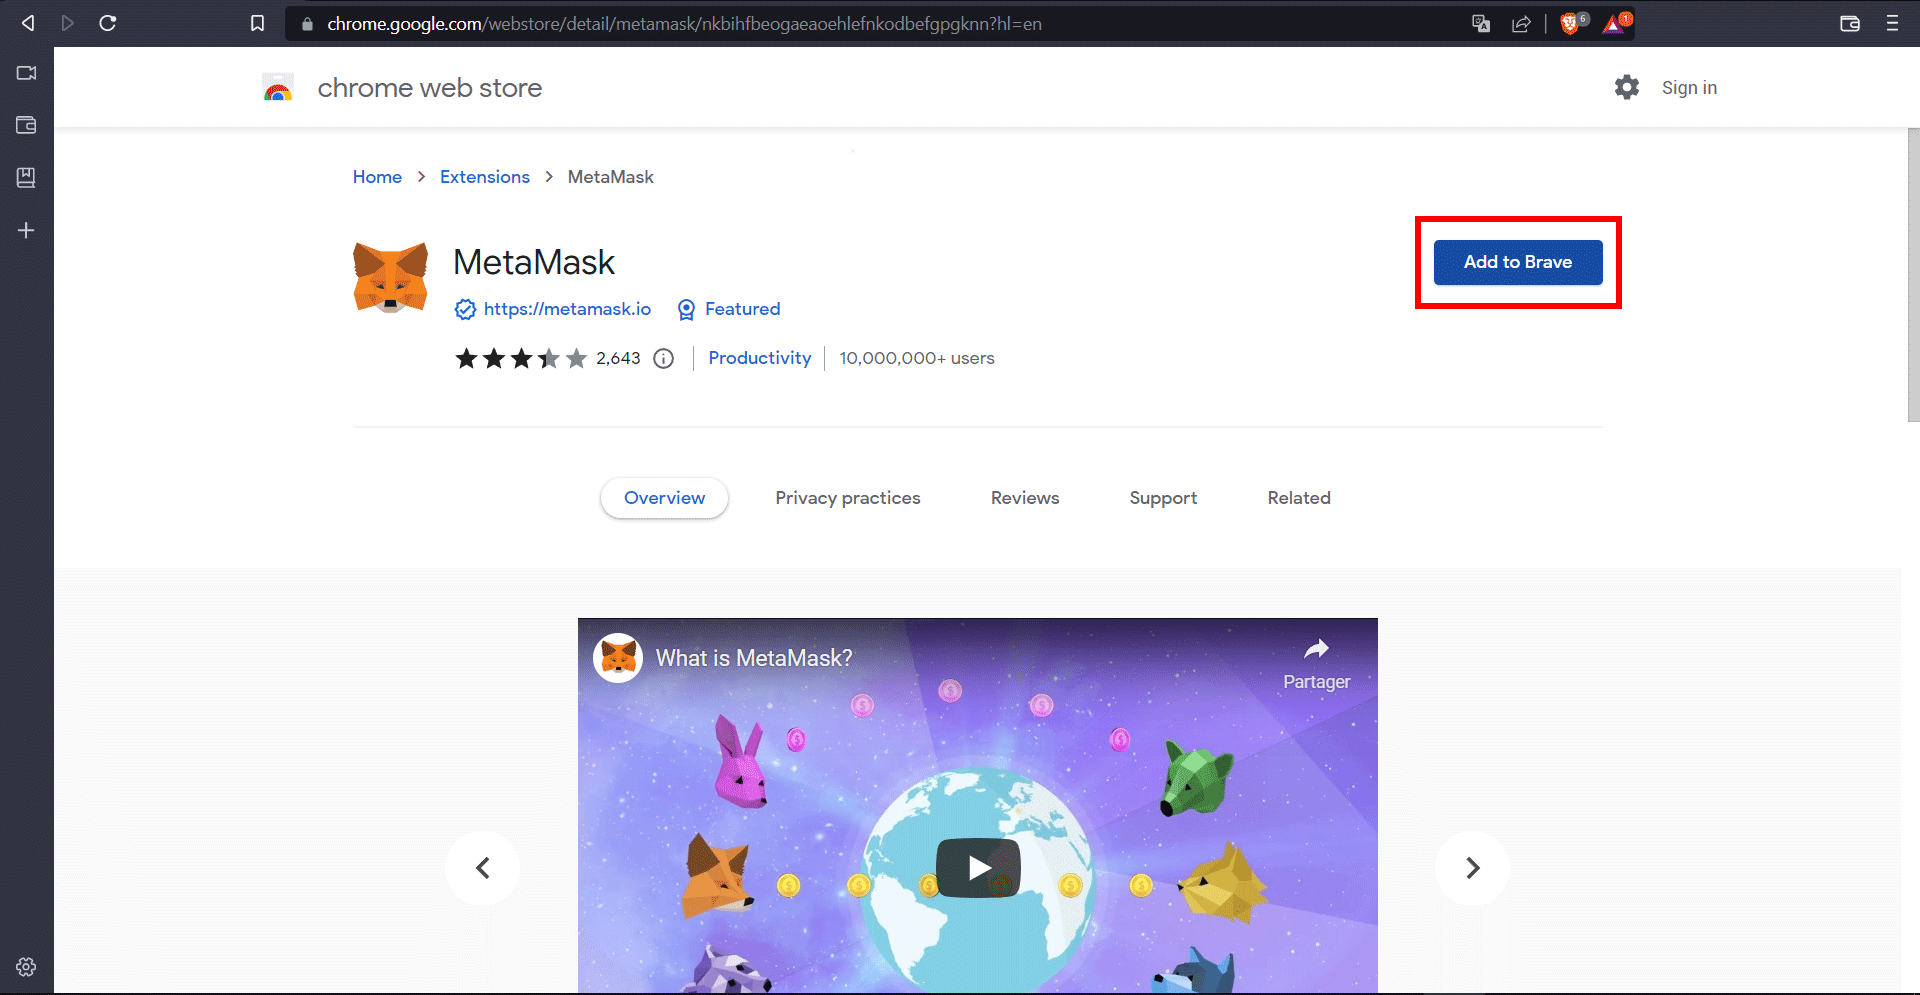
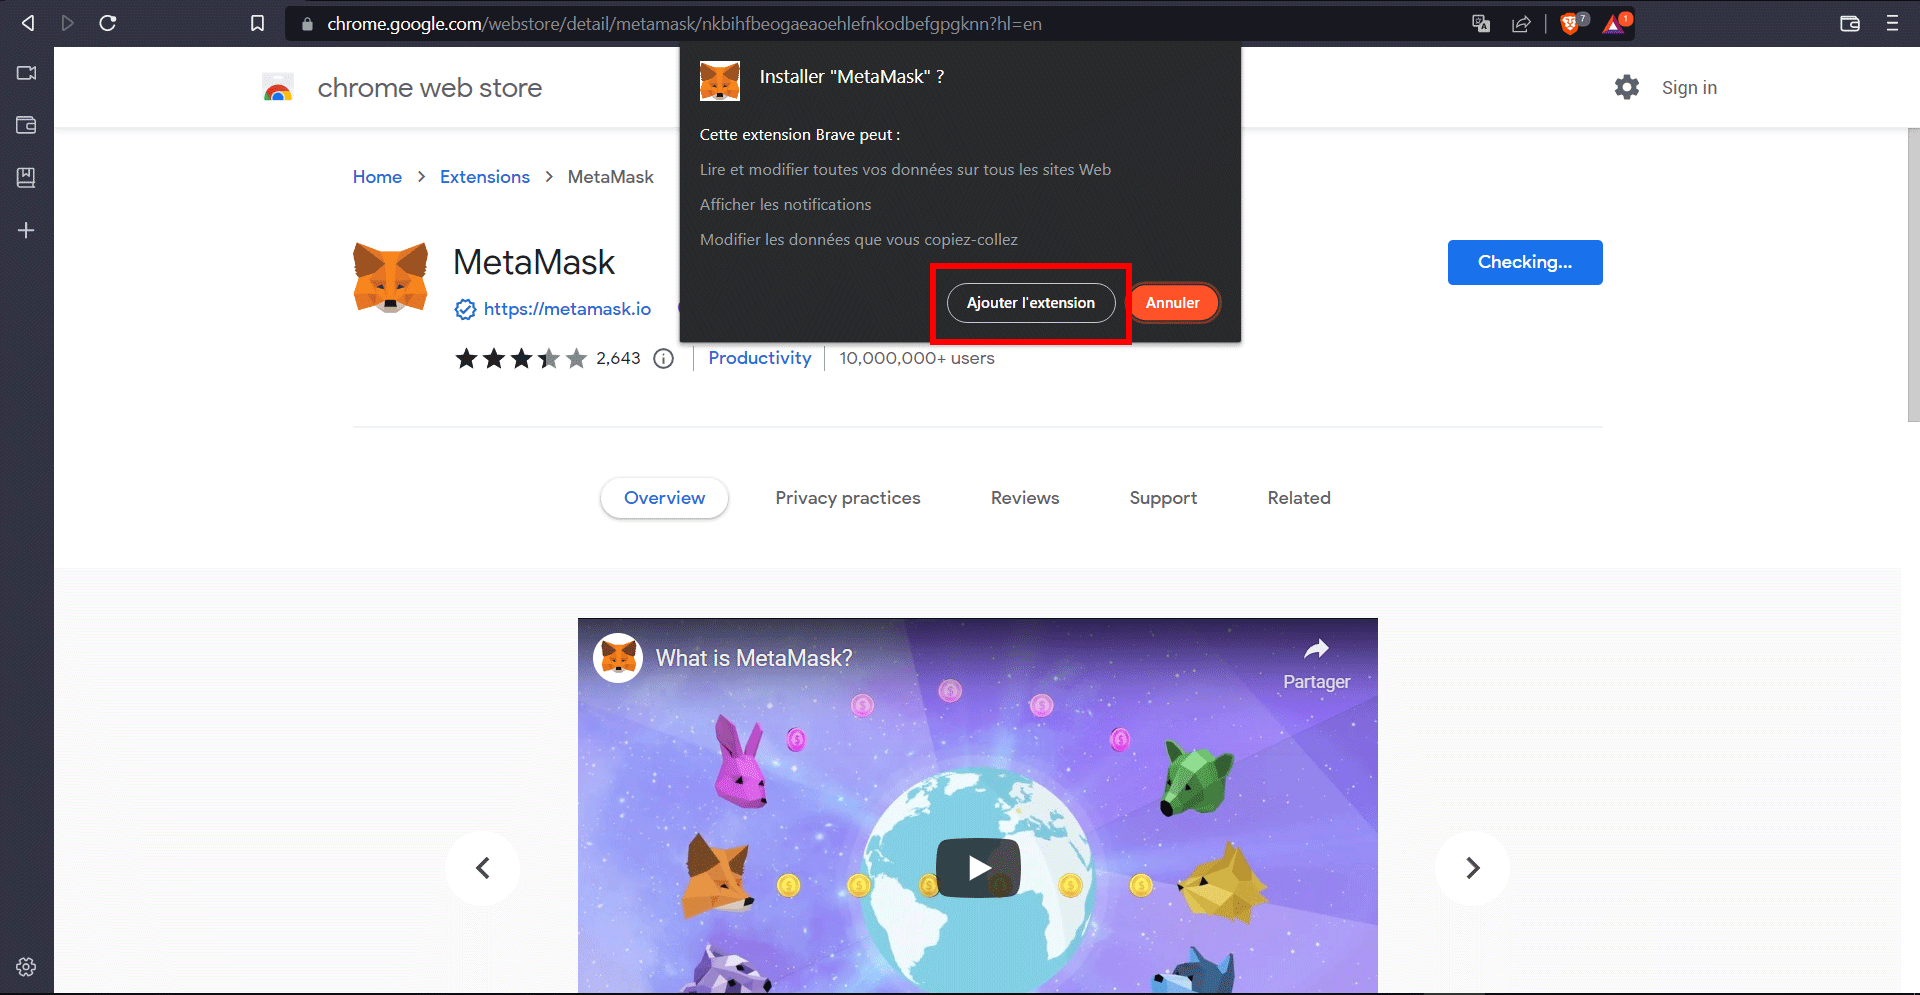
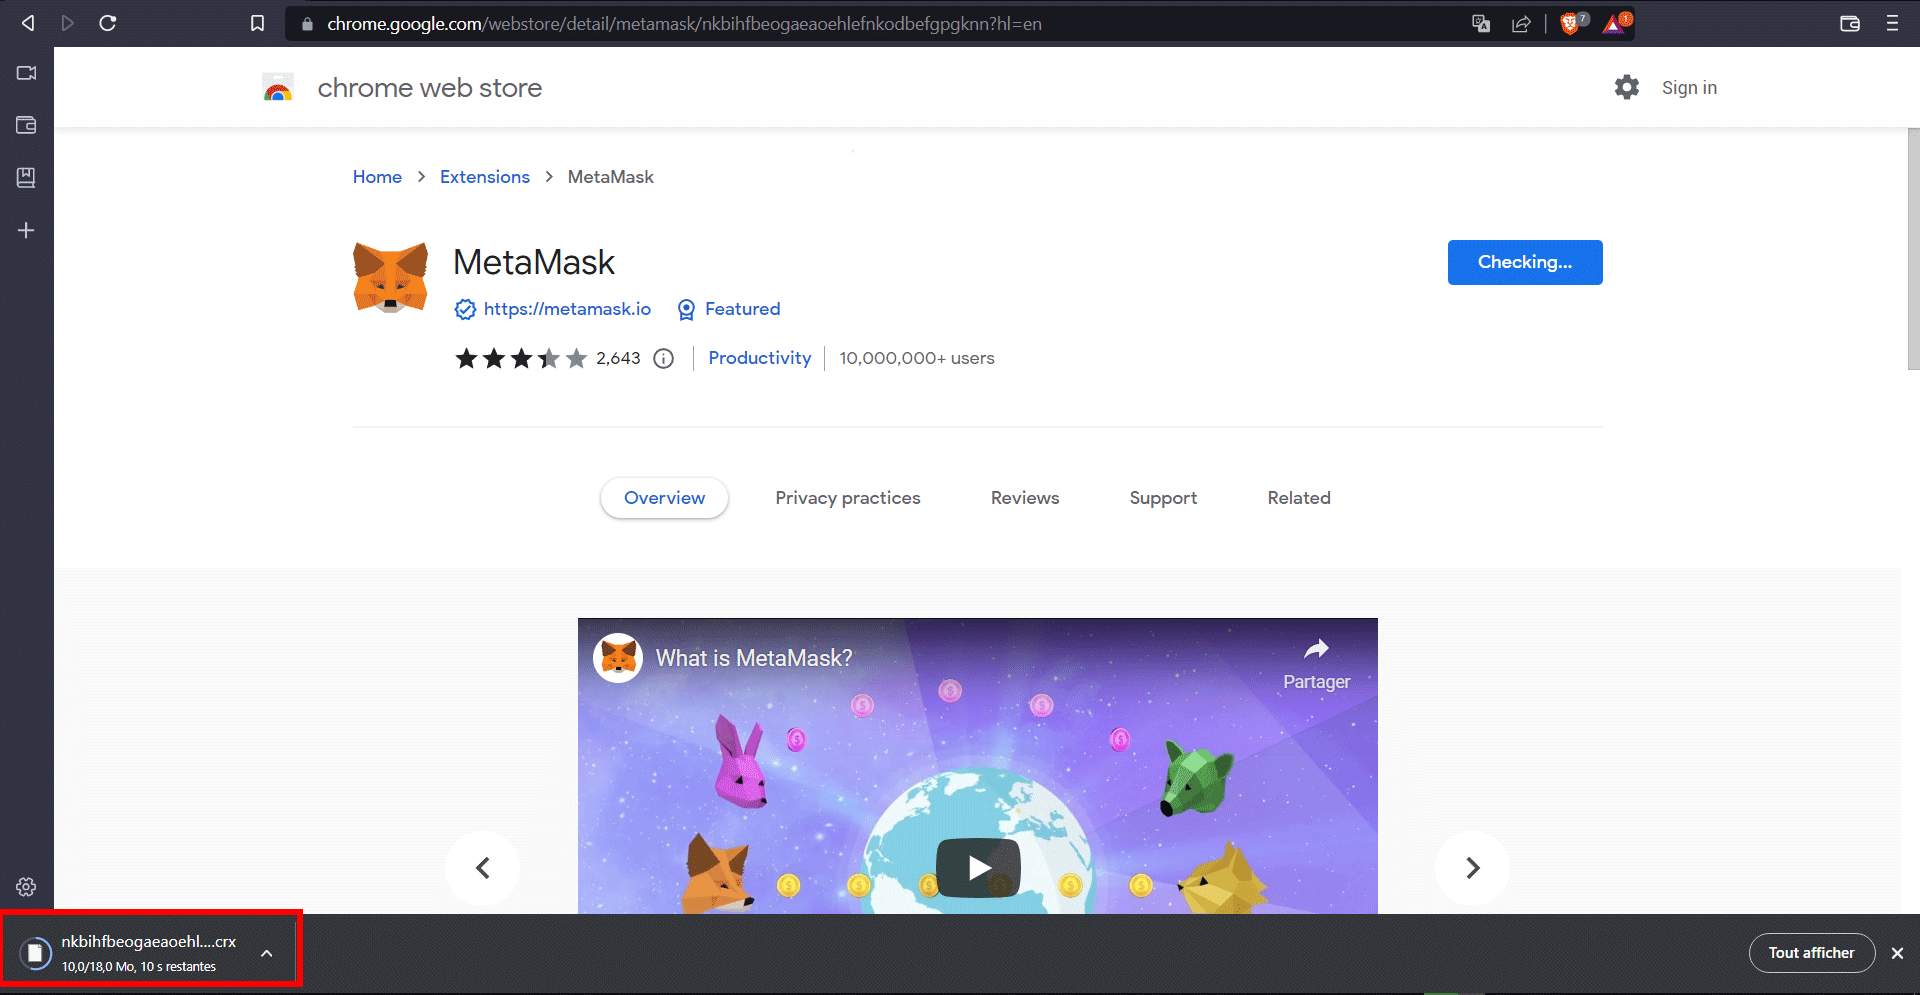
2 - Add MetaMask to Brave
MetaMask is a Wallet.
Search for Metamask plugin and click on the link to the Chrome web storeClick on "Add to BraveAdd theA download will start, please wait.
3 - Configure MetaMask
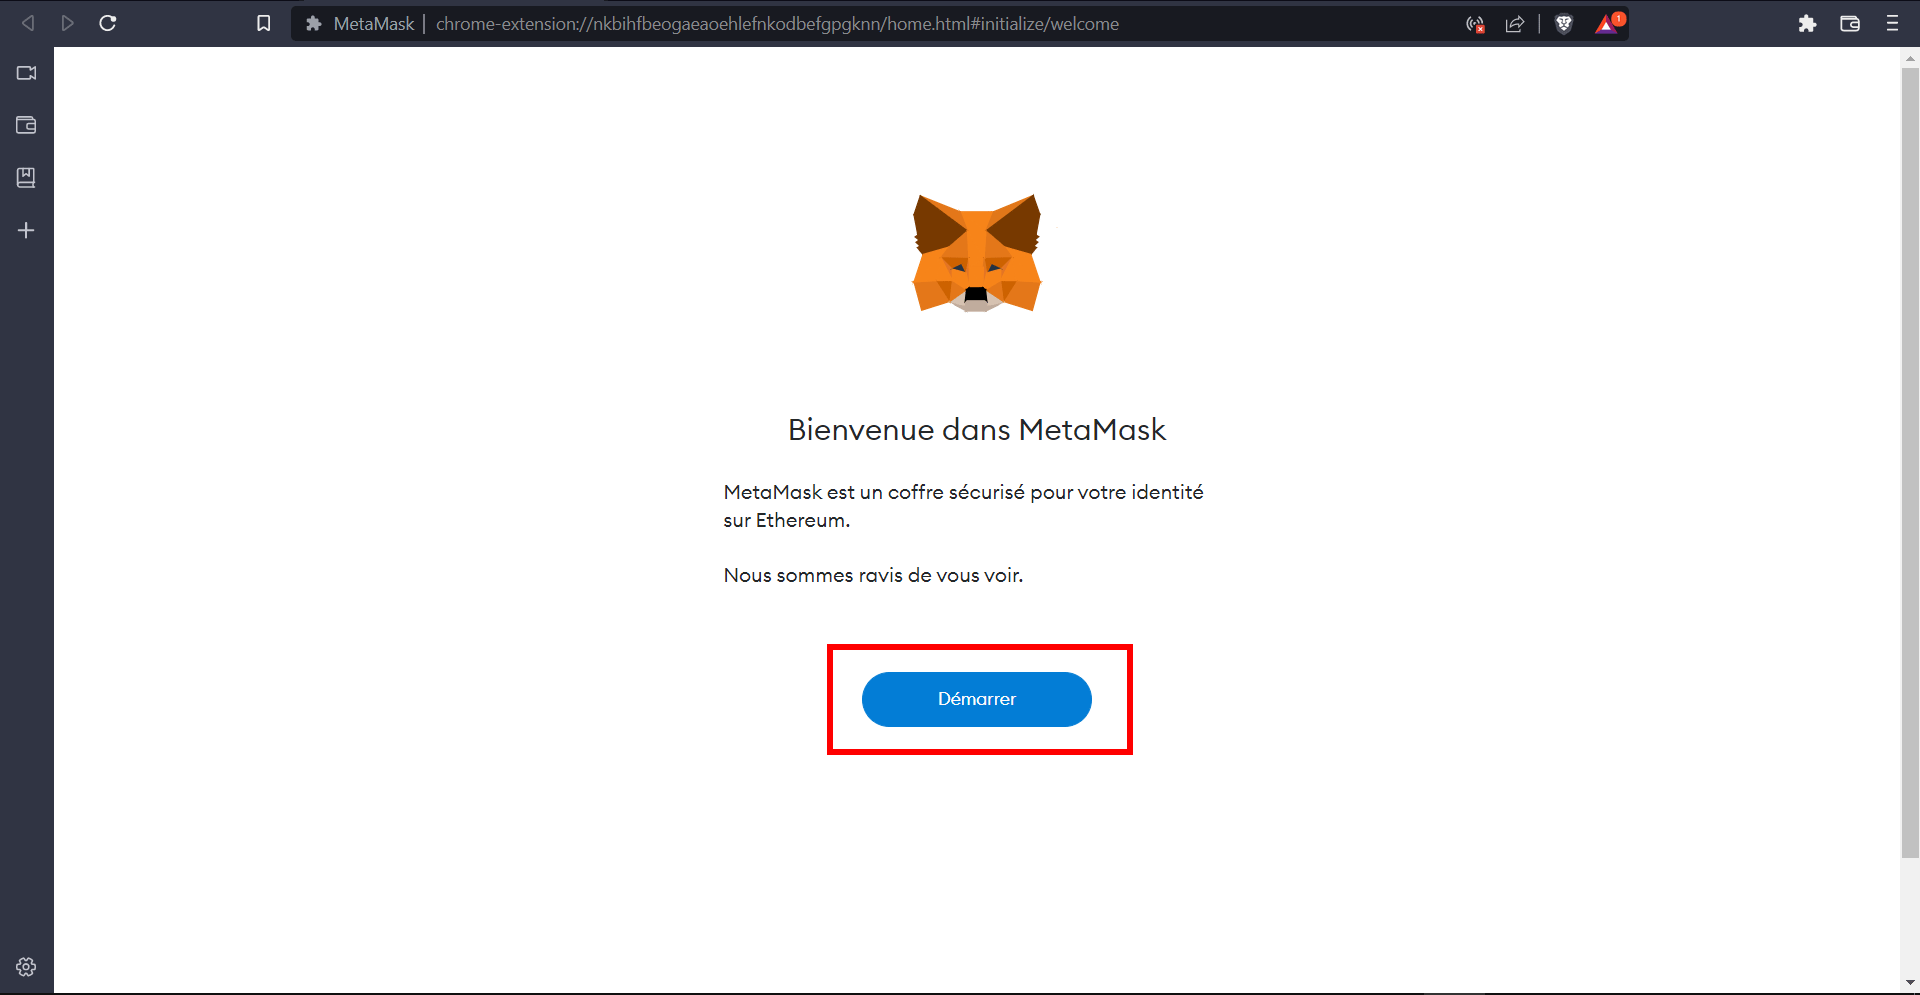
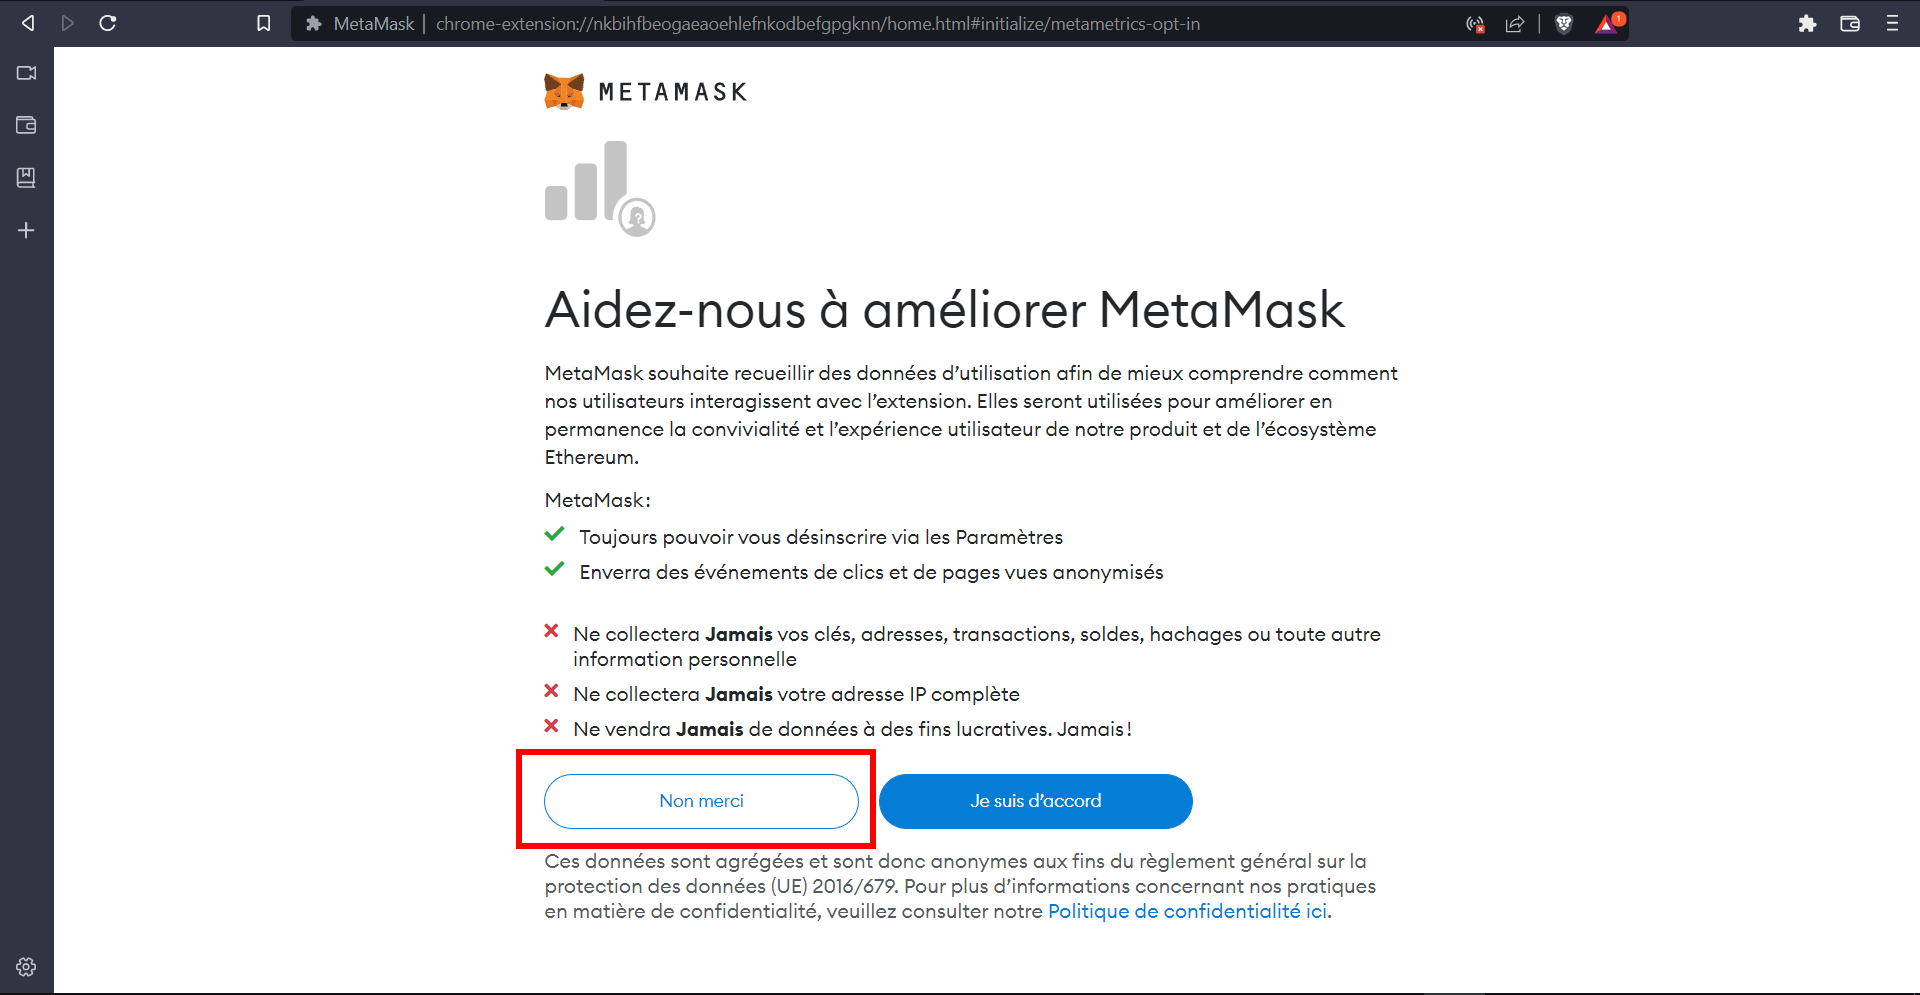
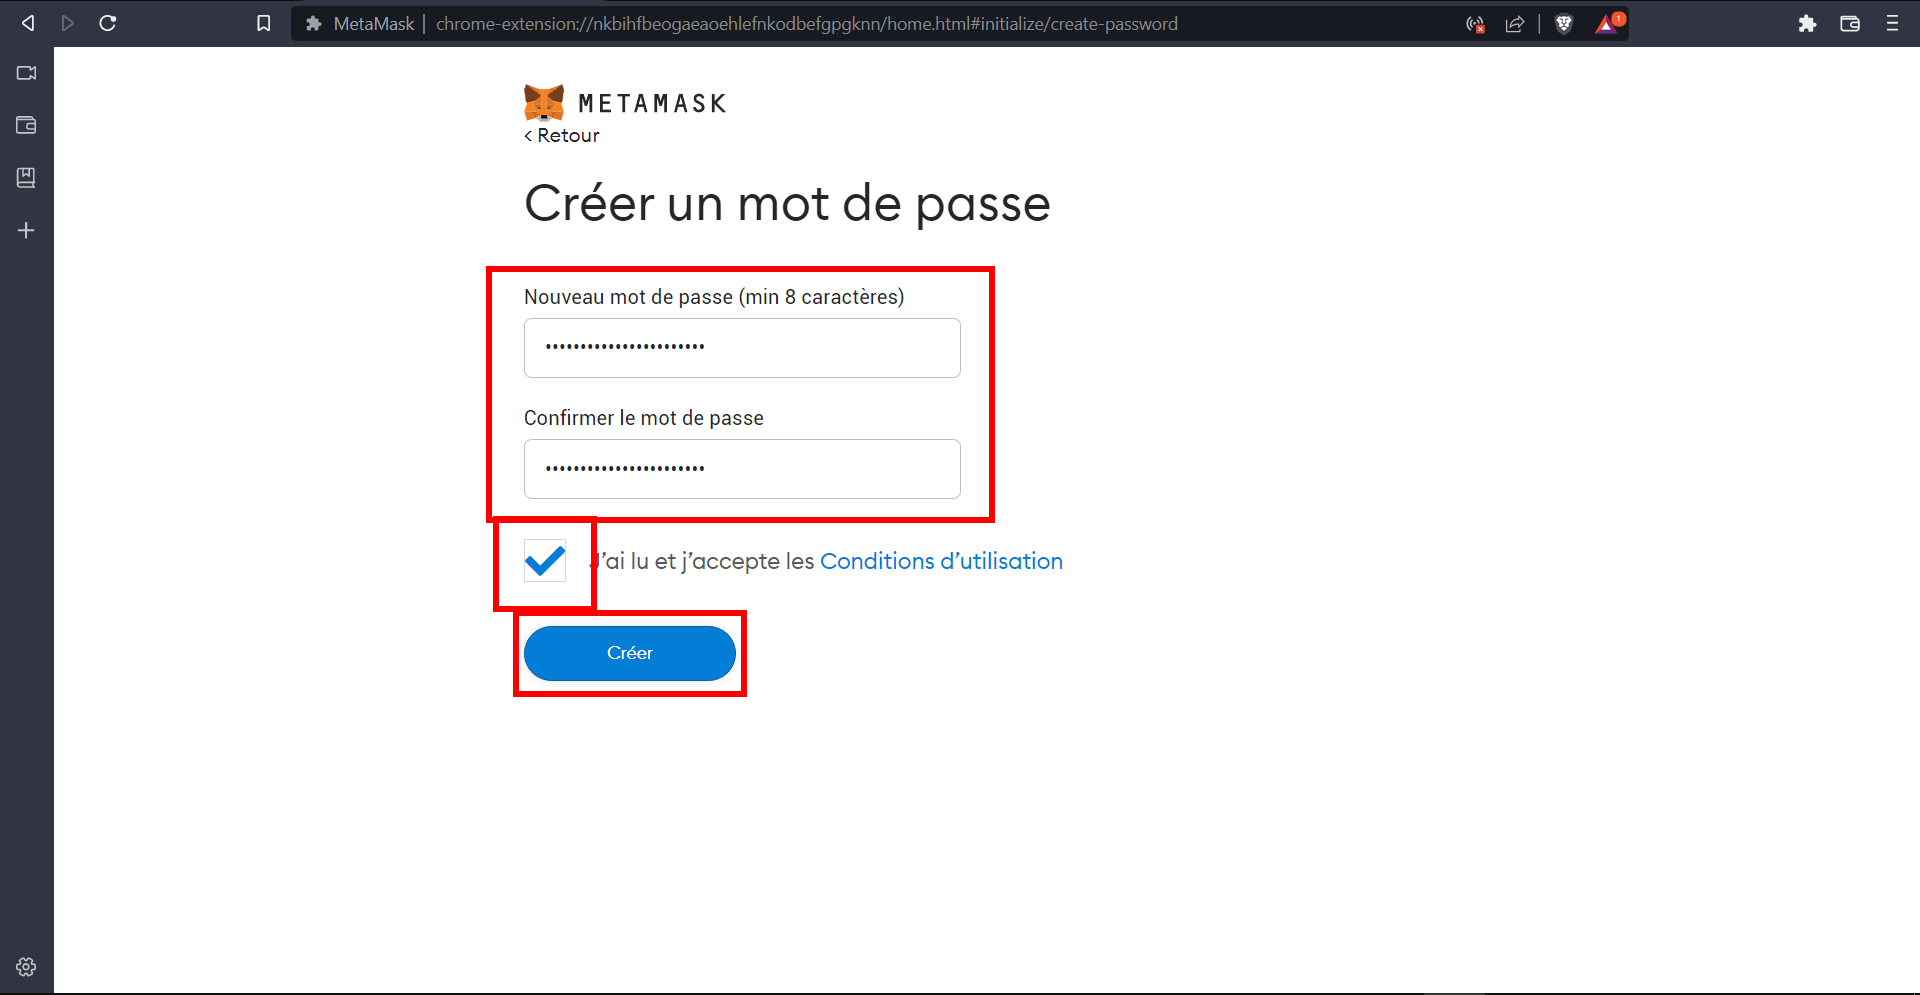
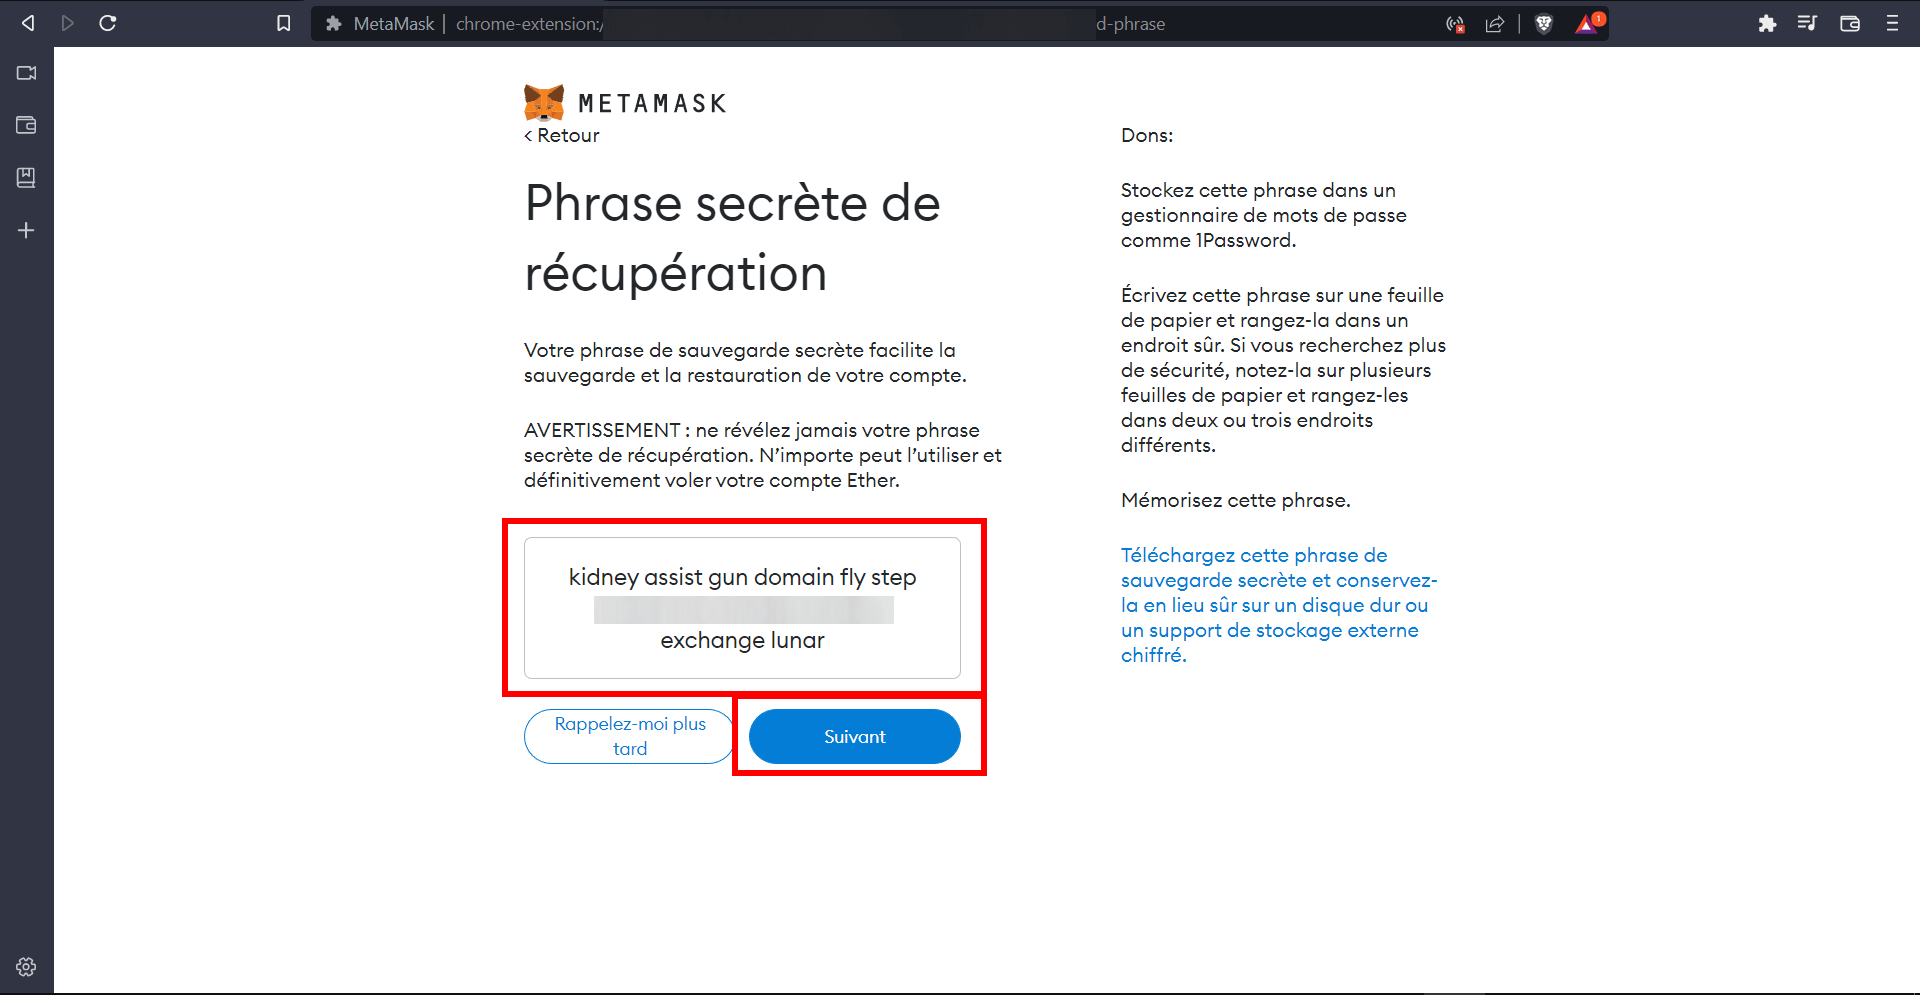
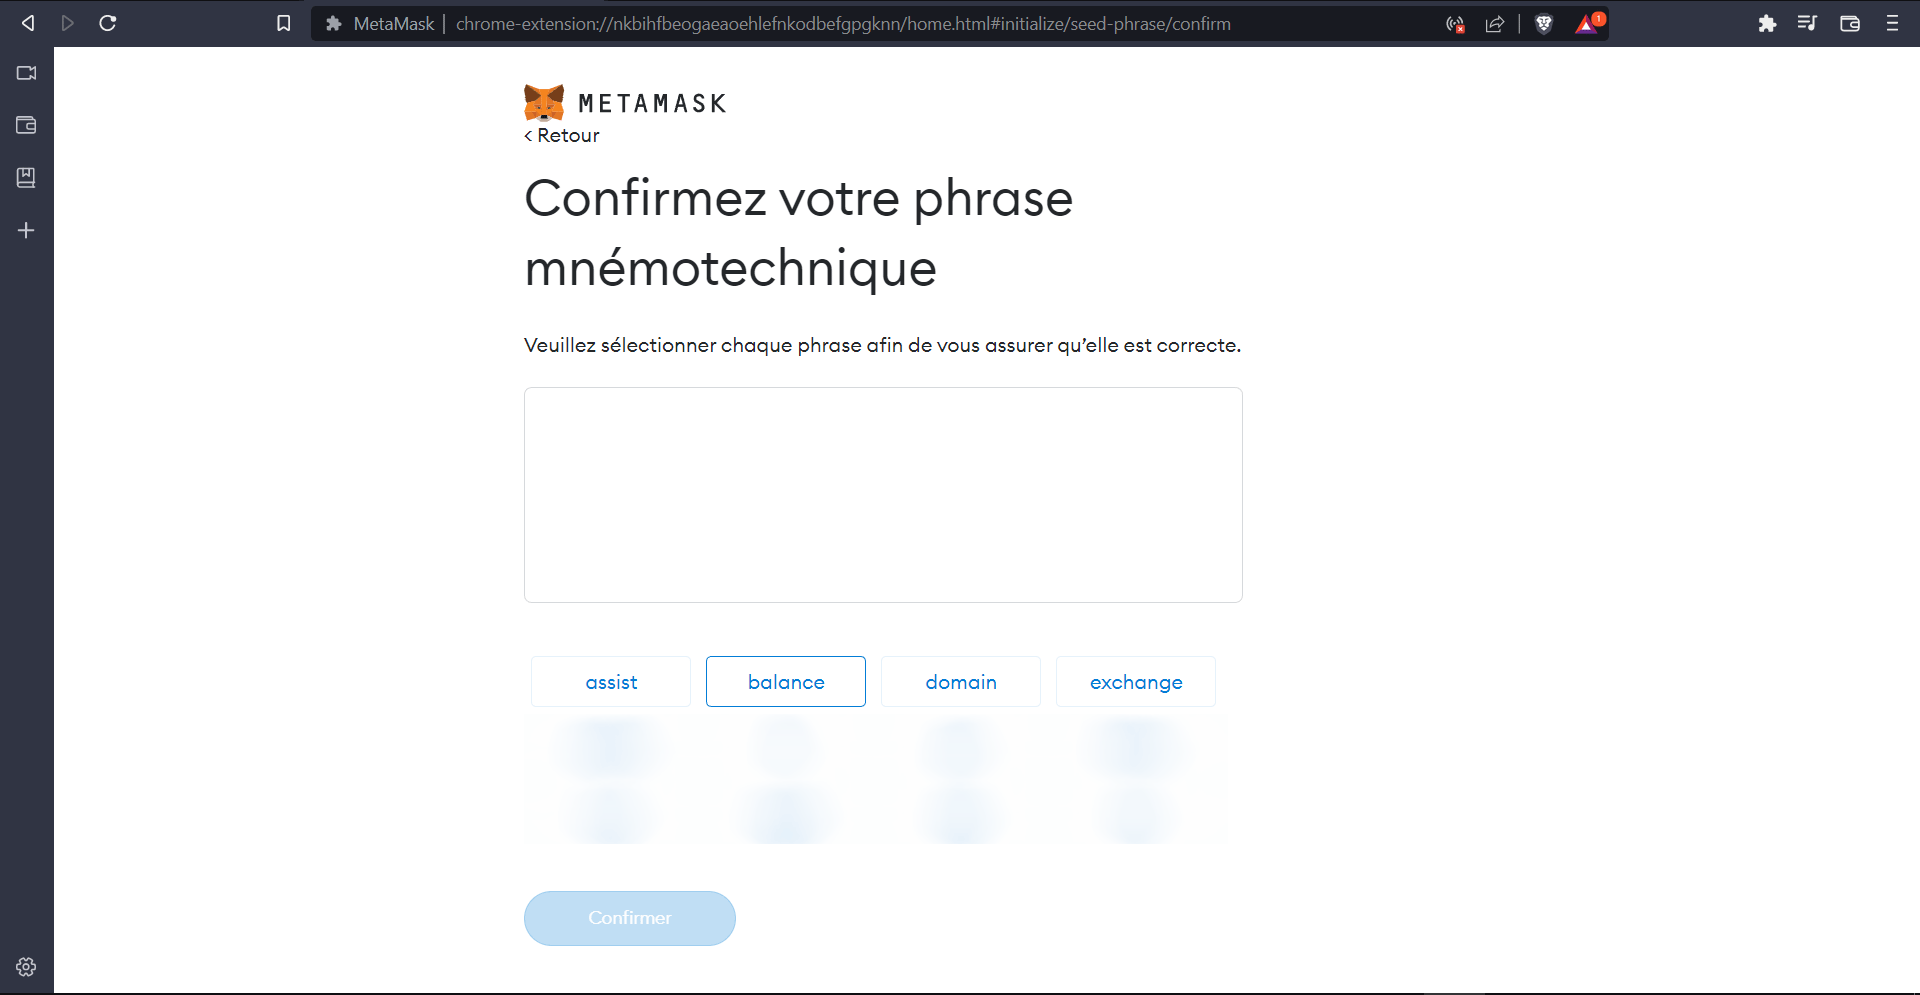
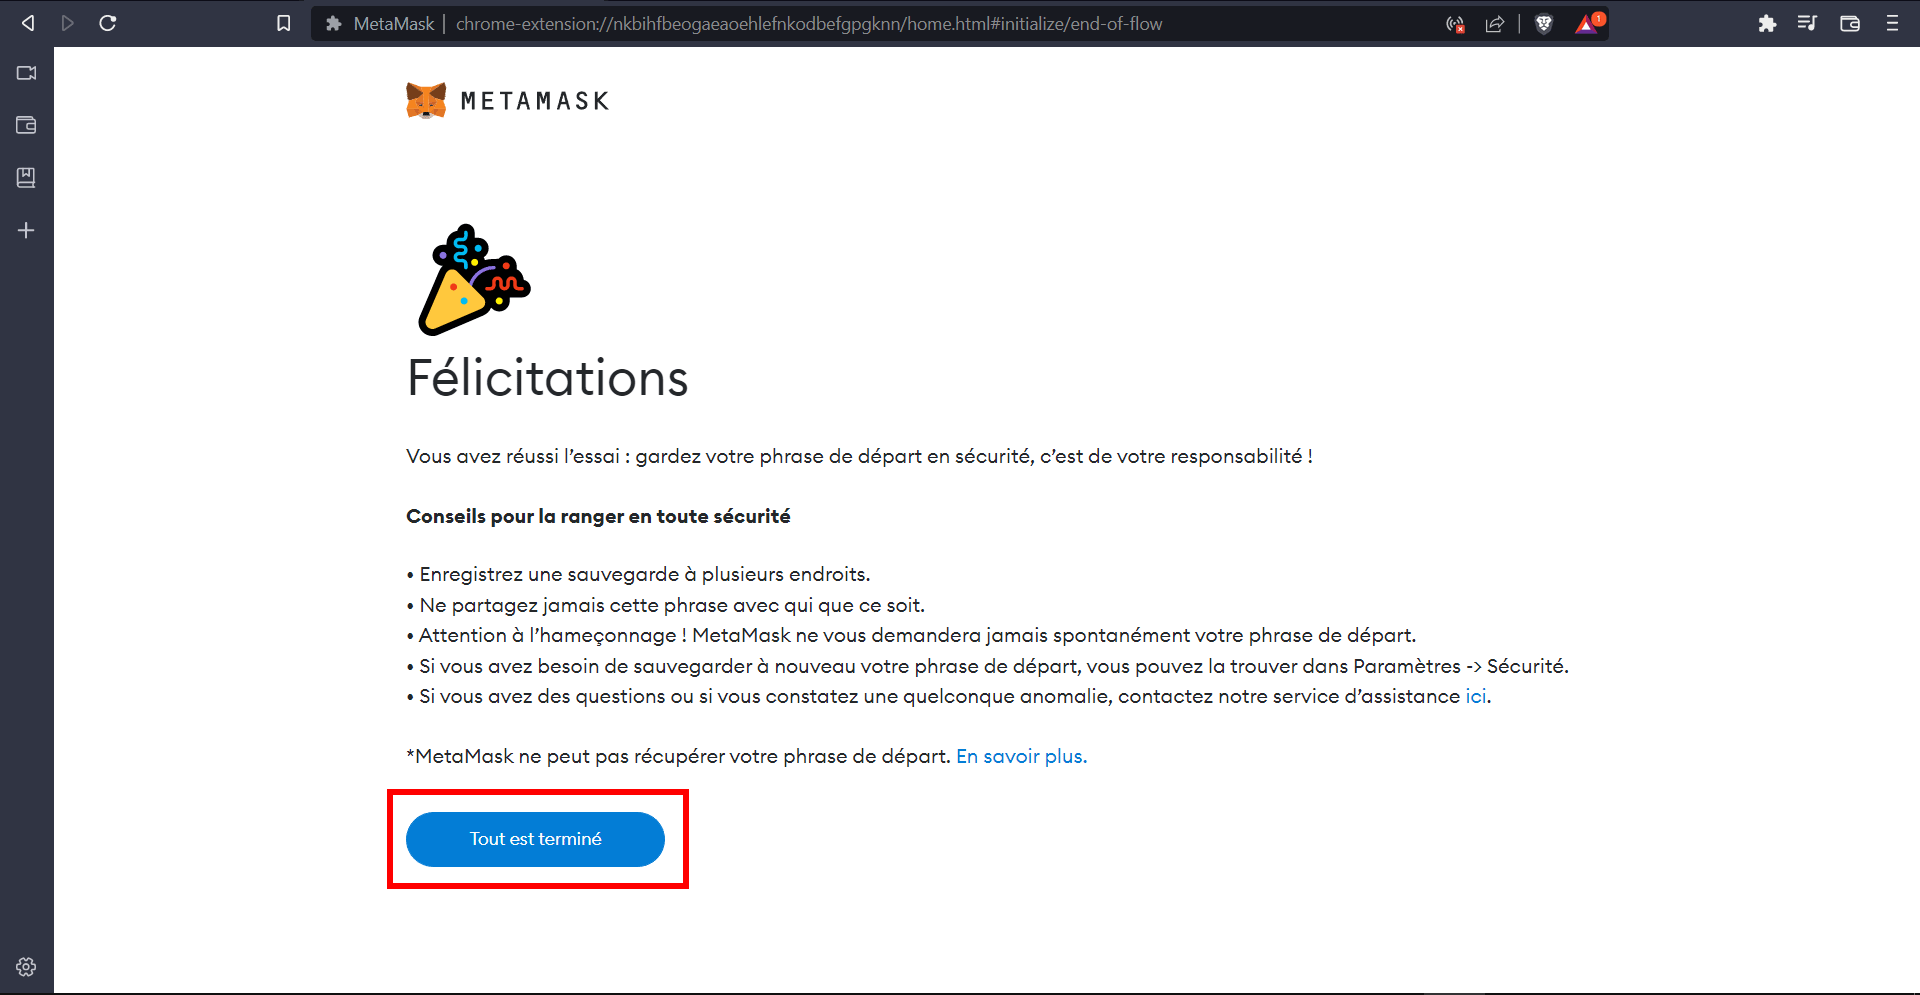
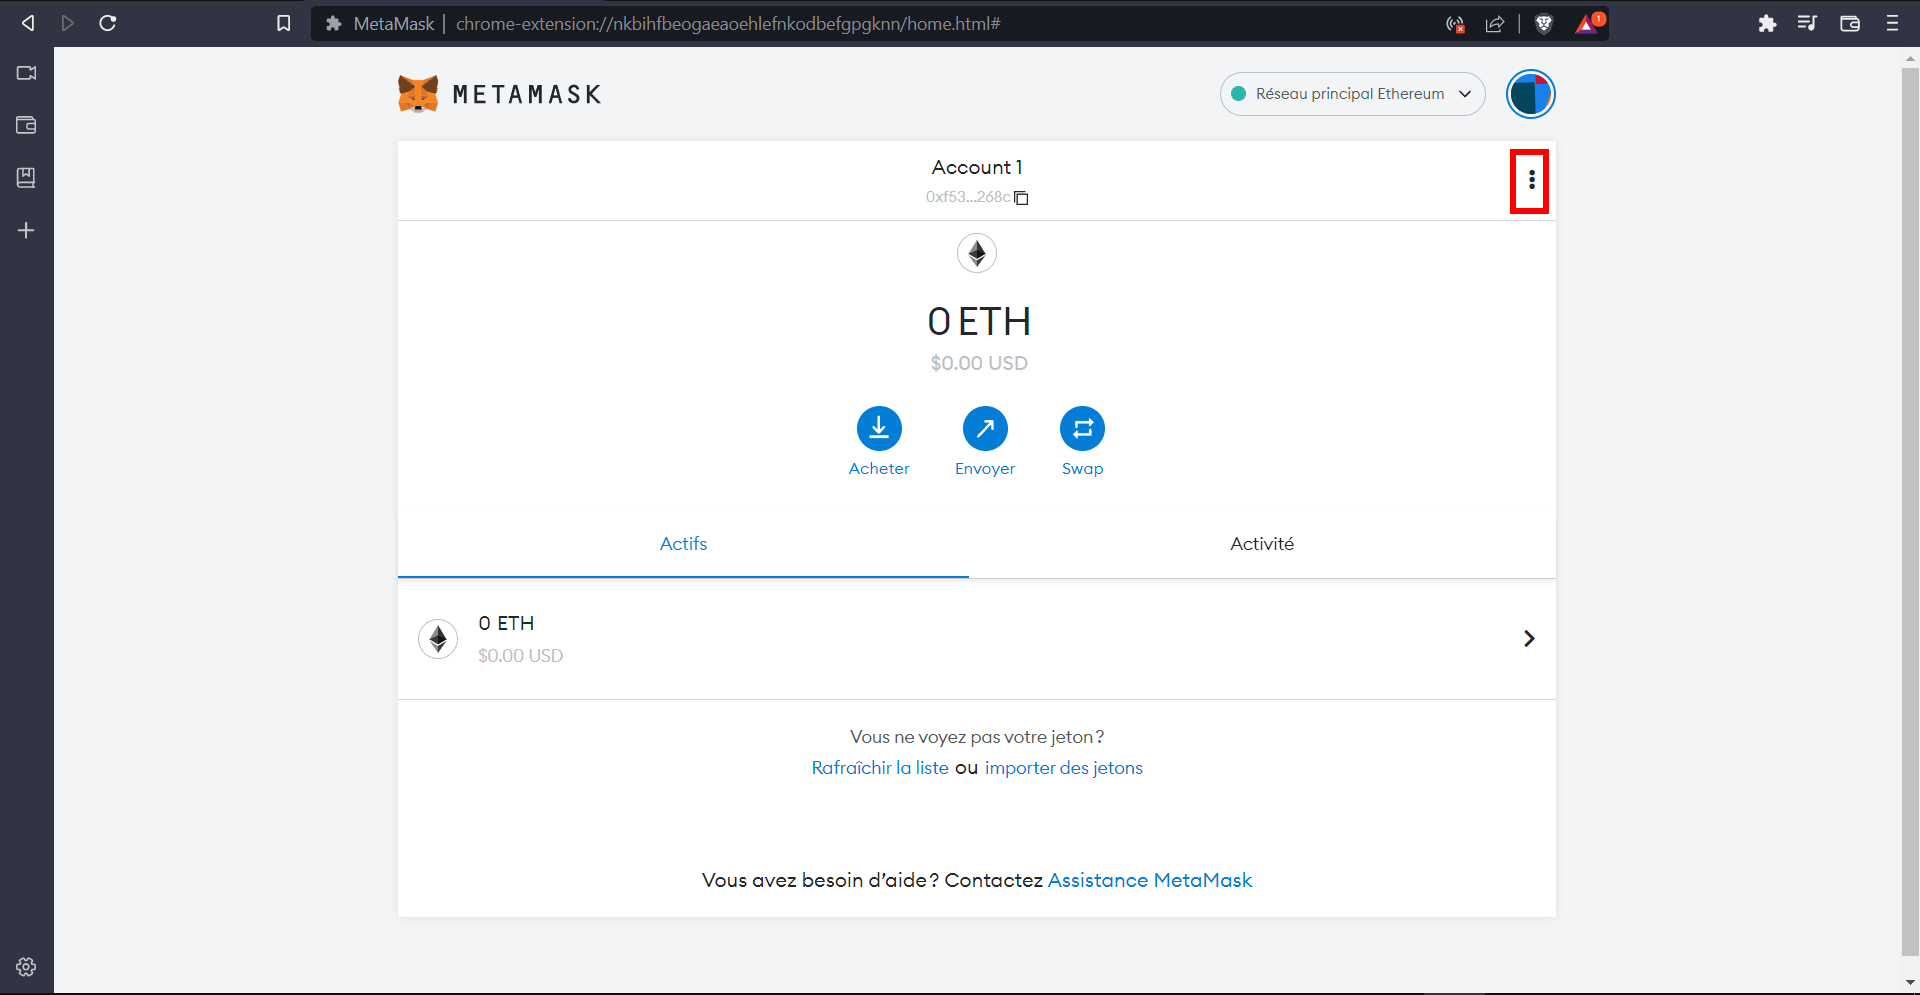
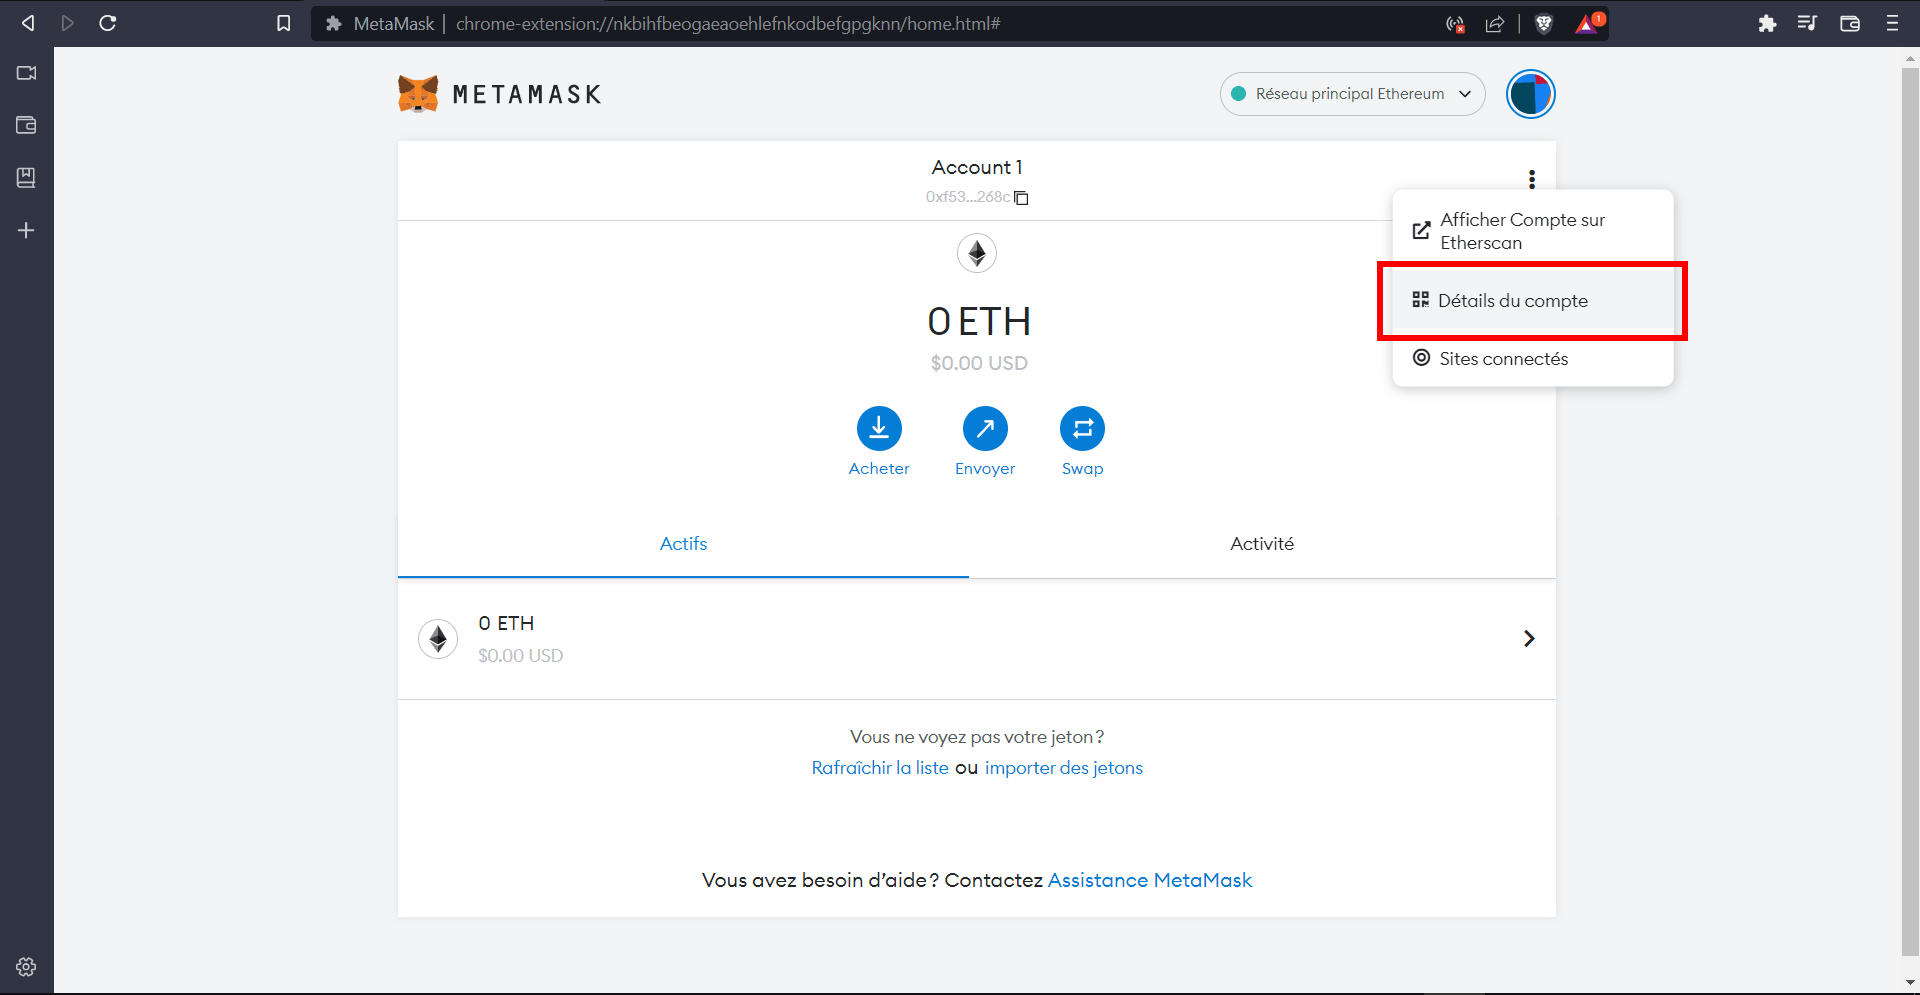
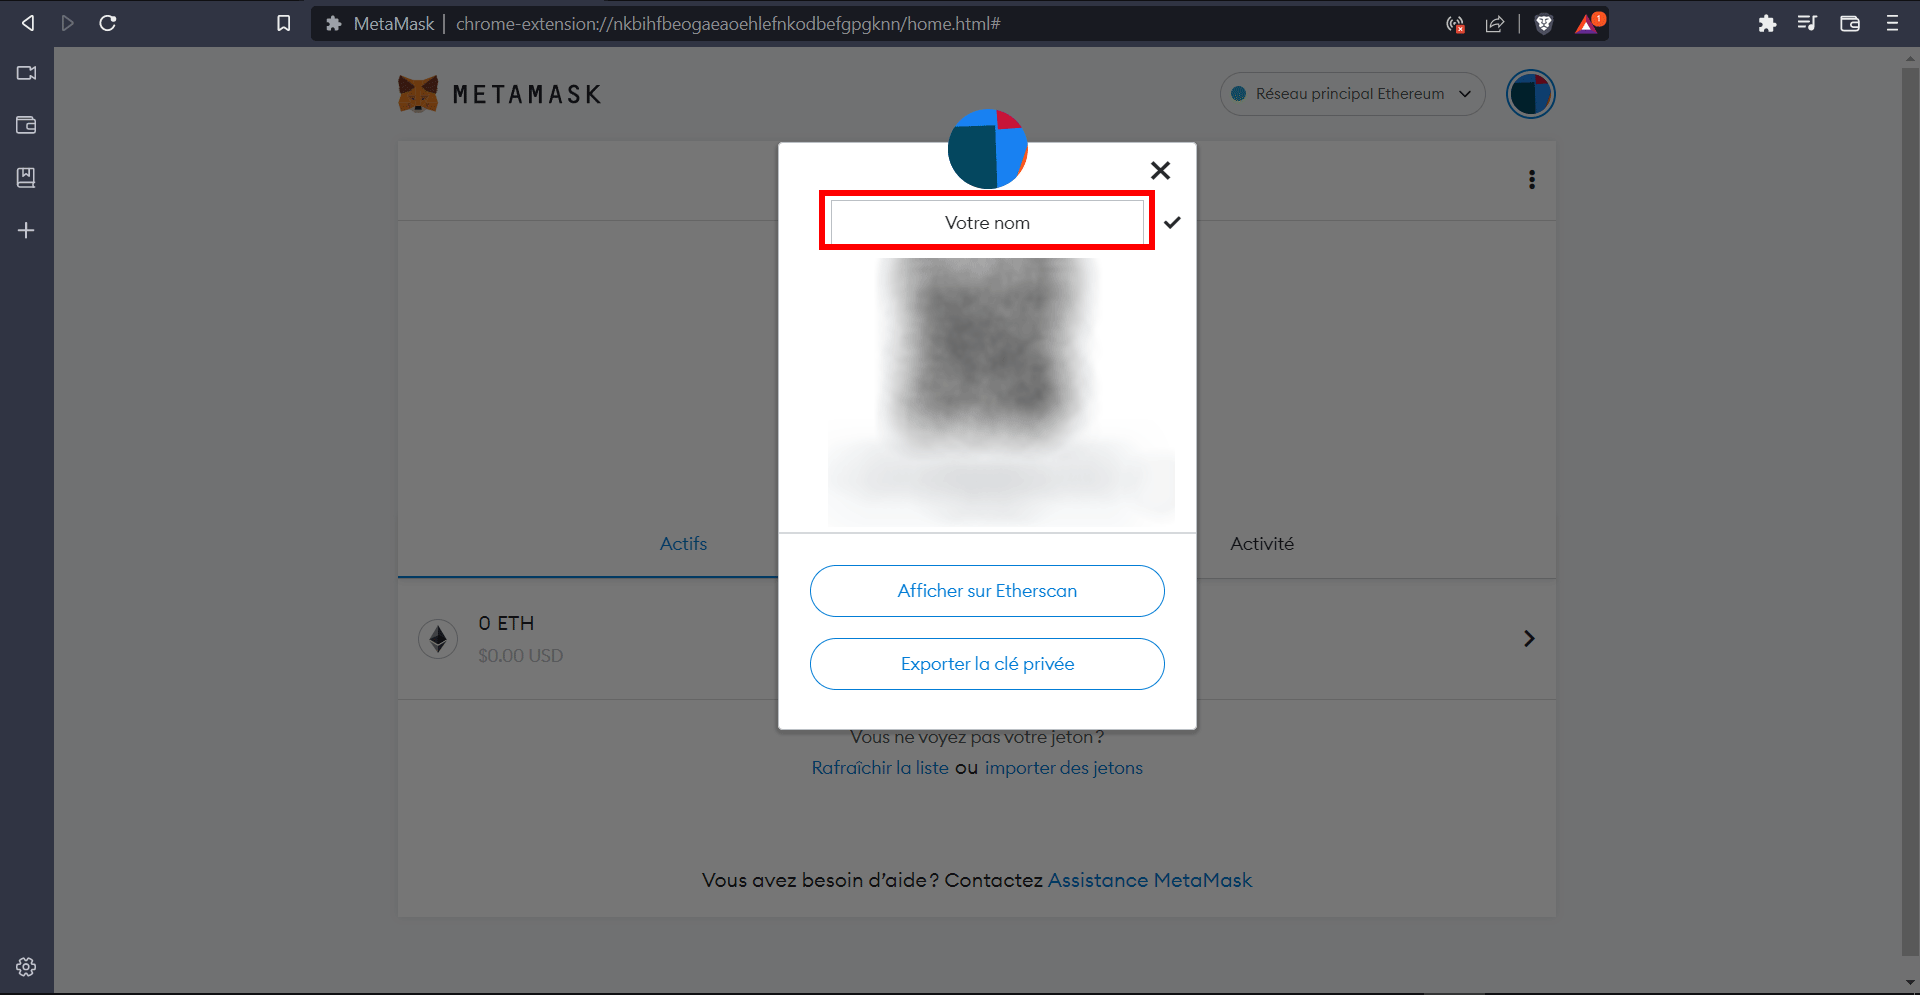
Click on "Start".Click on "Create a portfolio".Click on "No thanks".Create your password and save it, then copy the password and accept the "Terms of use". Finally click on "Create".The video gives you some interesting pointers, but you don't need them for the rest. Write down your secret phrase carefully.Copy your secret phrase in the right order by clicking on the words.Congratulations, the hard part is over. Click on "All finished".This is your digital wallet. Click on the 3 small dots in the top right-hand corner.Click on "Account details".Click on the pencil and edit your name. This name is visible to everyone.
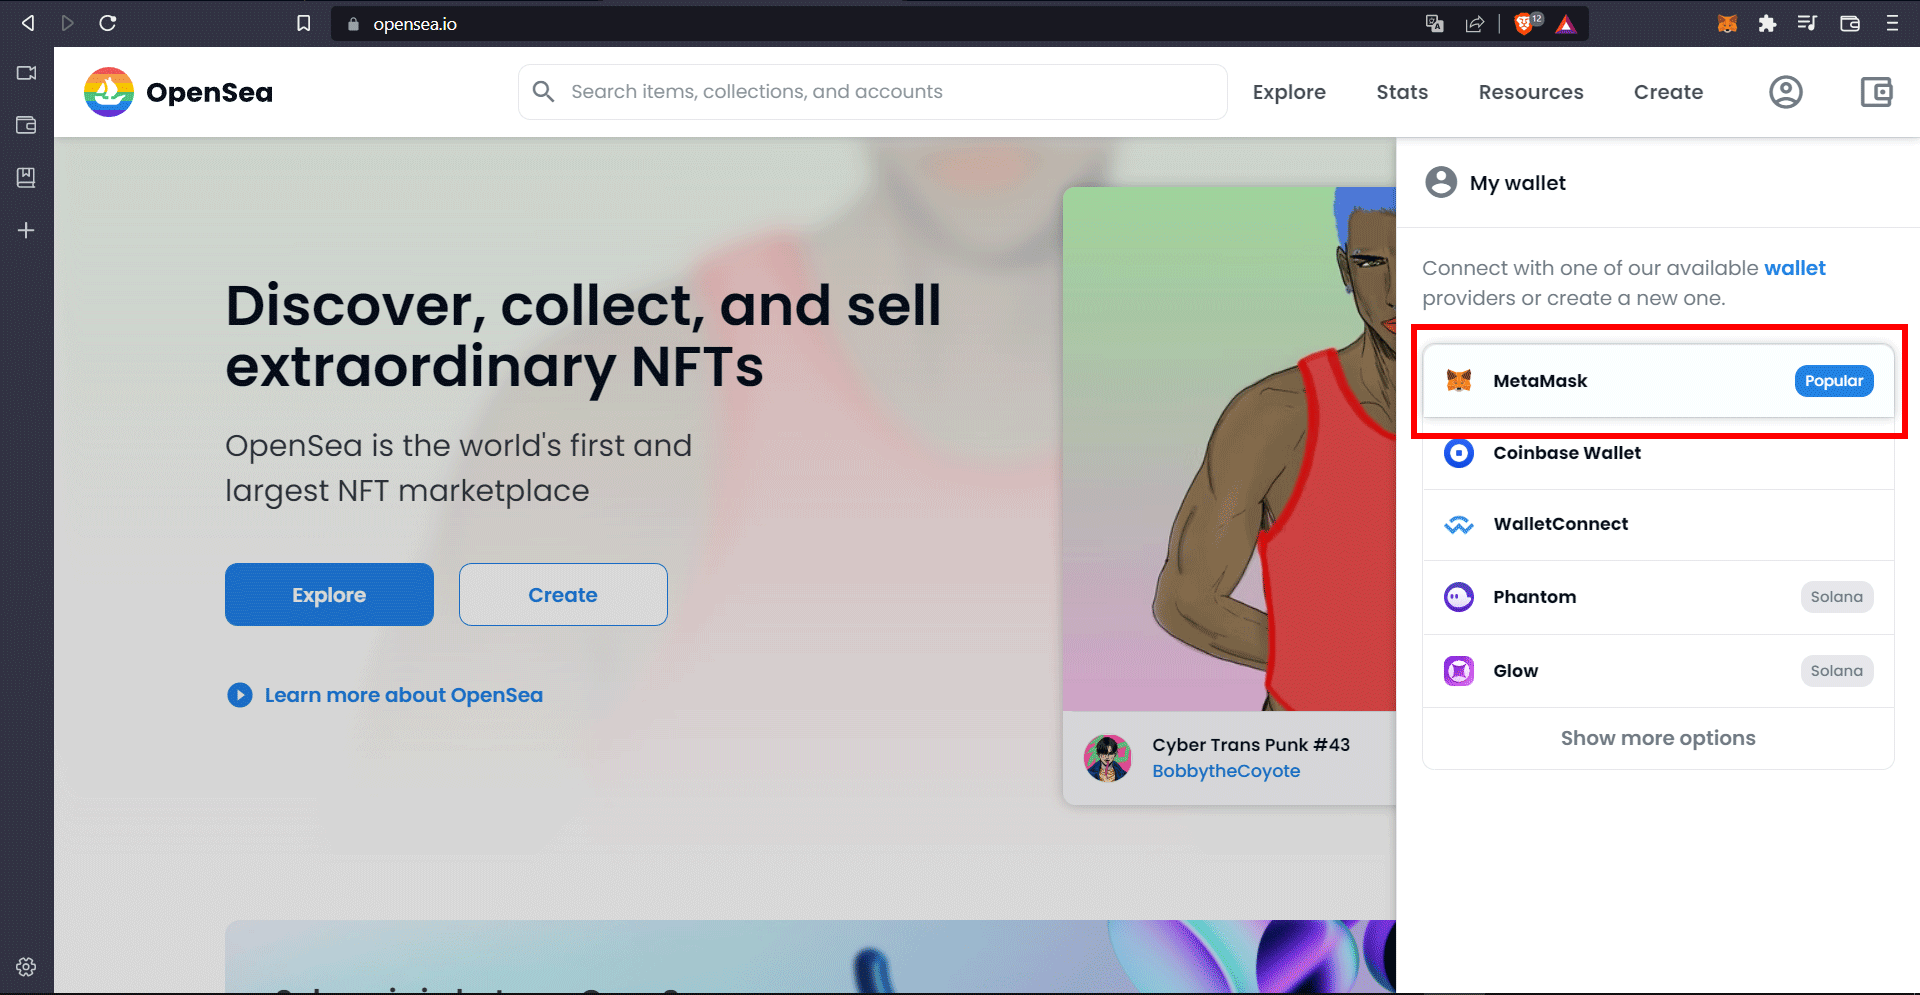
4 - Link your Wallet to OpenSea
Linking your wallet to Opensea enables you to create an account and generate your NFTs and NFT collections.
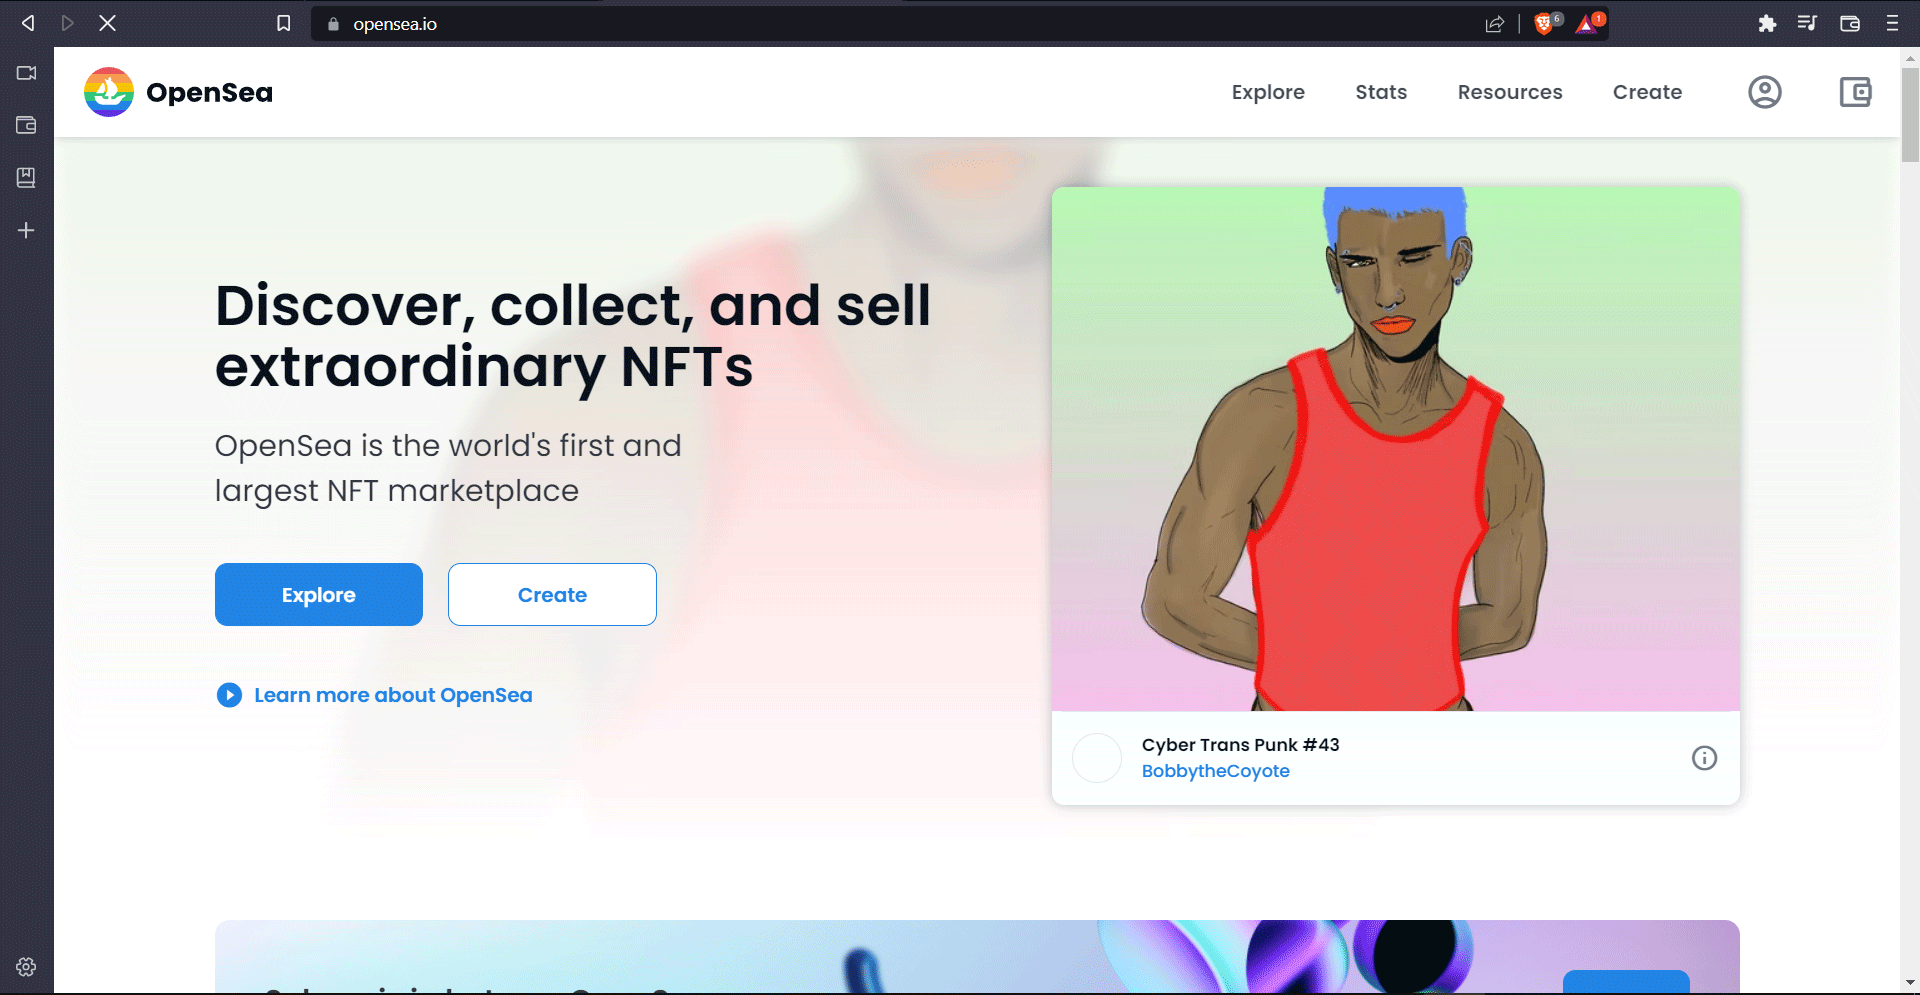
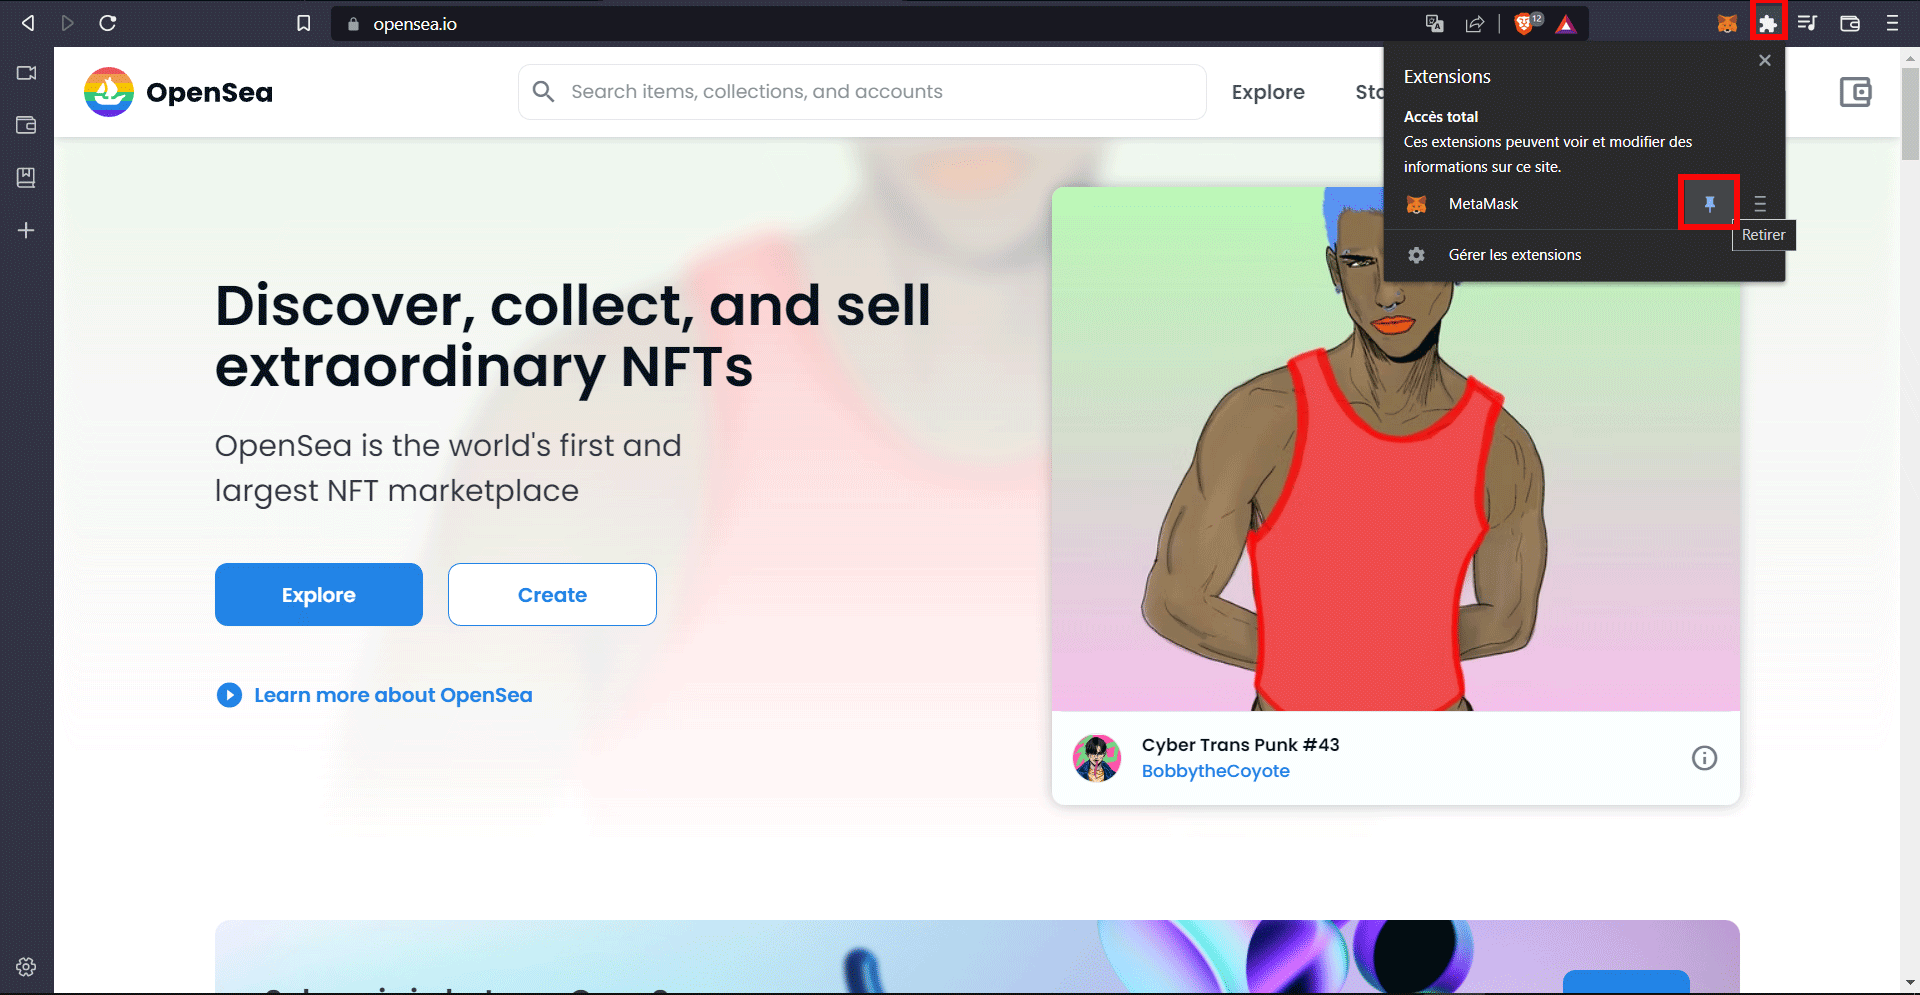
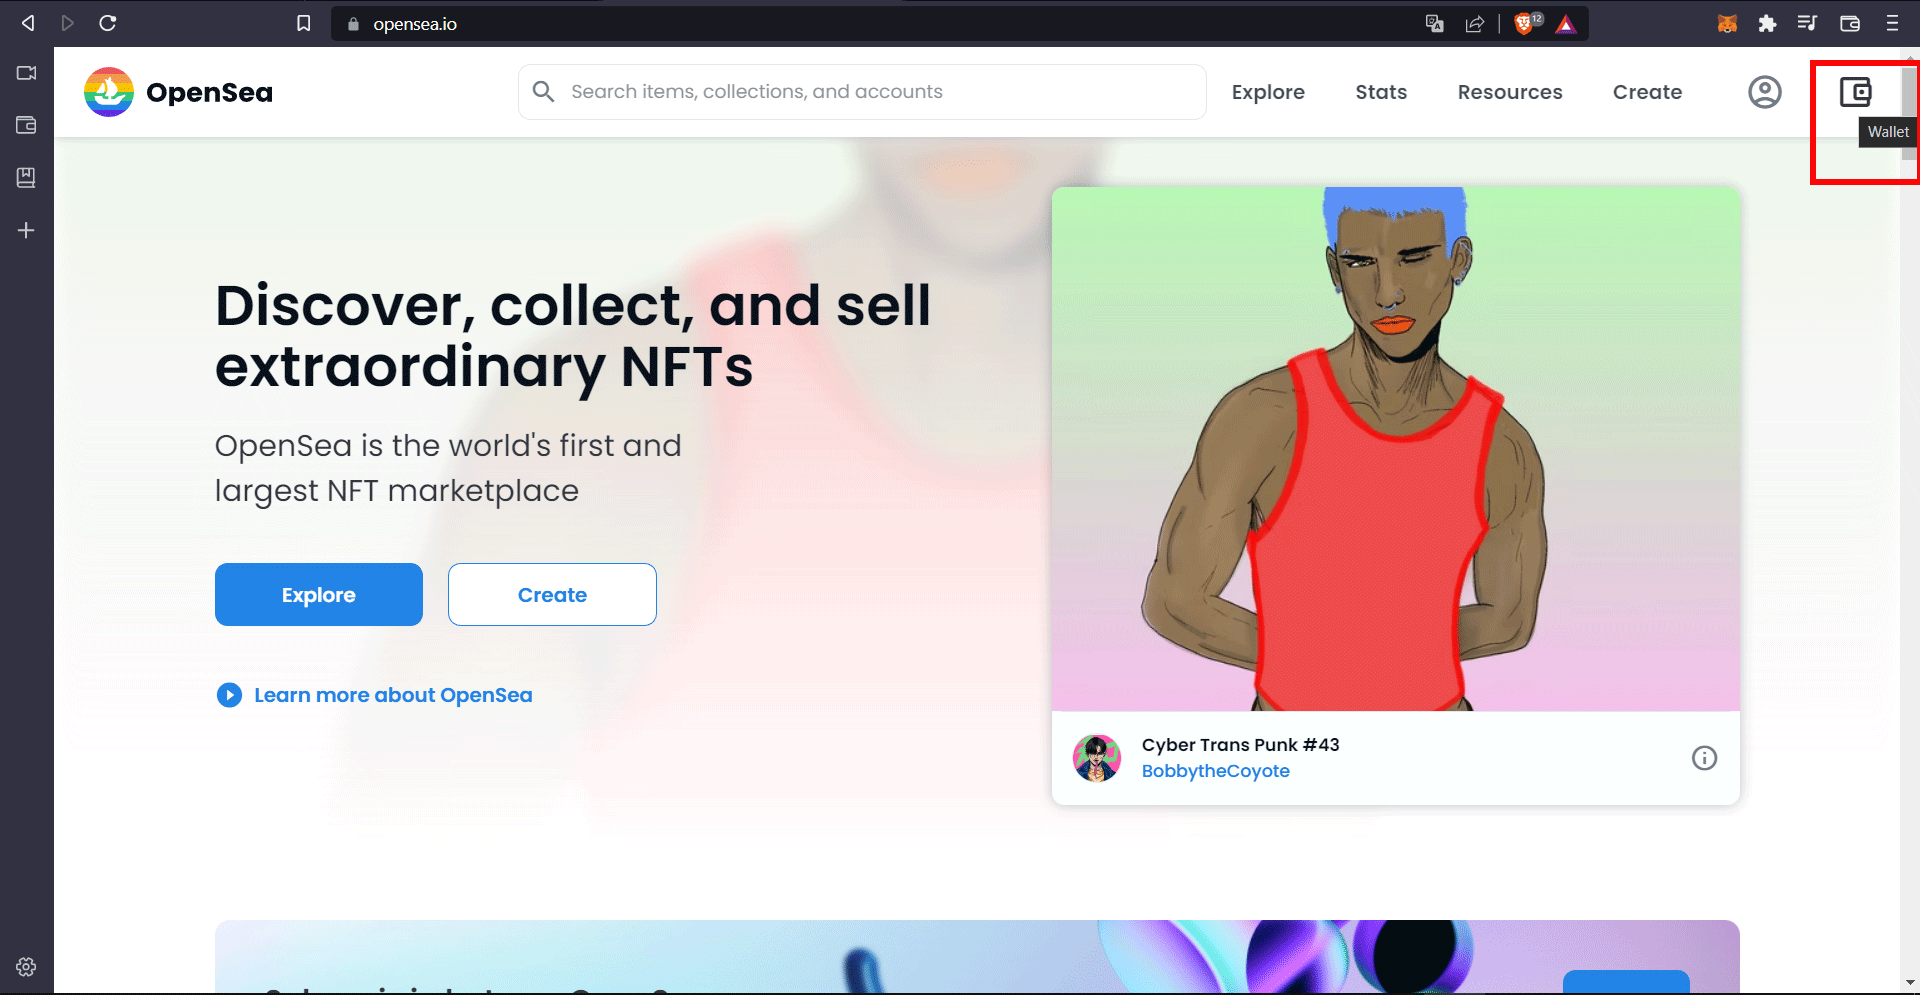
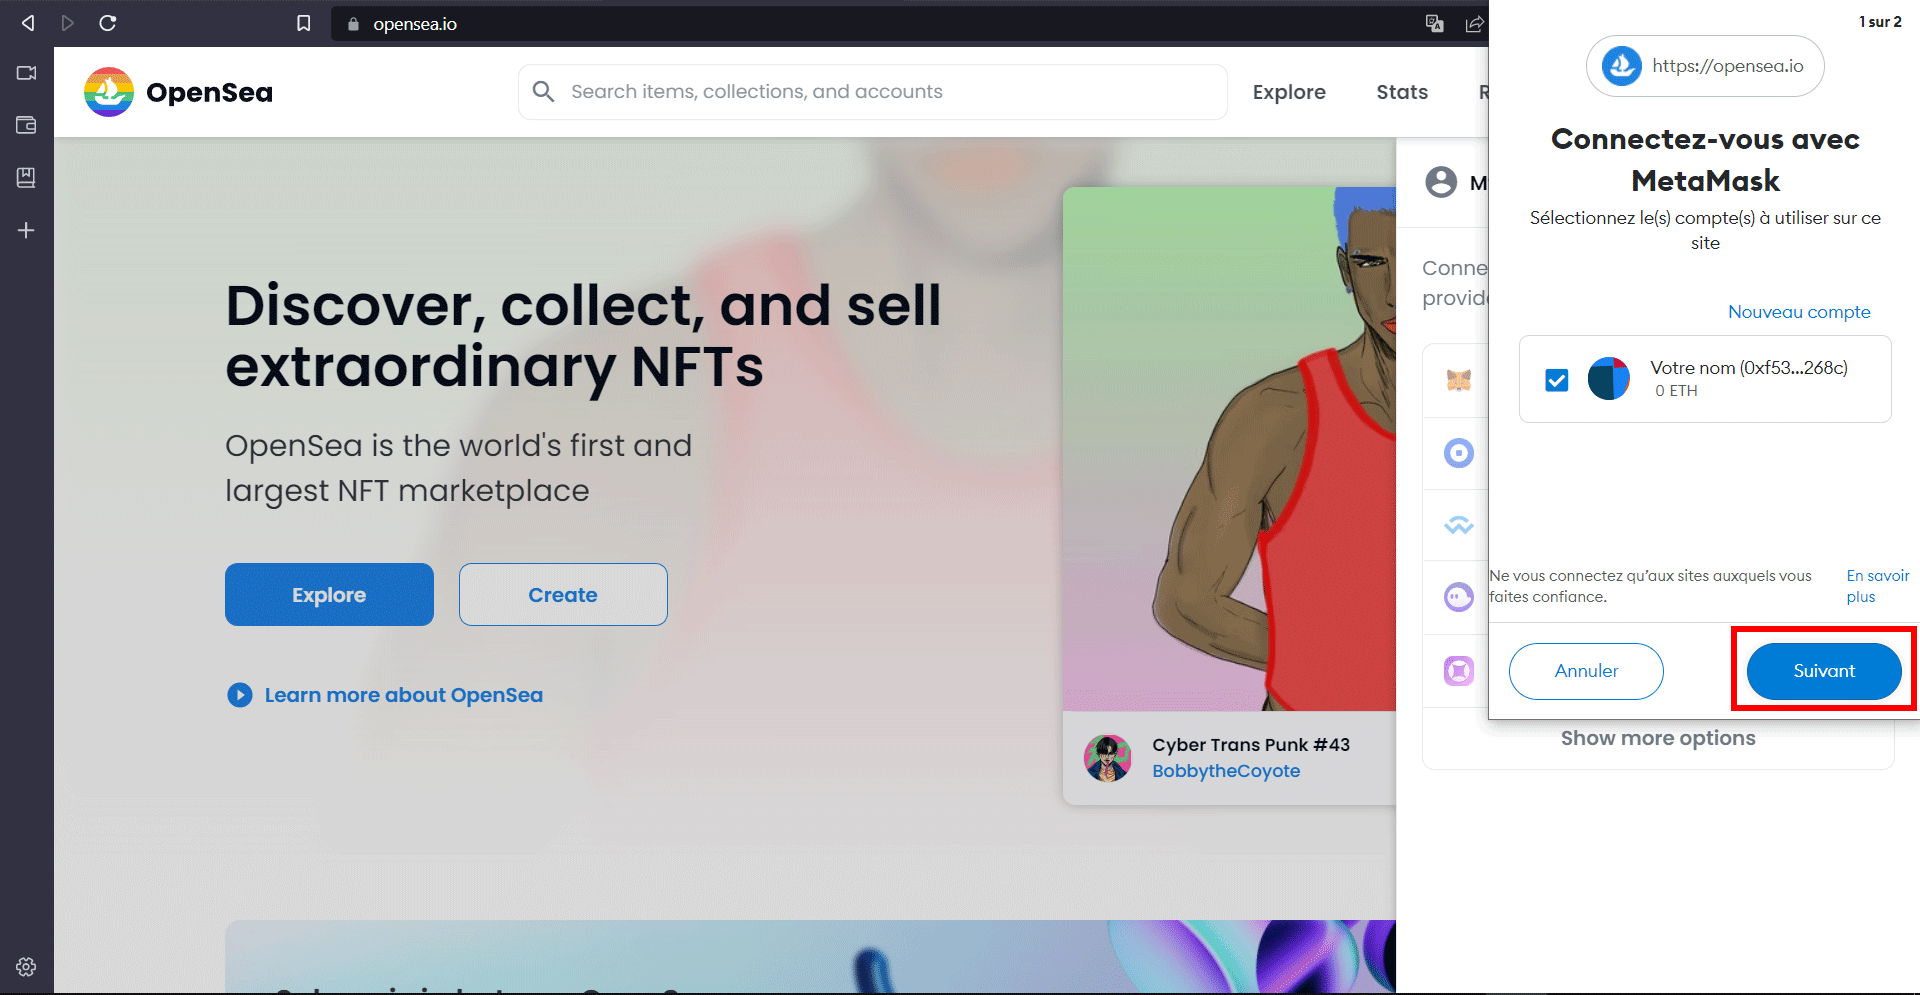
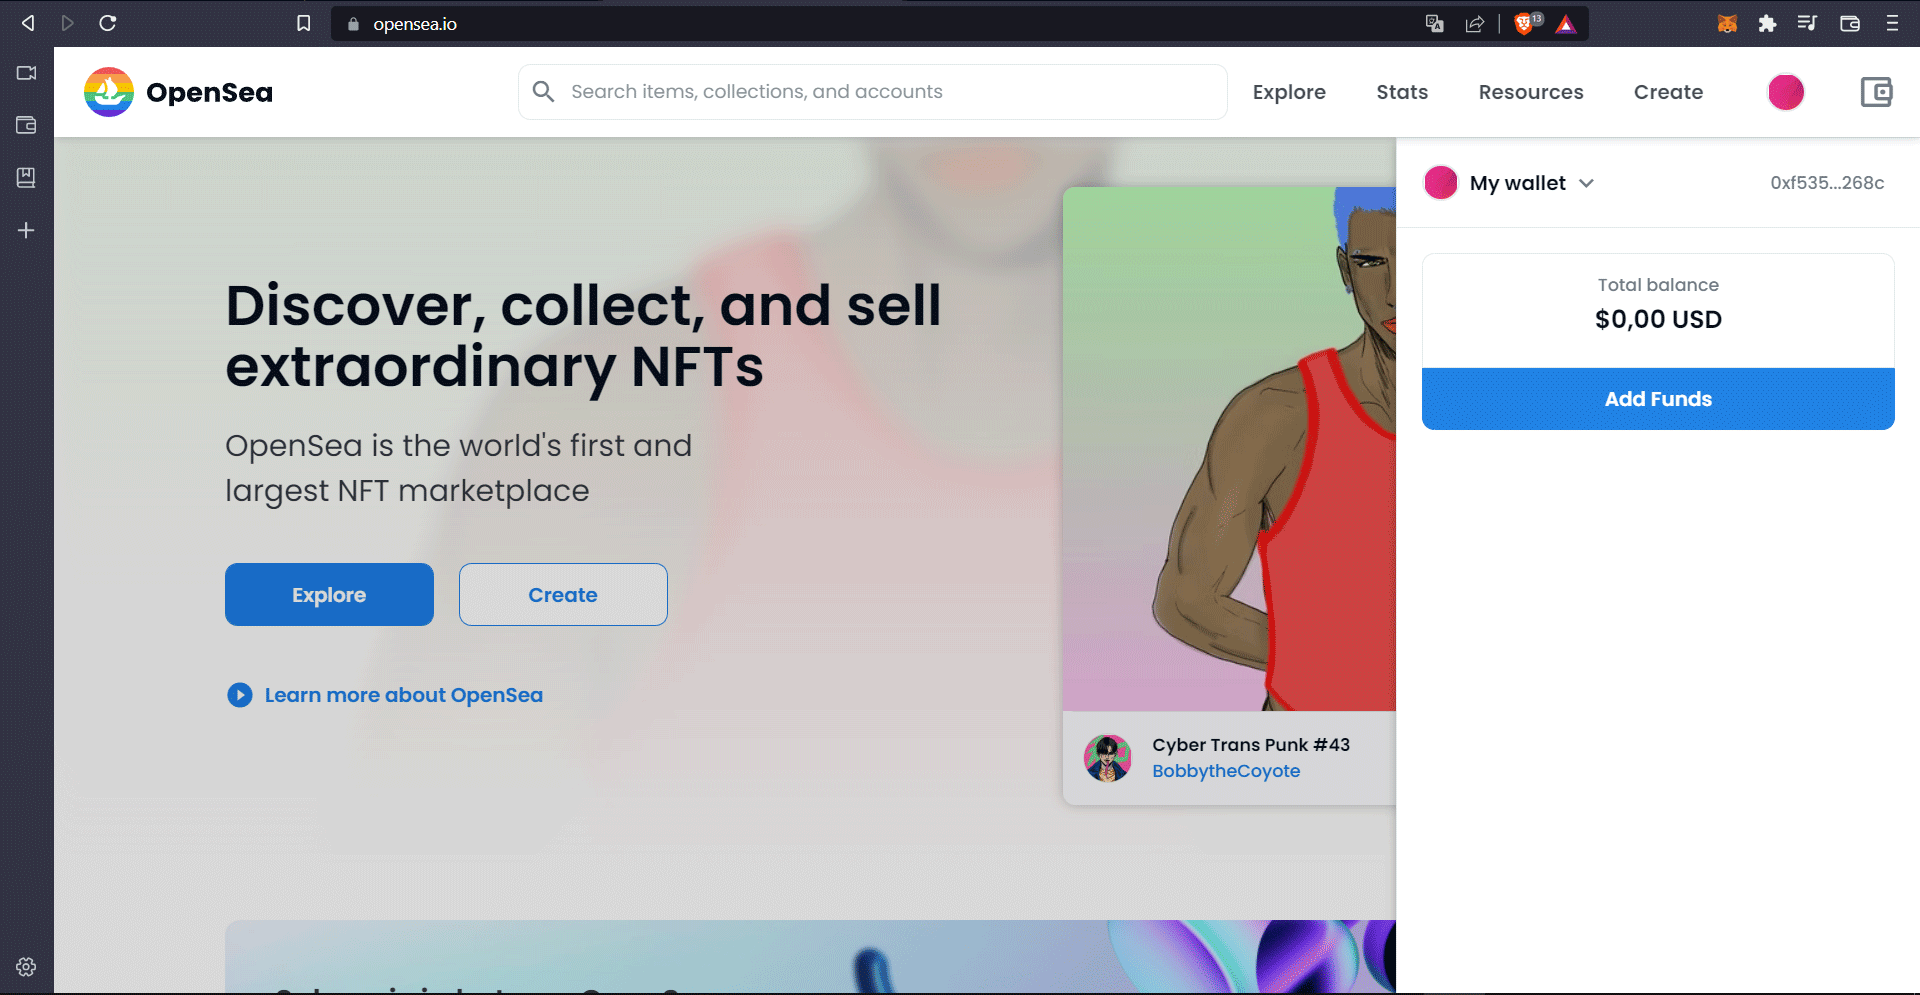
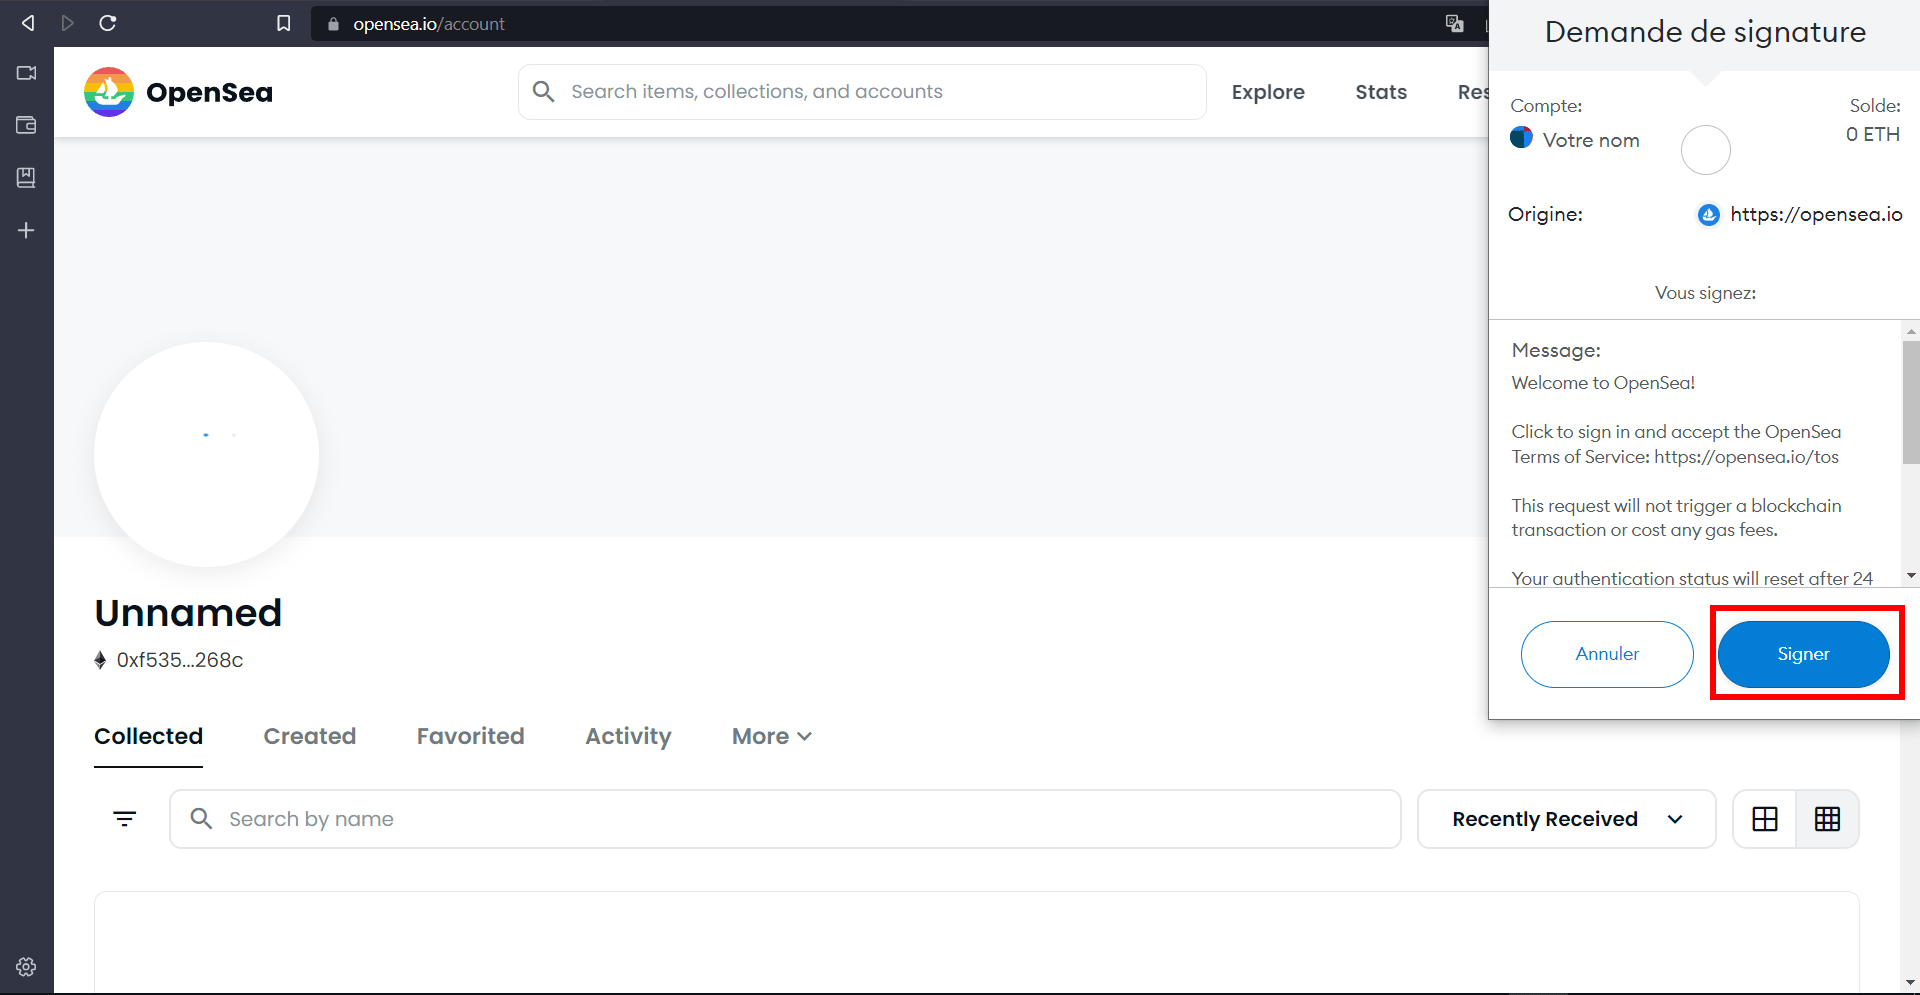
Visit www.opensea.ioPin MetaMask on Brave: click on the puzzle (the extensions) and then on the pin next to MetaMask.Click on the wallet in the top right-hand corner.Click on MetaMaskMetaMask opens in a "Pop Up" window. Click on "Next" to accept the links between OpenSea and your Wallet. Always check the address on the MetaMask. Only accept sites you know well.Click on "Connect".Your Wallet is connected to OpenSea. Your Wallet is like your OpenSea login.
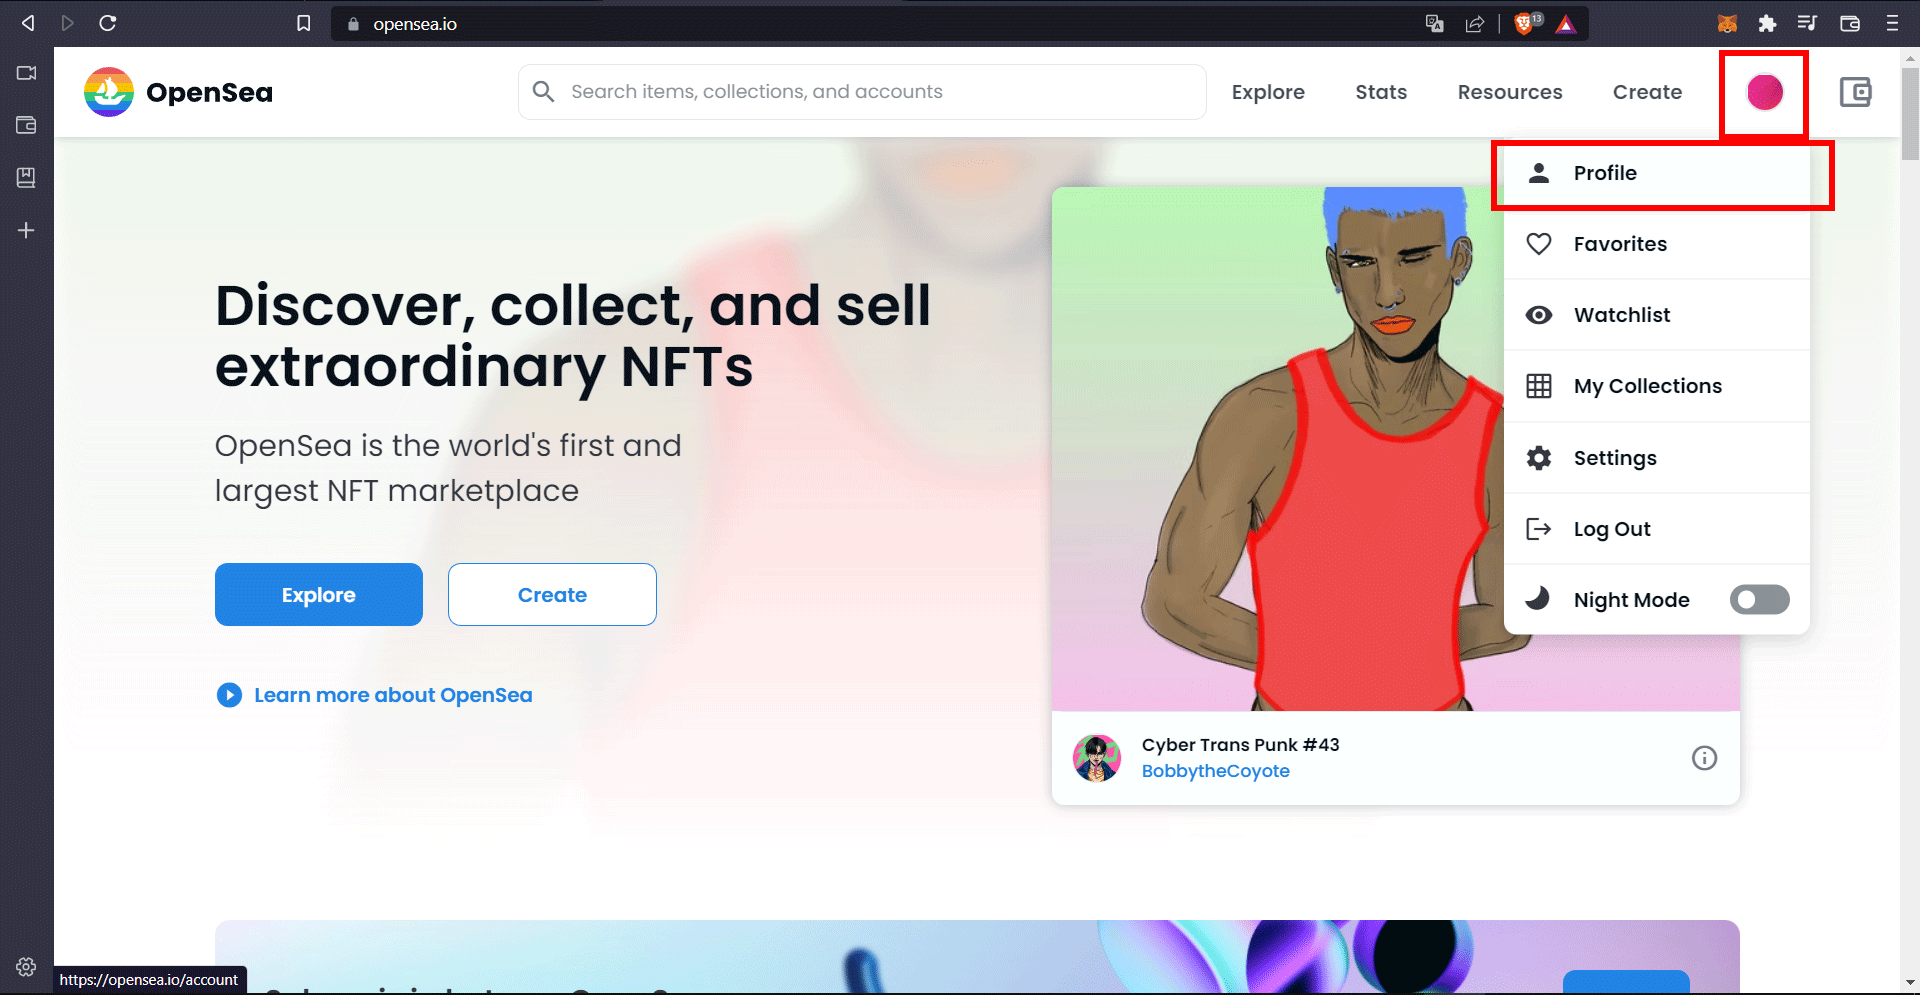
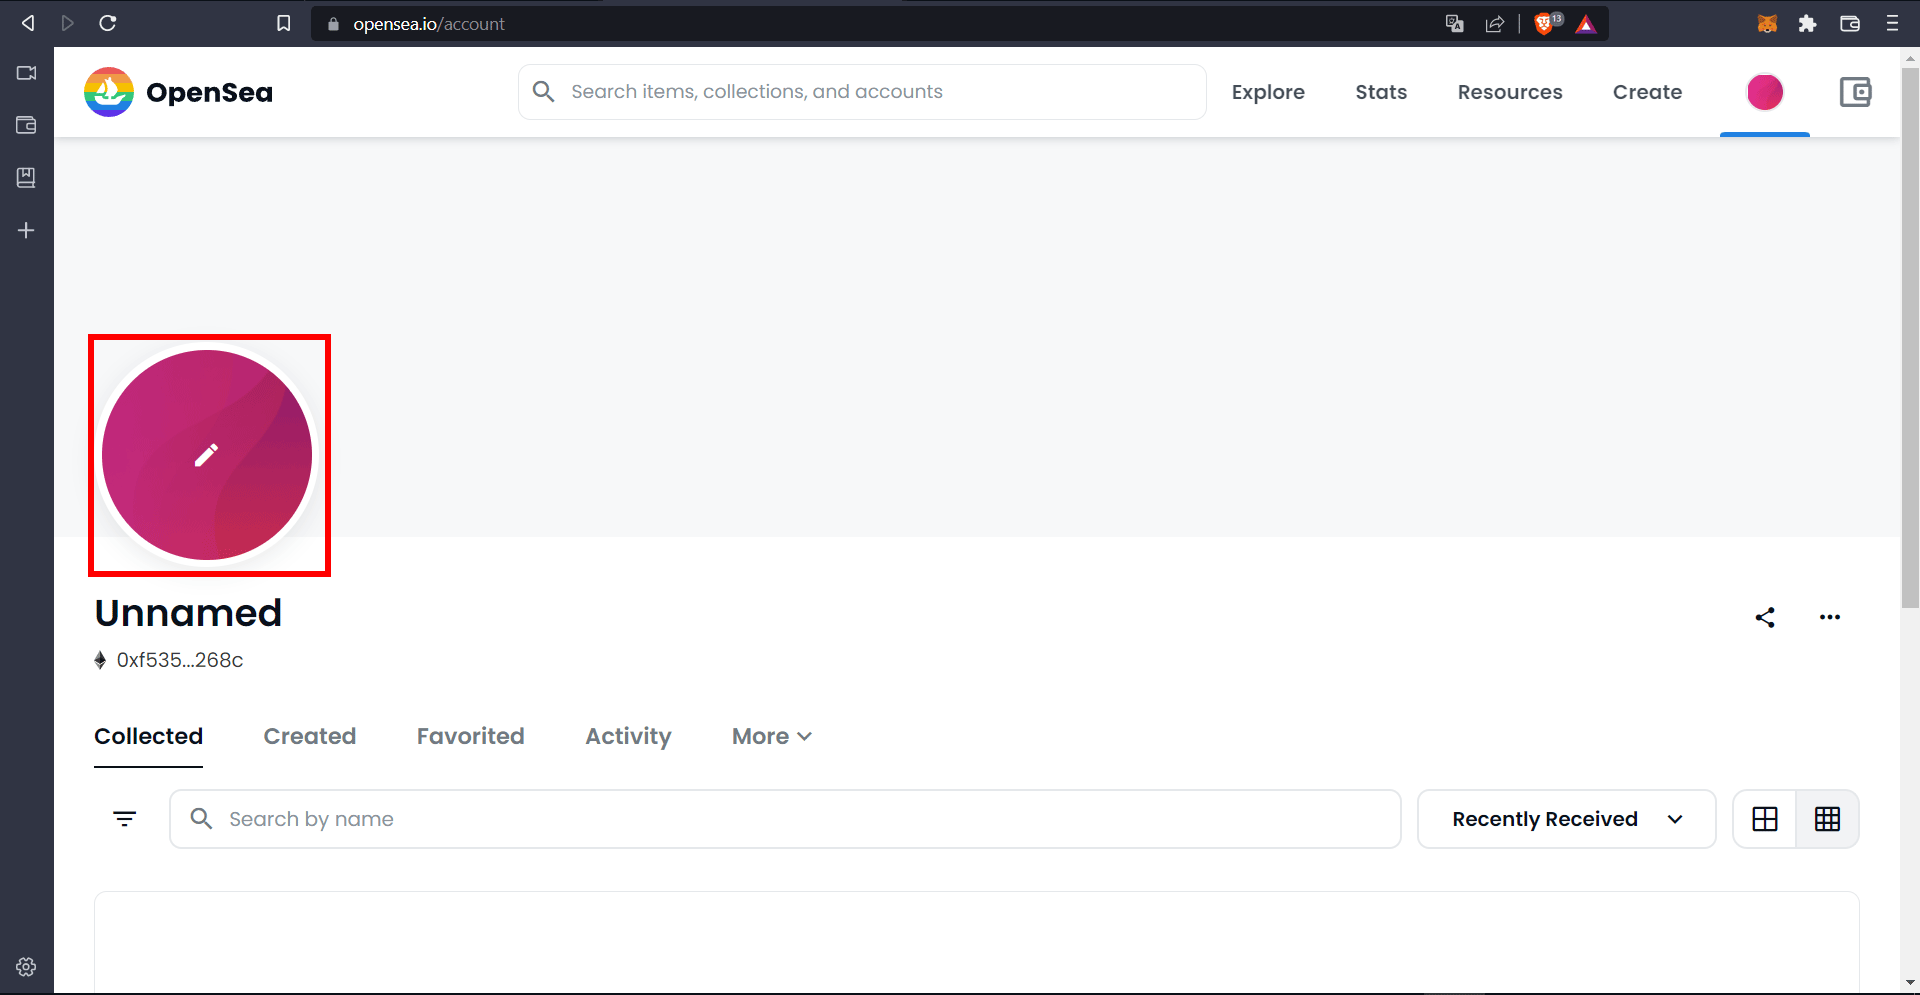
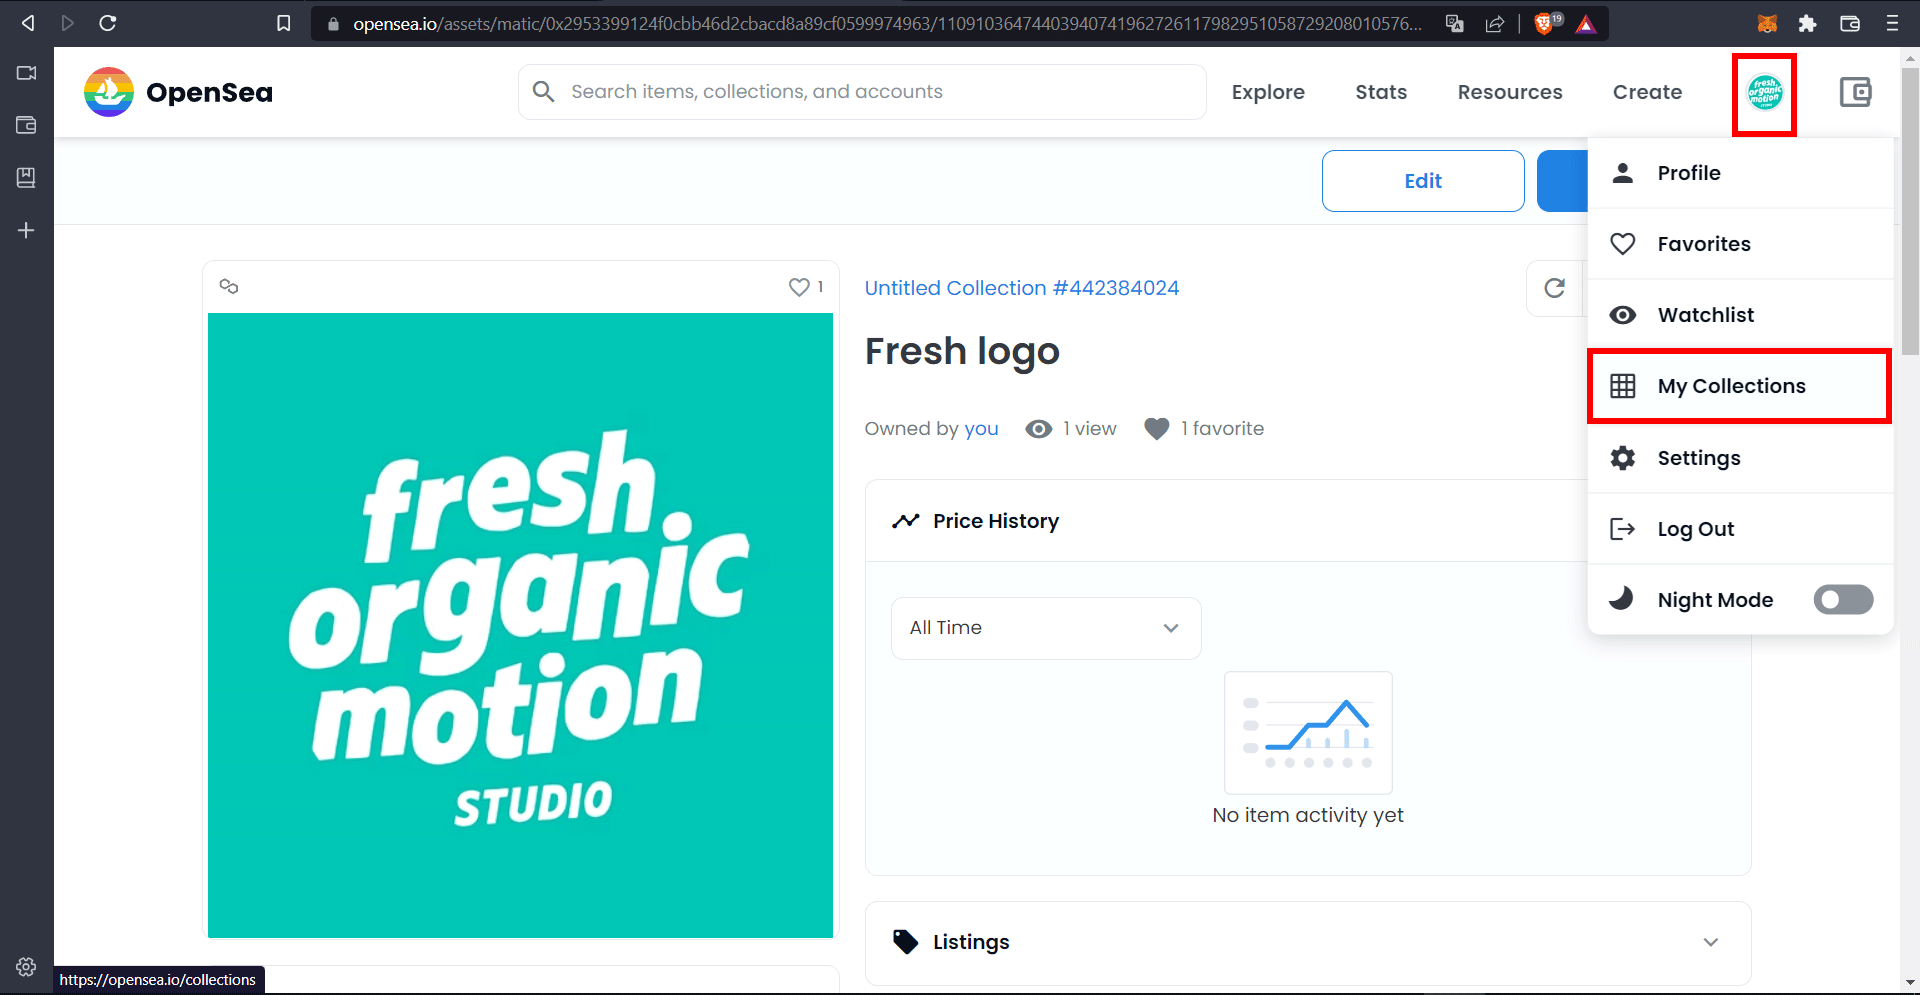
5 - Configure your Profile - optional
Prepare your profile. Click on "Profile".Click on the pencil to add a profile photo. Select the photo you want.Sign in MetaMask to give permission to change the profile photo.
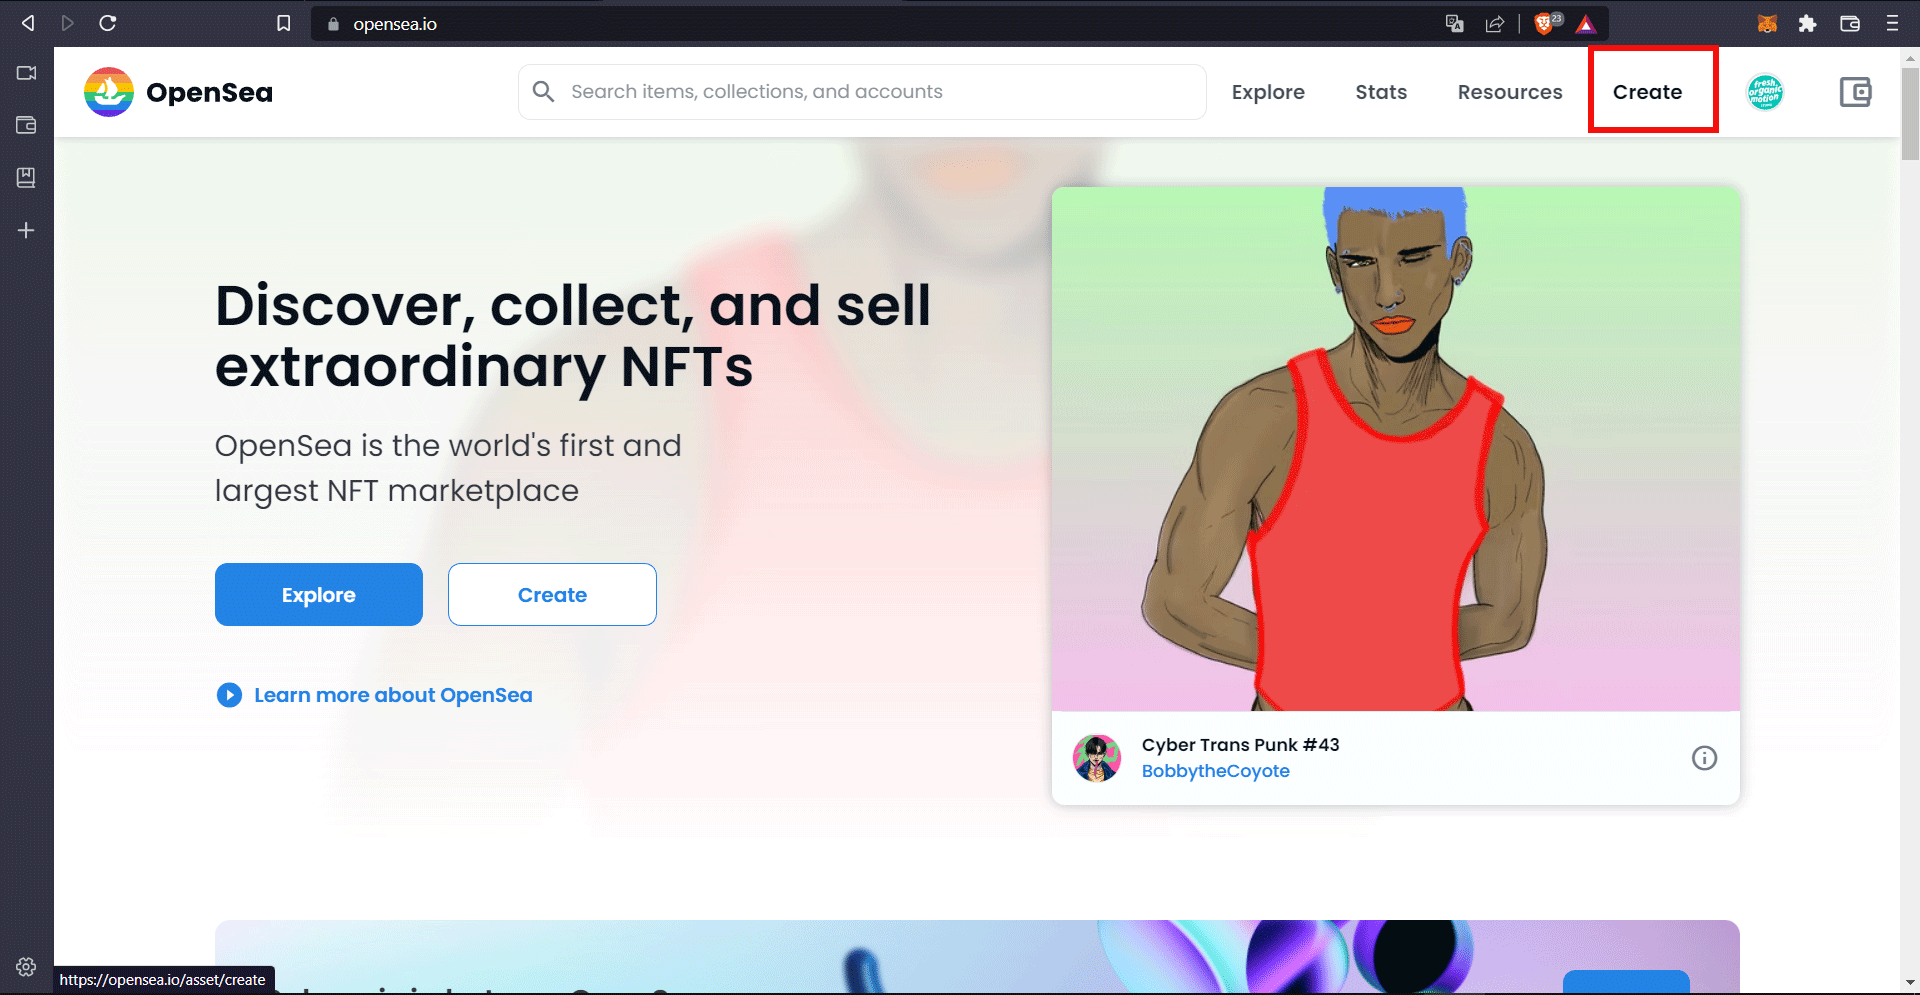
6 - Create your first NFT
This is the step you've all been waiting for: the creation of the NFT. An NFT is a link between a photo (or video, audio file, 3D file...) and a blockchain, in this case the Ethereum blockchain.
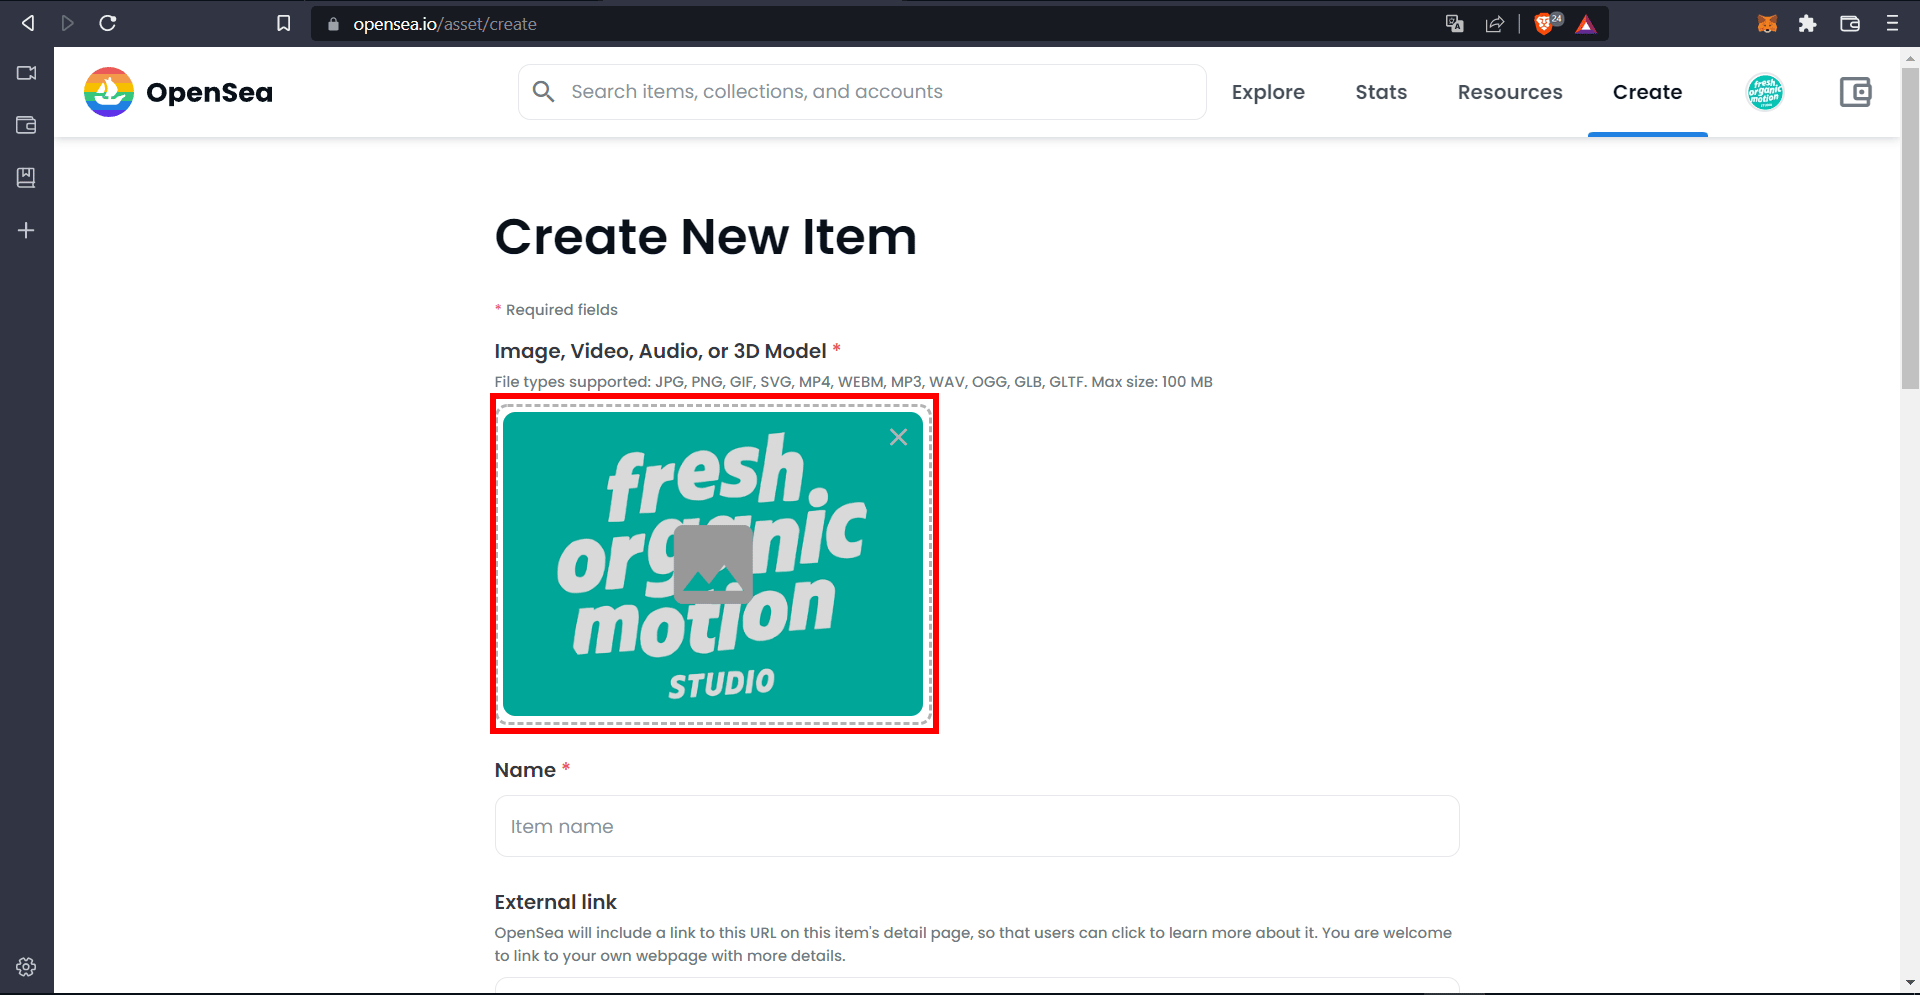
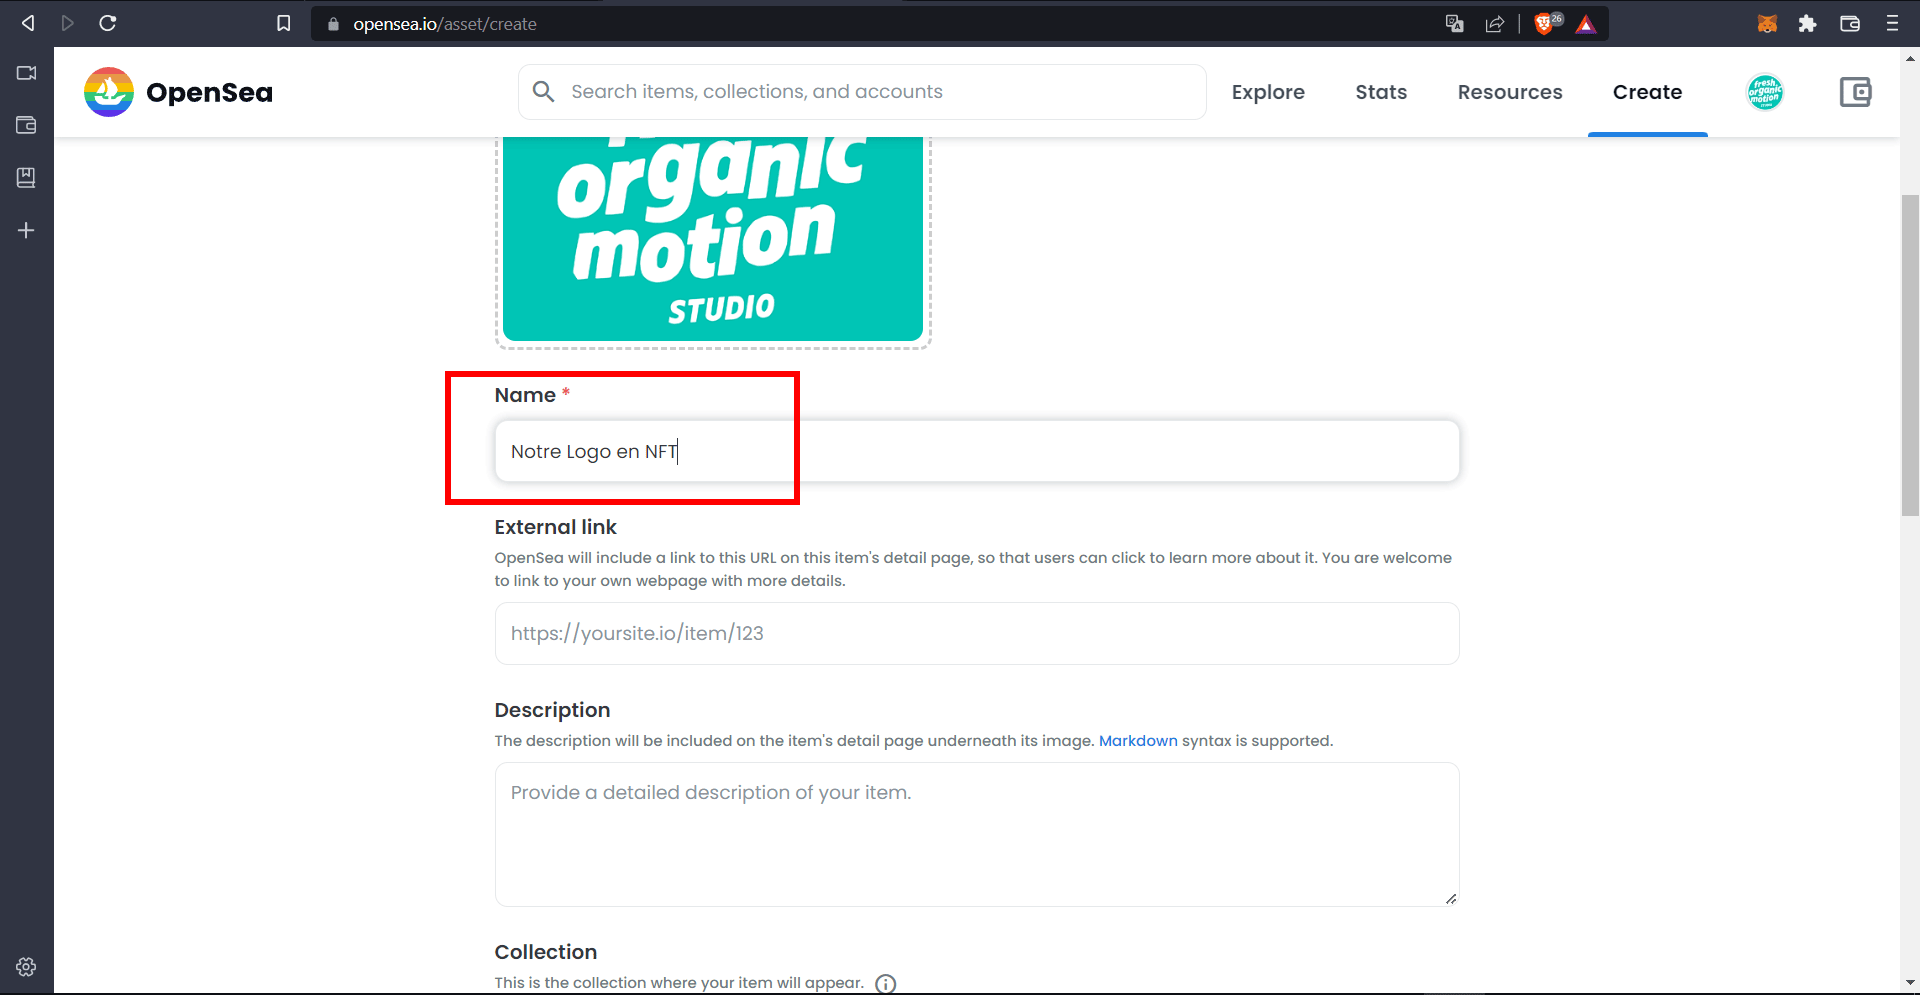
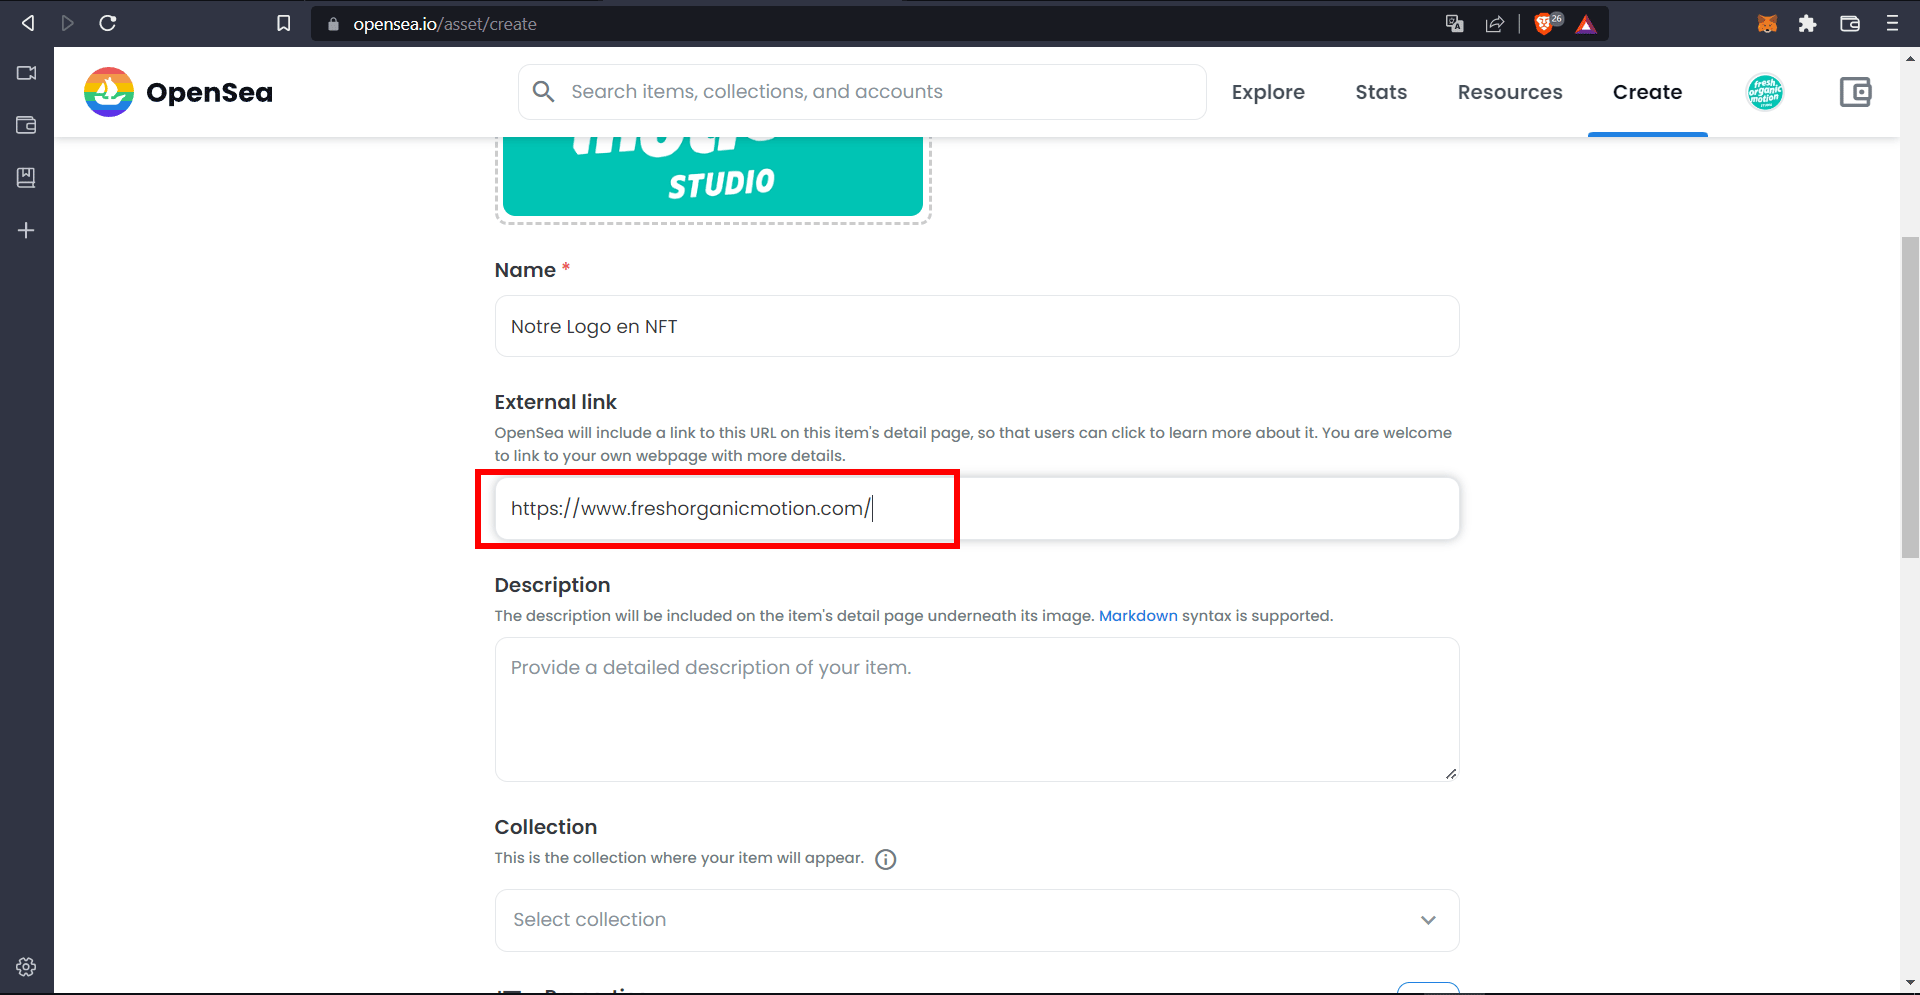
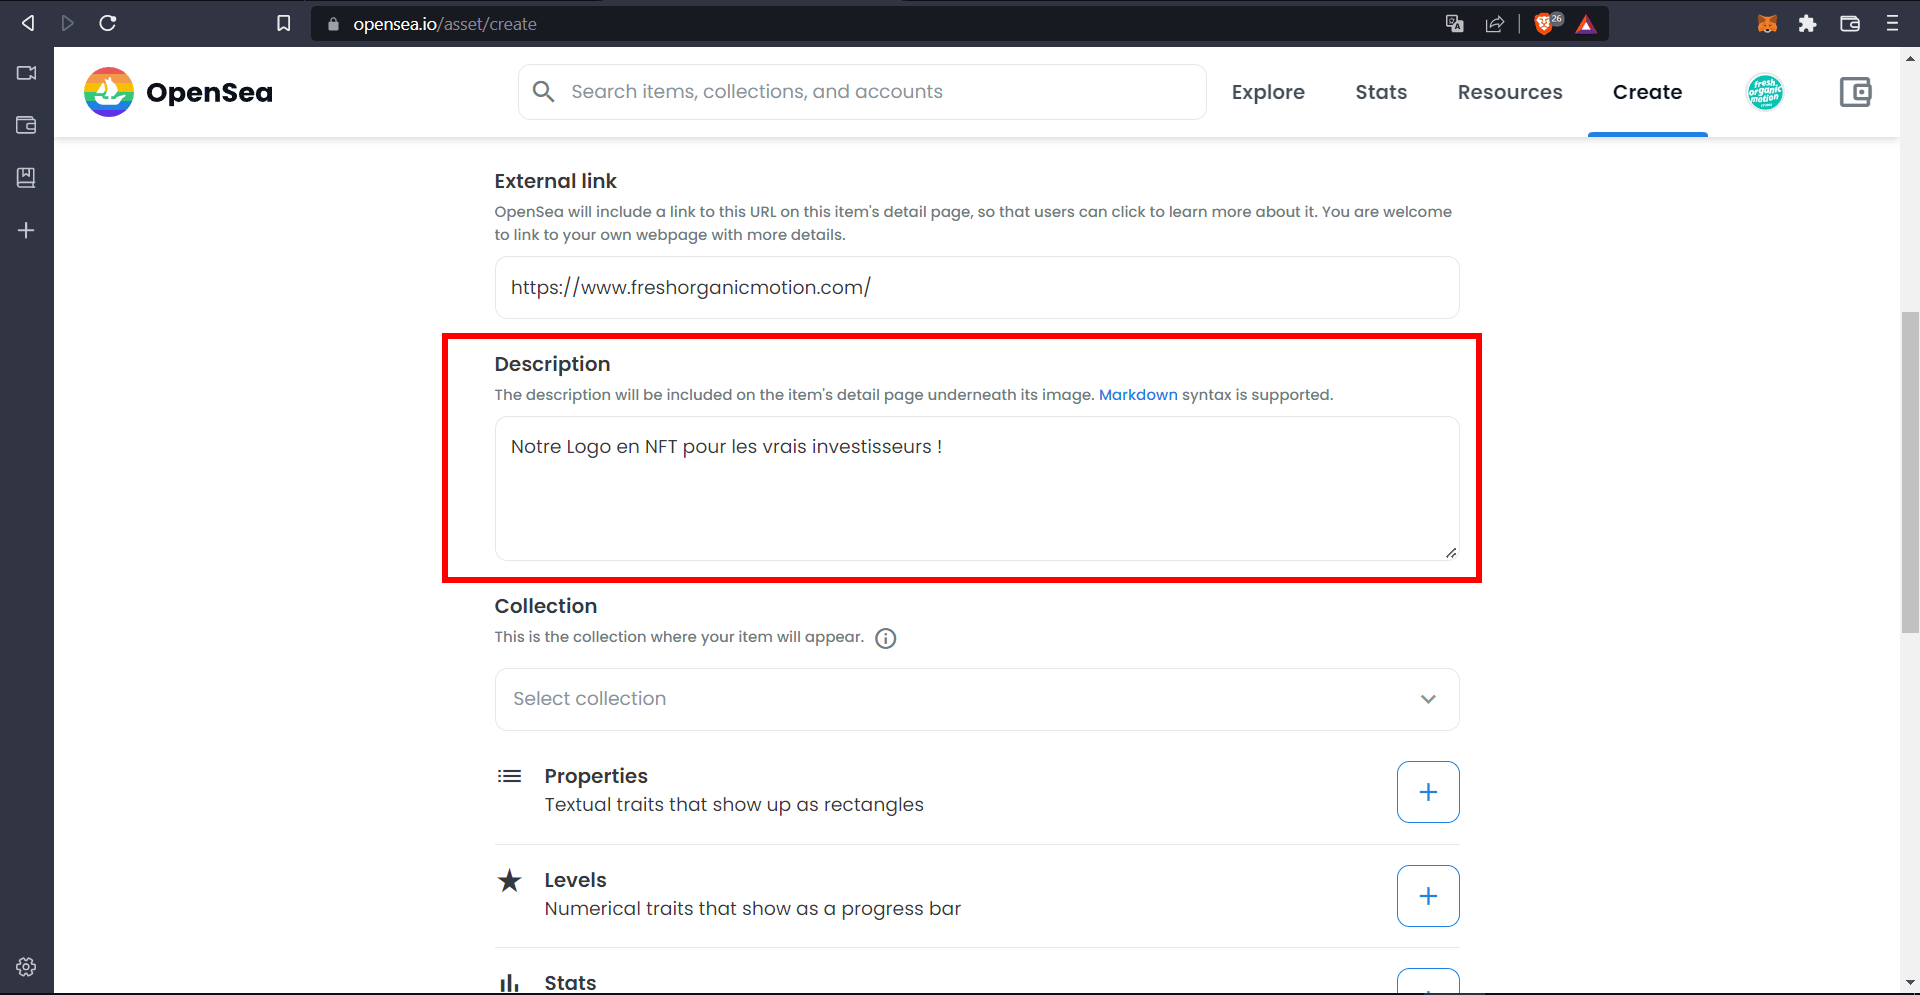
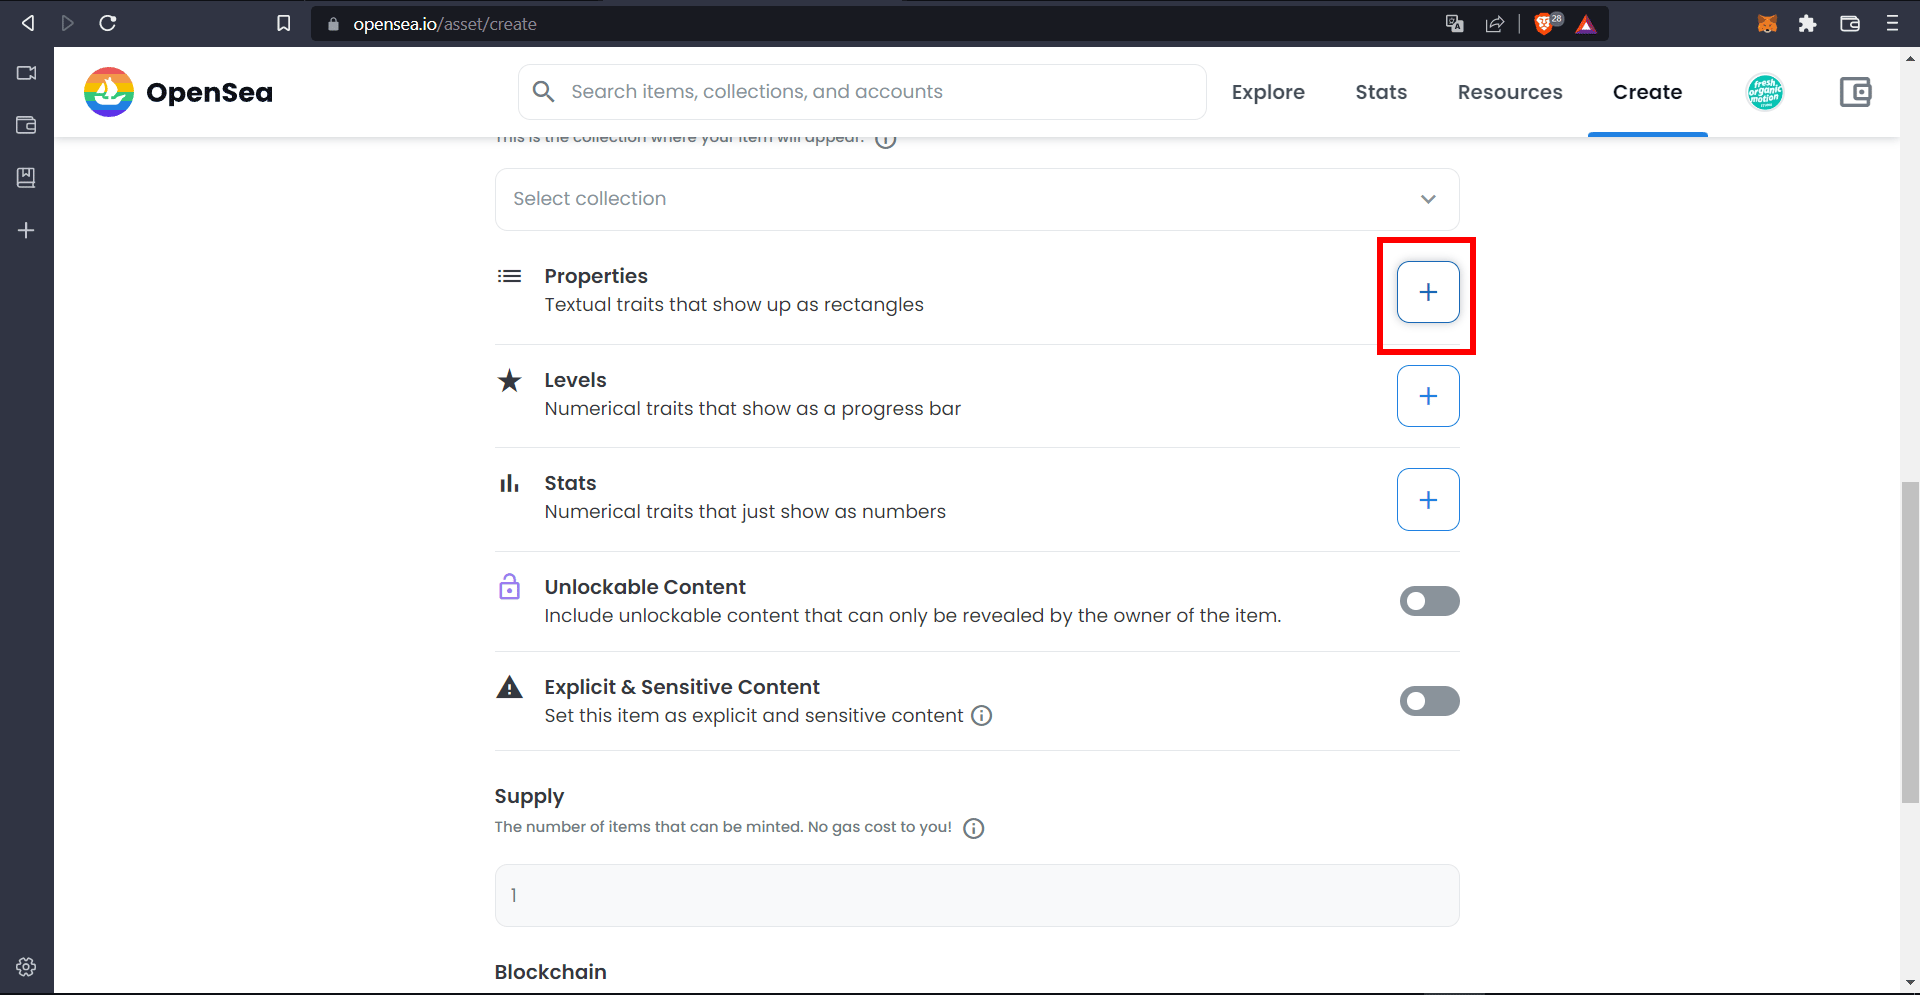
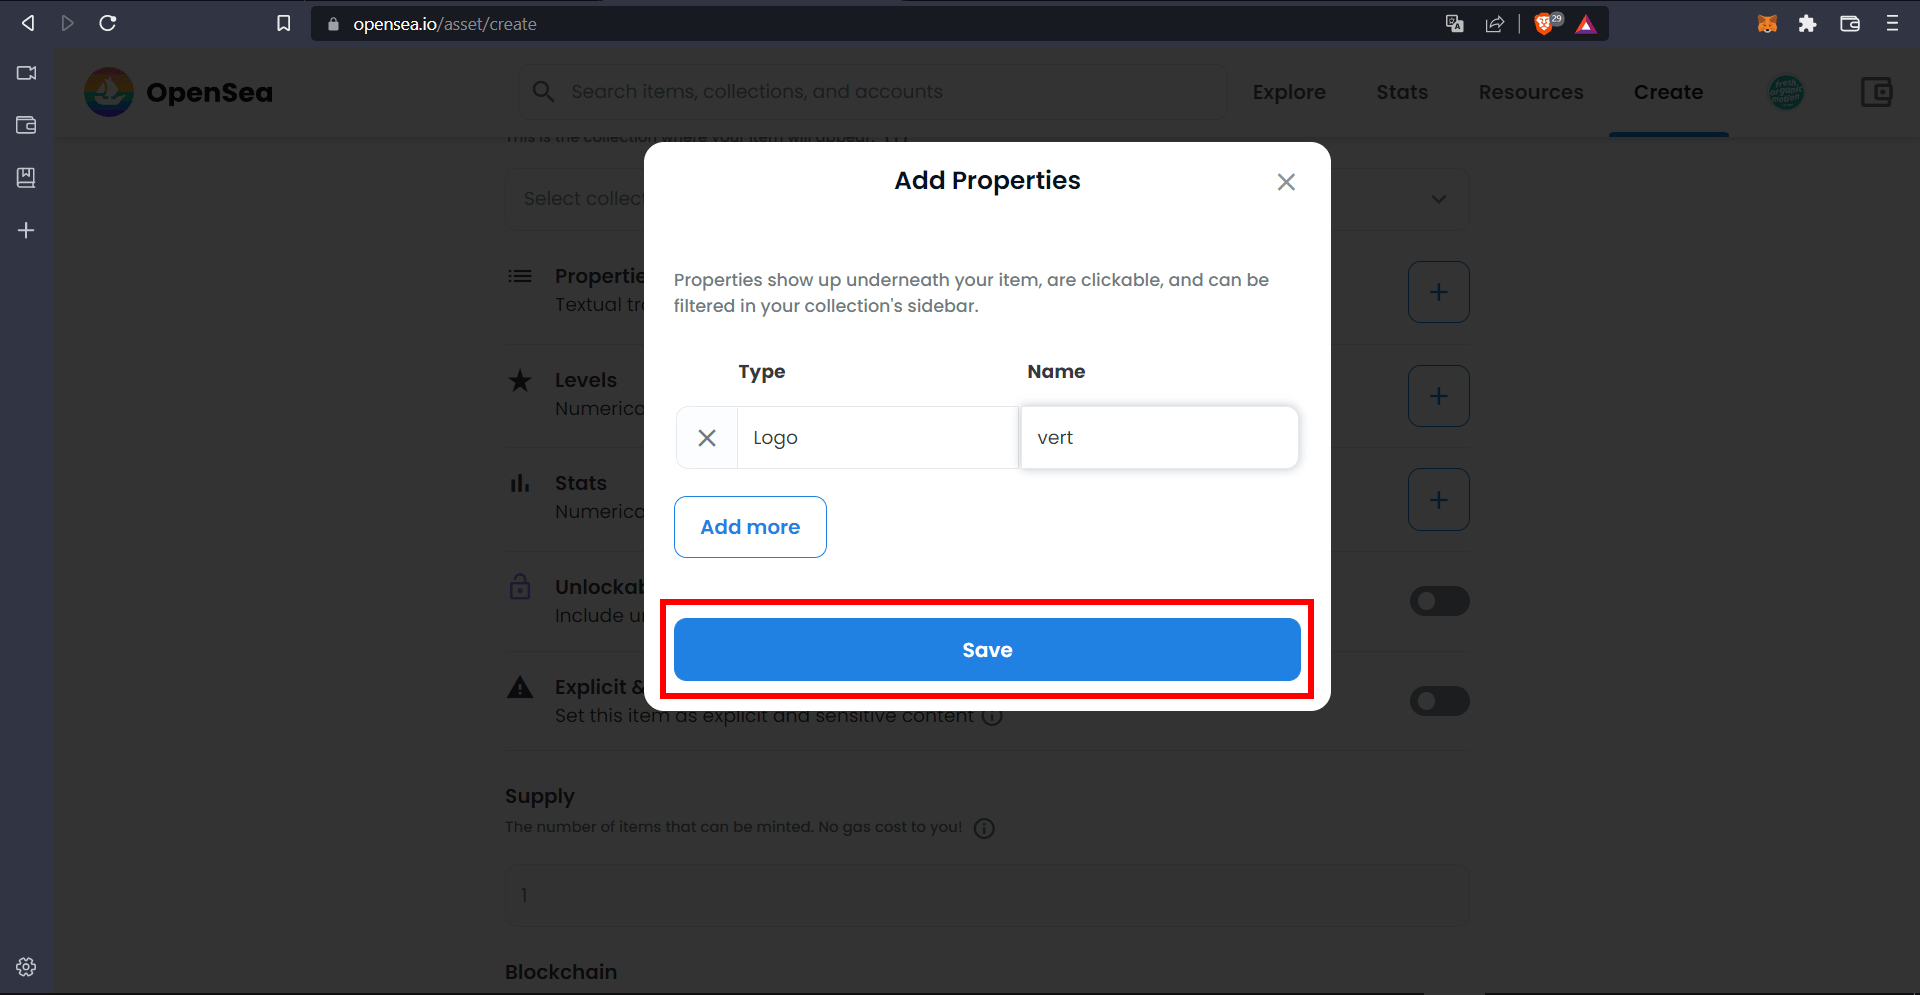
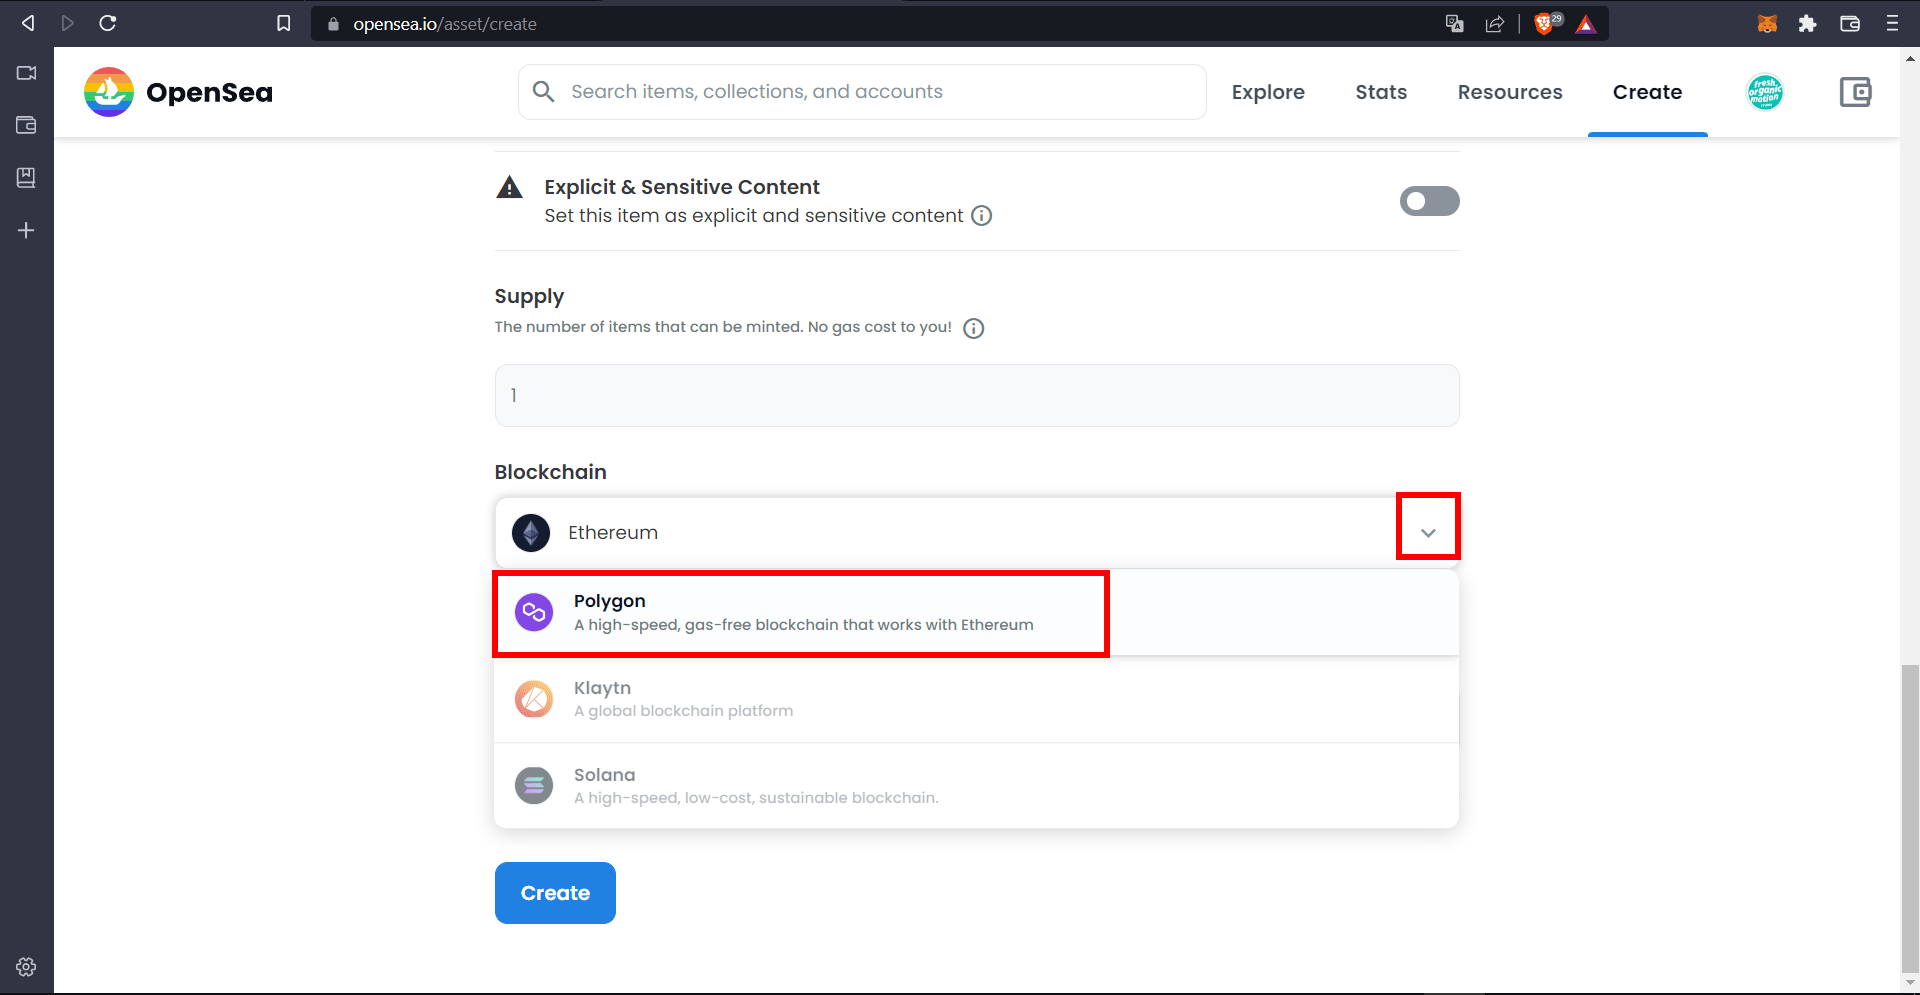
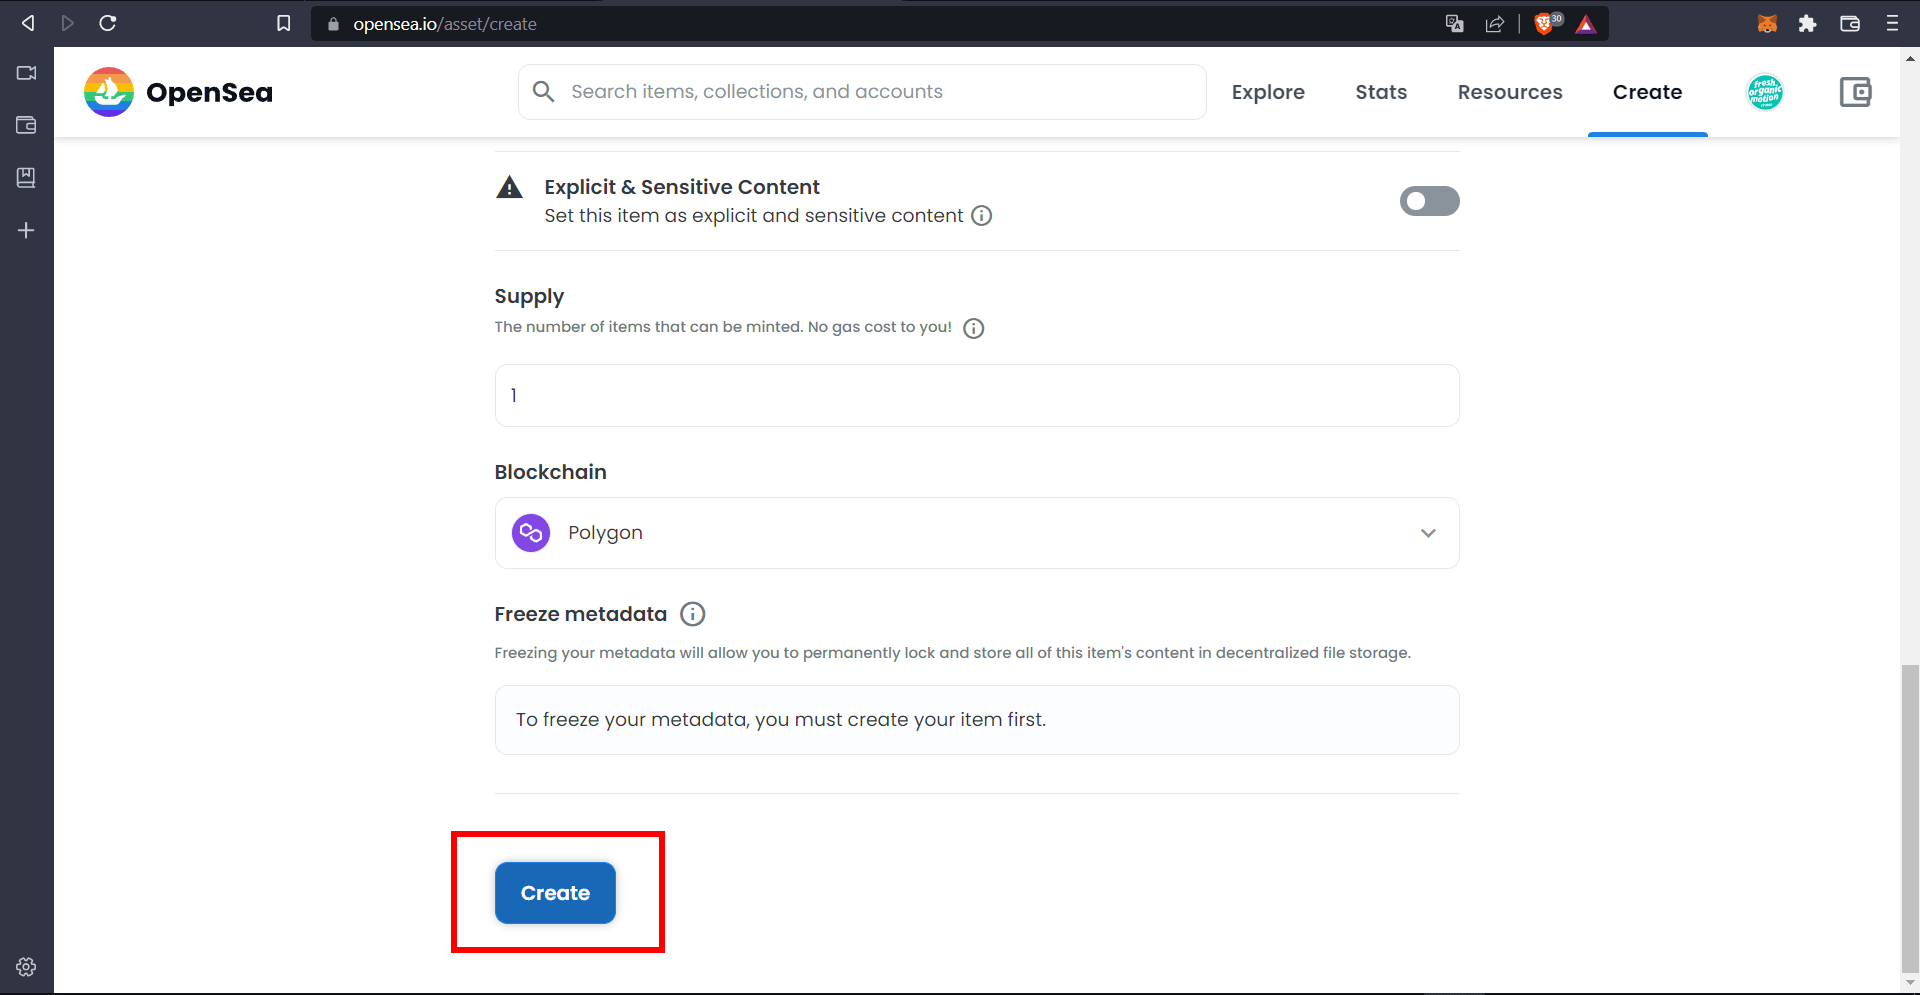
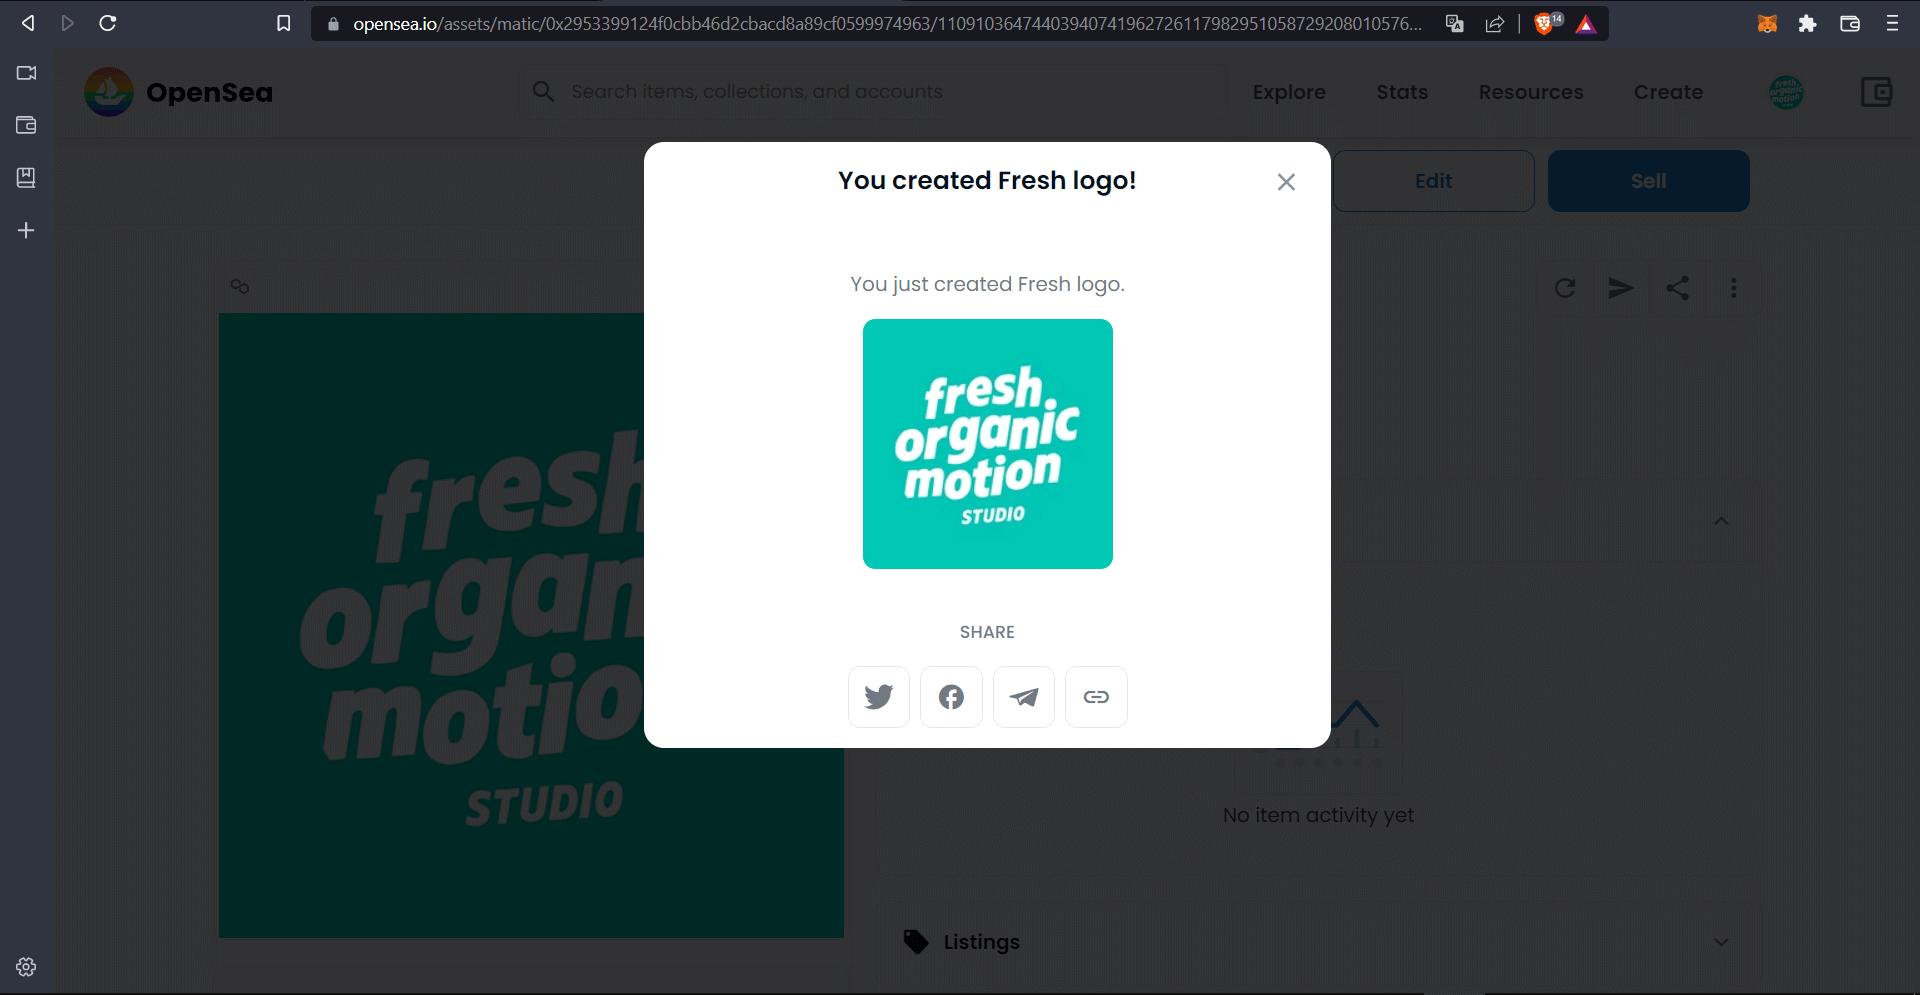
Click on "Create".Click on the little mountain logo to import your photo or illustration.Name your NFT.Fill in the link to your website if it refers to unique information in your NFT, otherwise leave it blank.Add an inspiring description!Add properties, click on "Properties". Optional.You can add as many properties as you like. These are the characteristics that define your NFTs, and are only useful if you publish several of them. For example, for a character series you add "Type : Accessory - Name: Cap".Select "Polygon", it's the "free" blockchain.Click on "Create".Congratulations, your NFT is created. You can share it to show your friends.
7 - Preparing your collection for sale
To sell your NFT, you need to personalize your collection. To receive your cryptos, you need to follow this step.
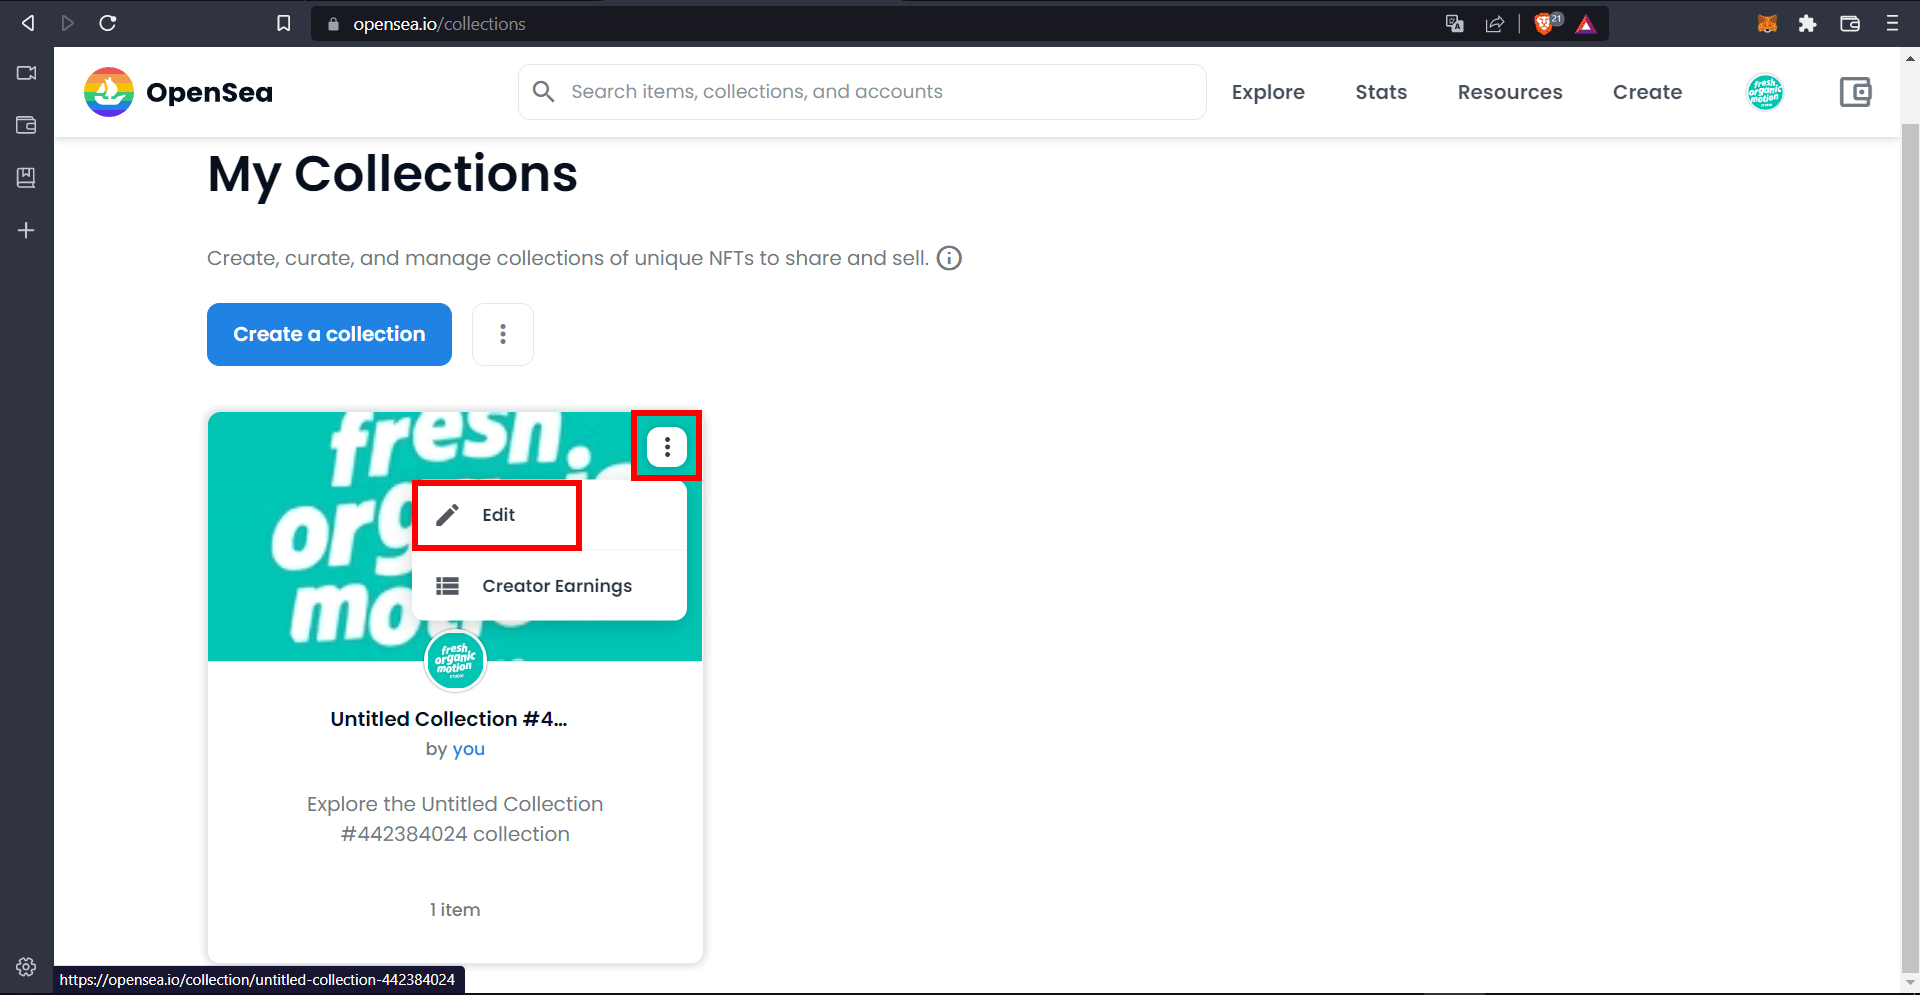
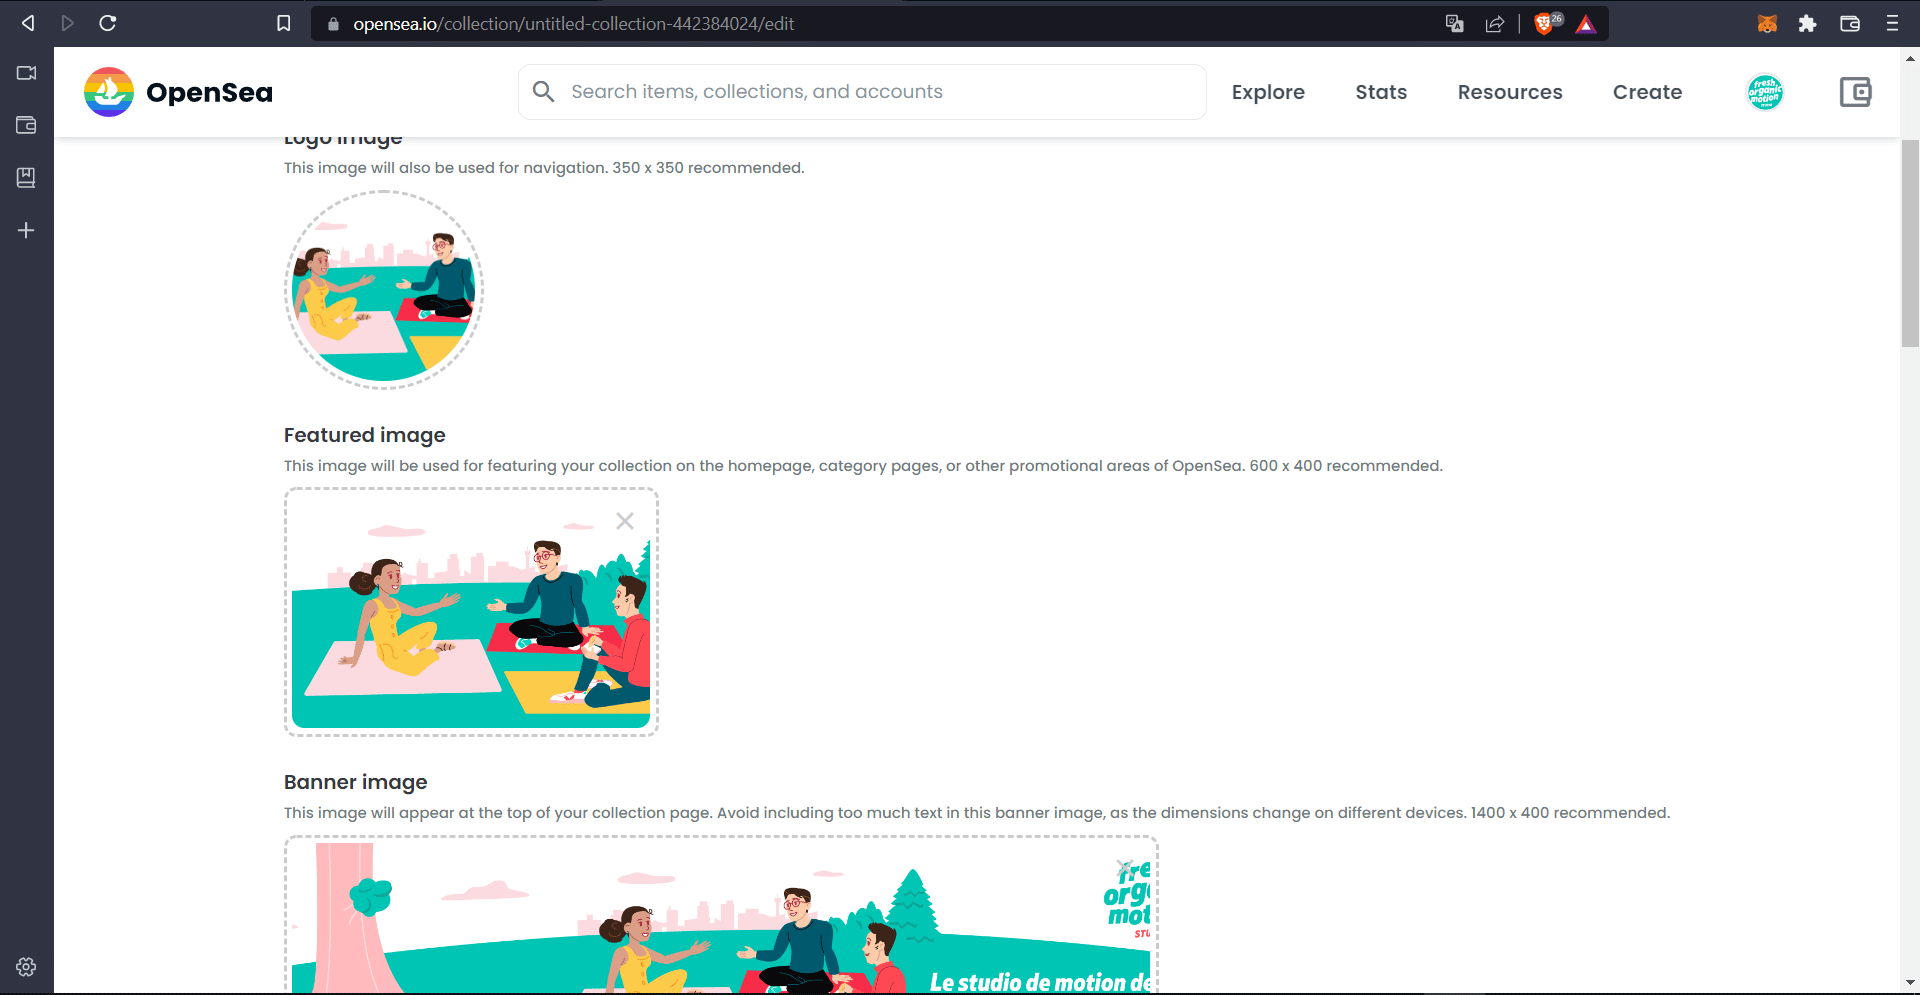
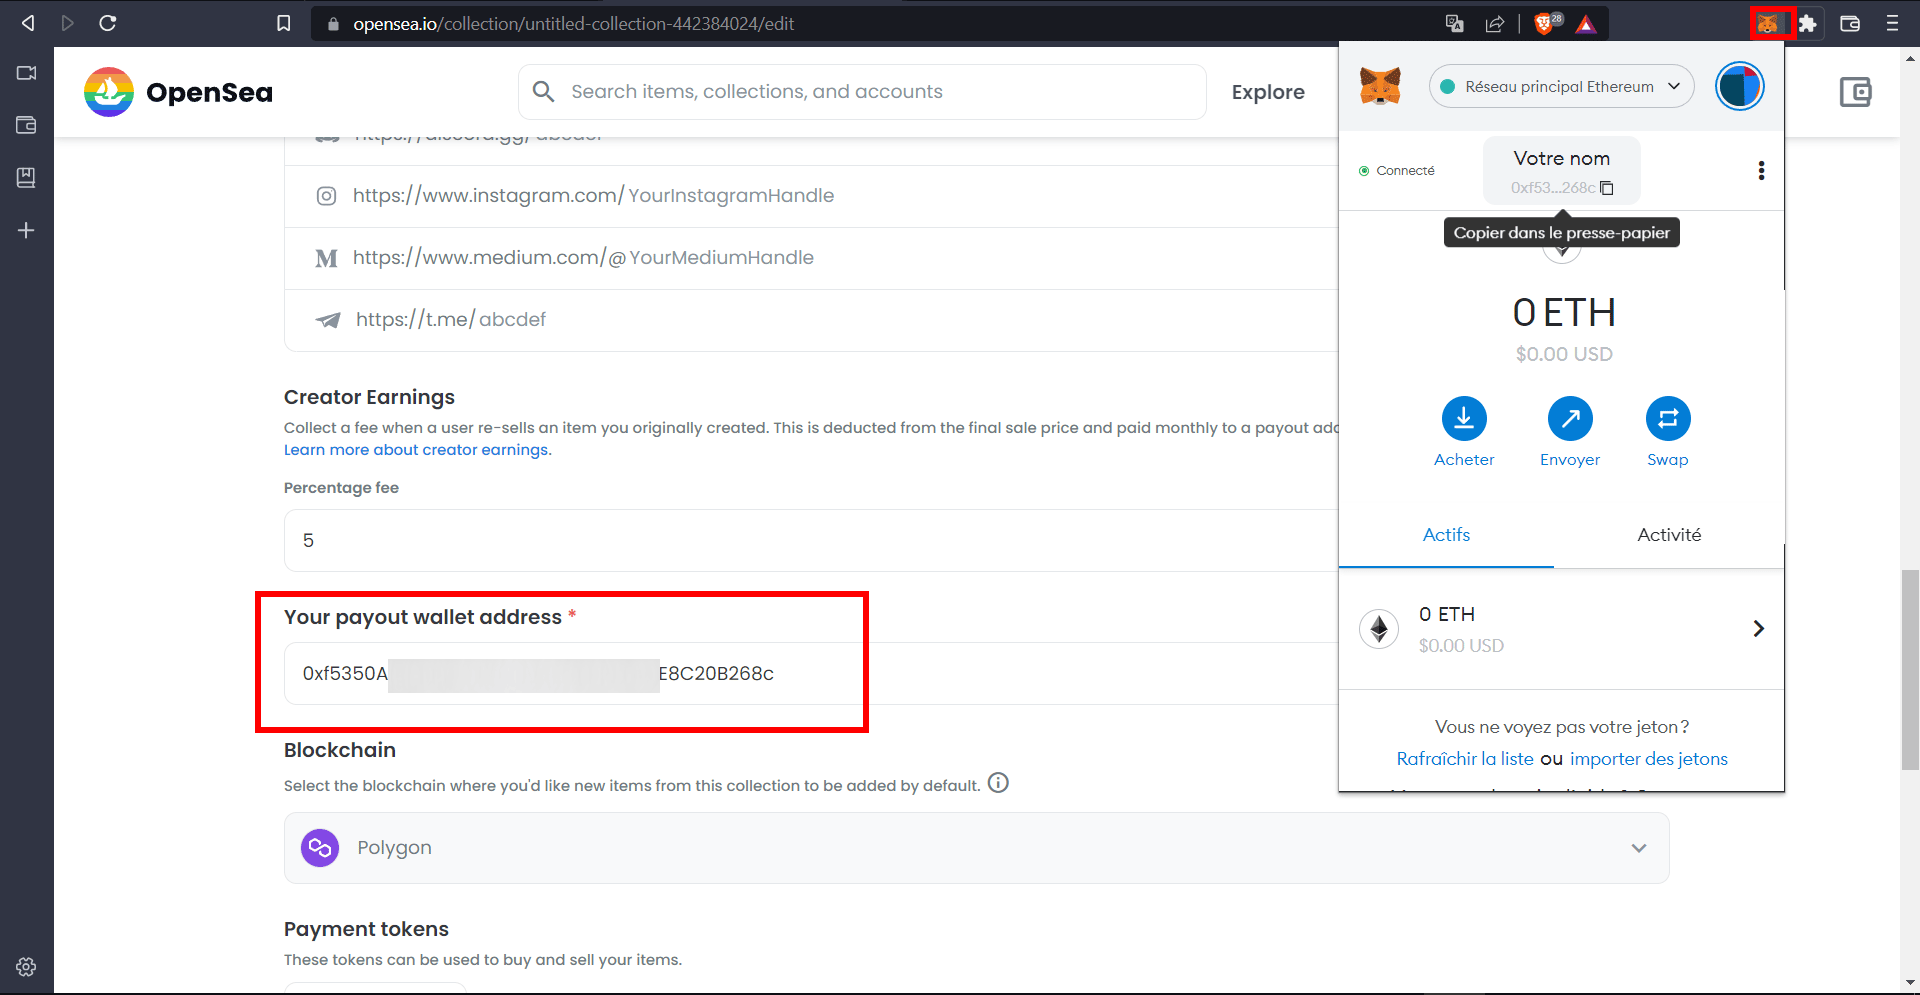
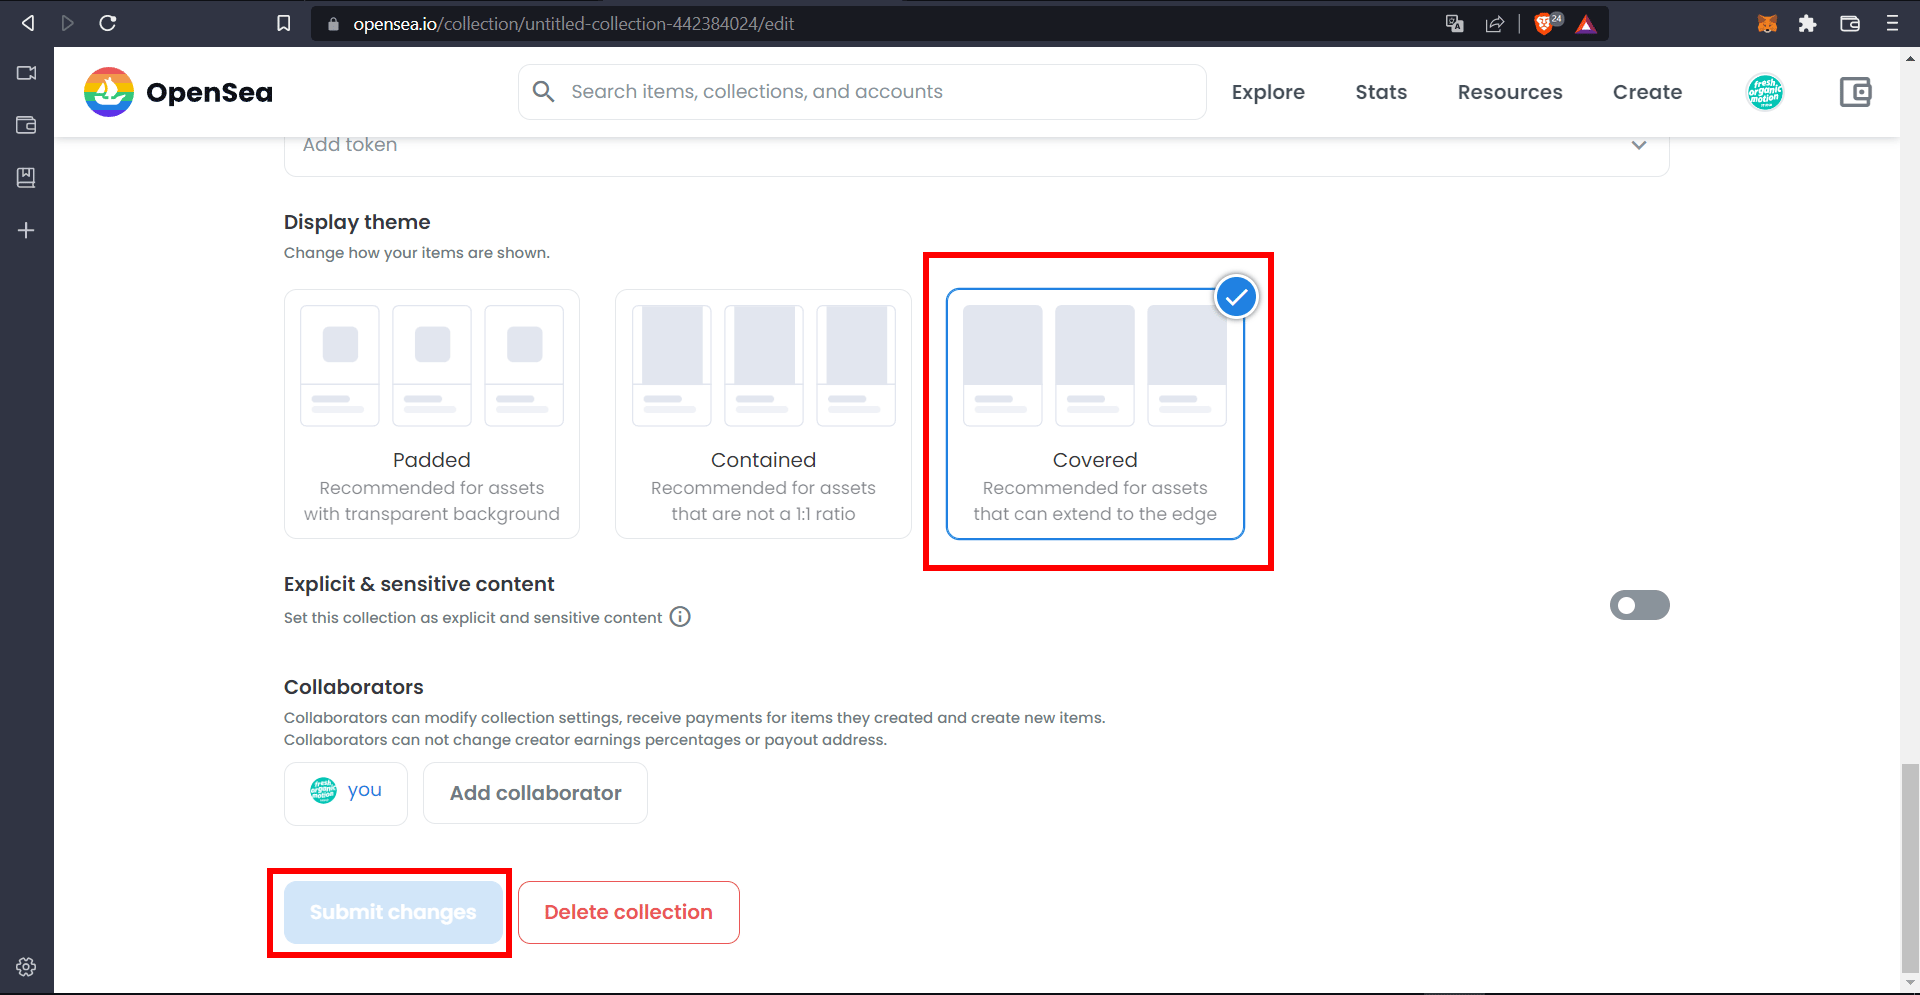
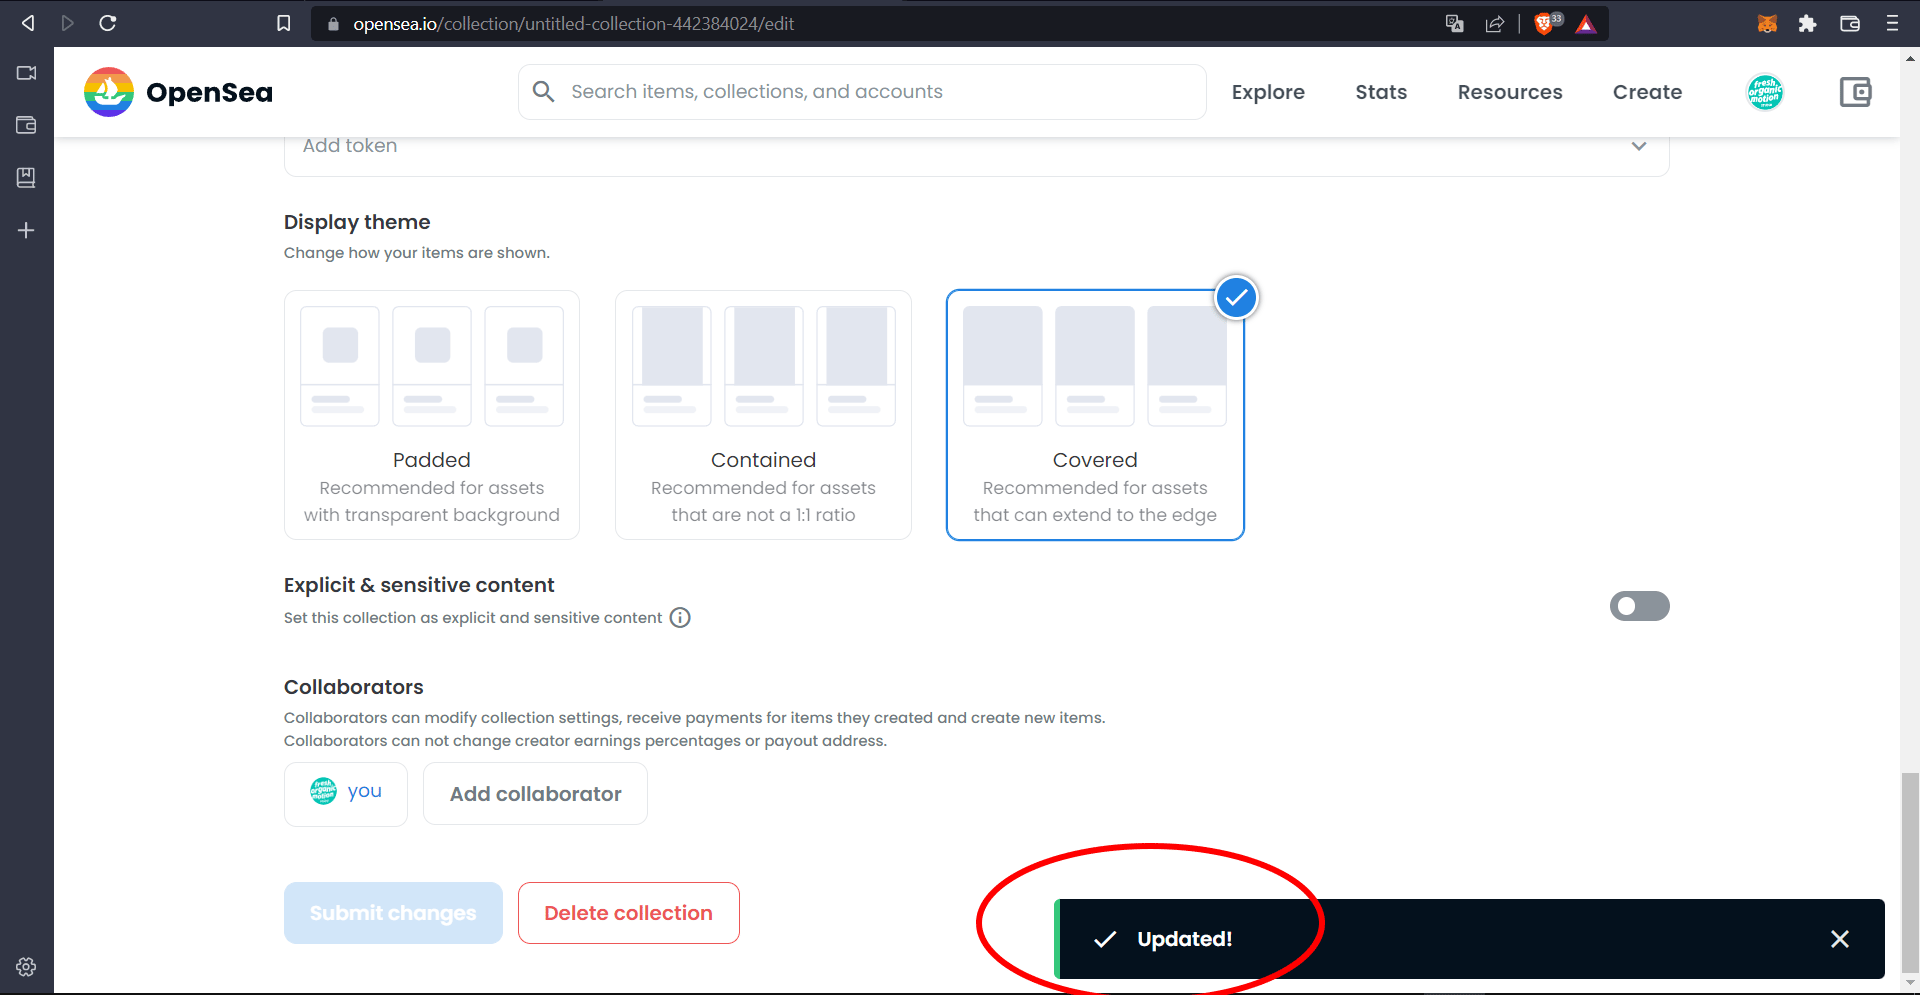
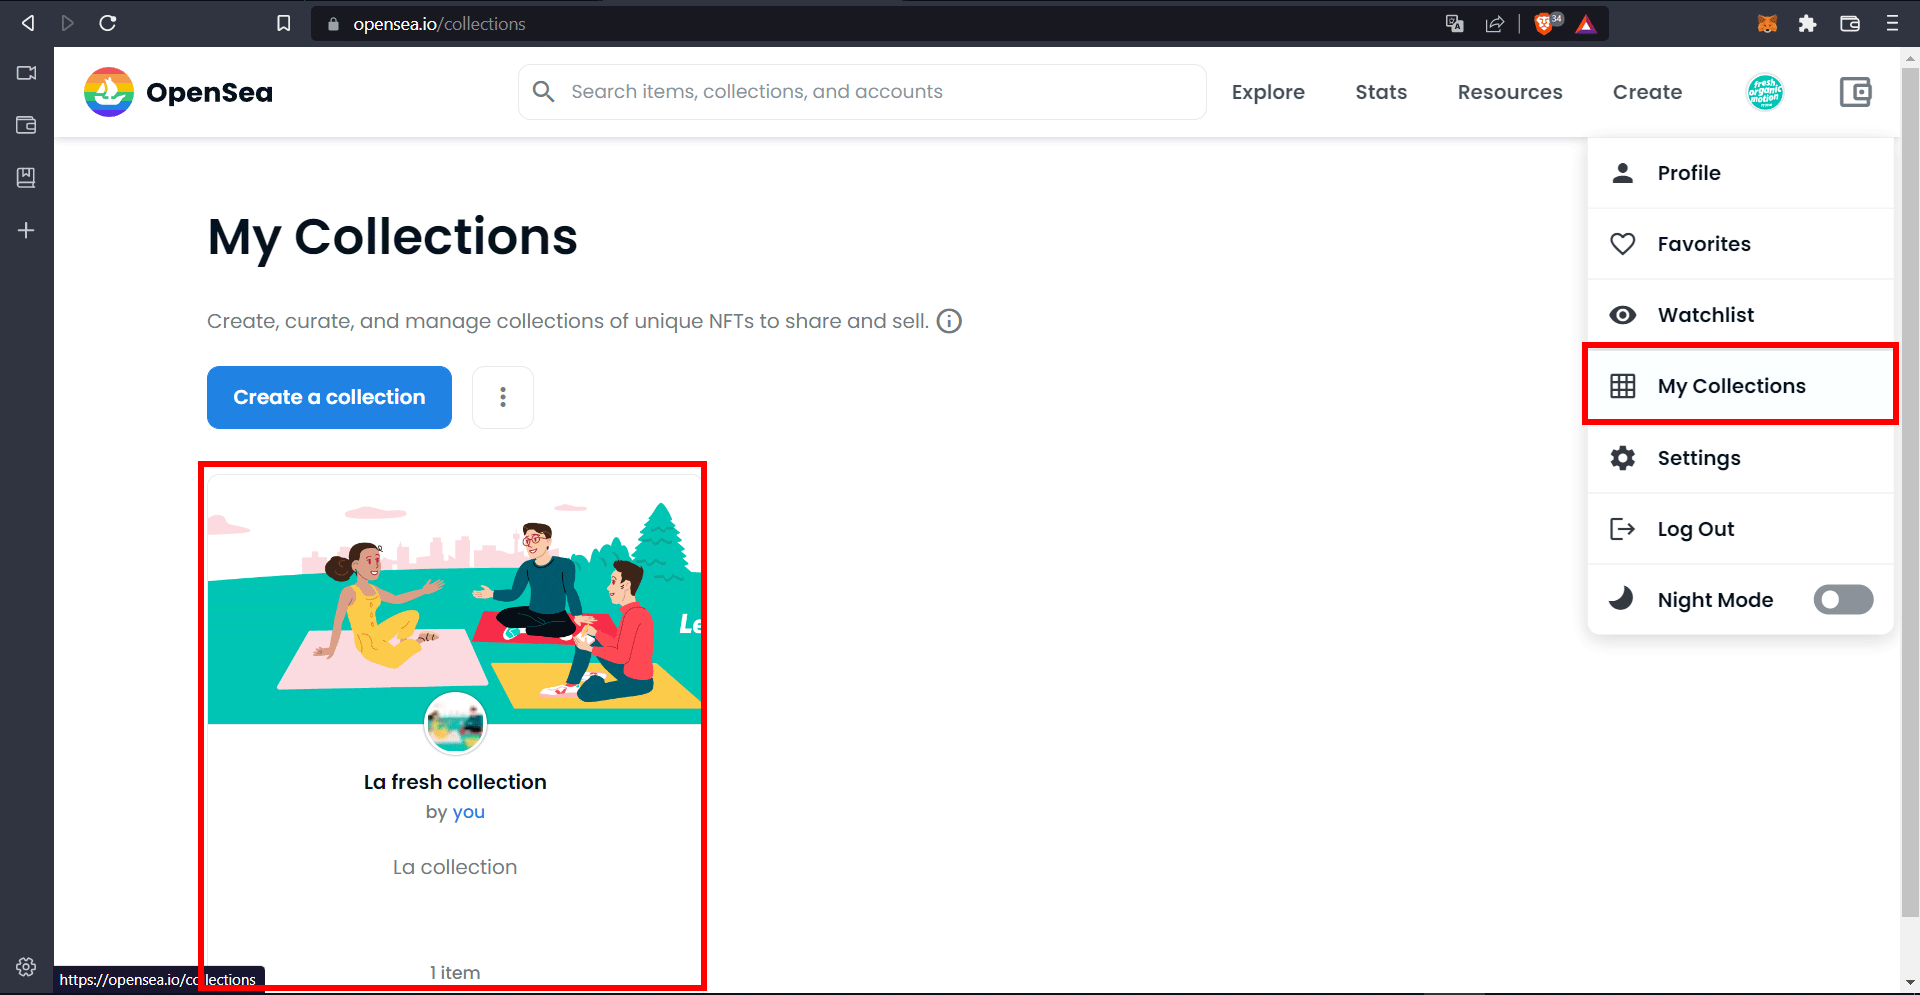
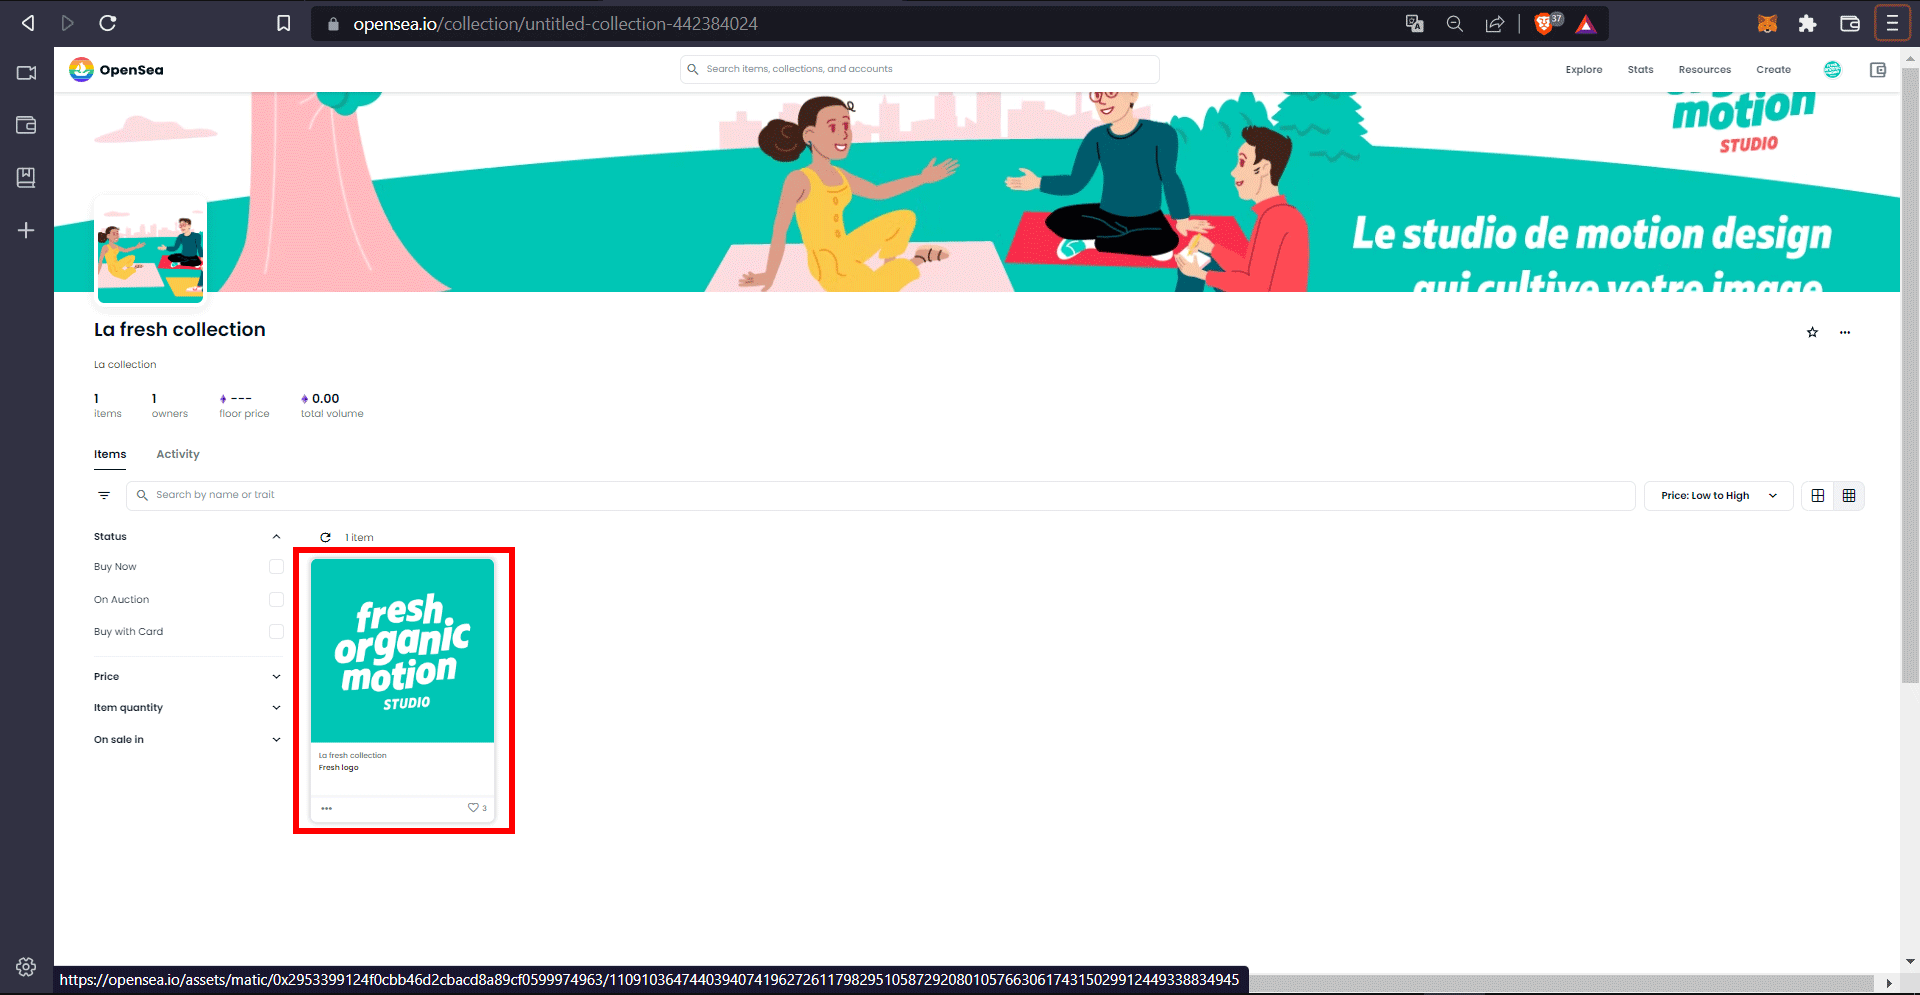
Click on "My CollectionsClick on the 3 small dots and then on "Edit".Fill in the images, if you need graphics, contact us for a free quote.Fill in "Your payout wallet address" with your wallet number, which you copy from MetaMask (always pinned to the top right).Choose the "Display theme" in "Covered" mode for a more beautiful collection. Then click on "Submit Changes".Your collection is ready.
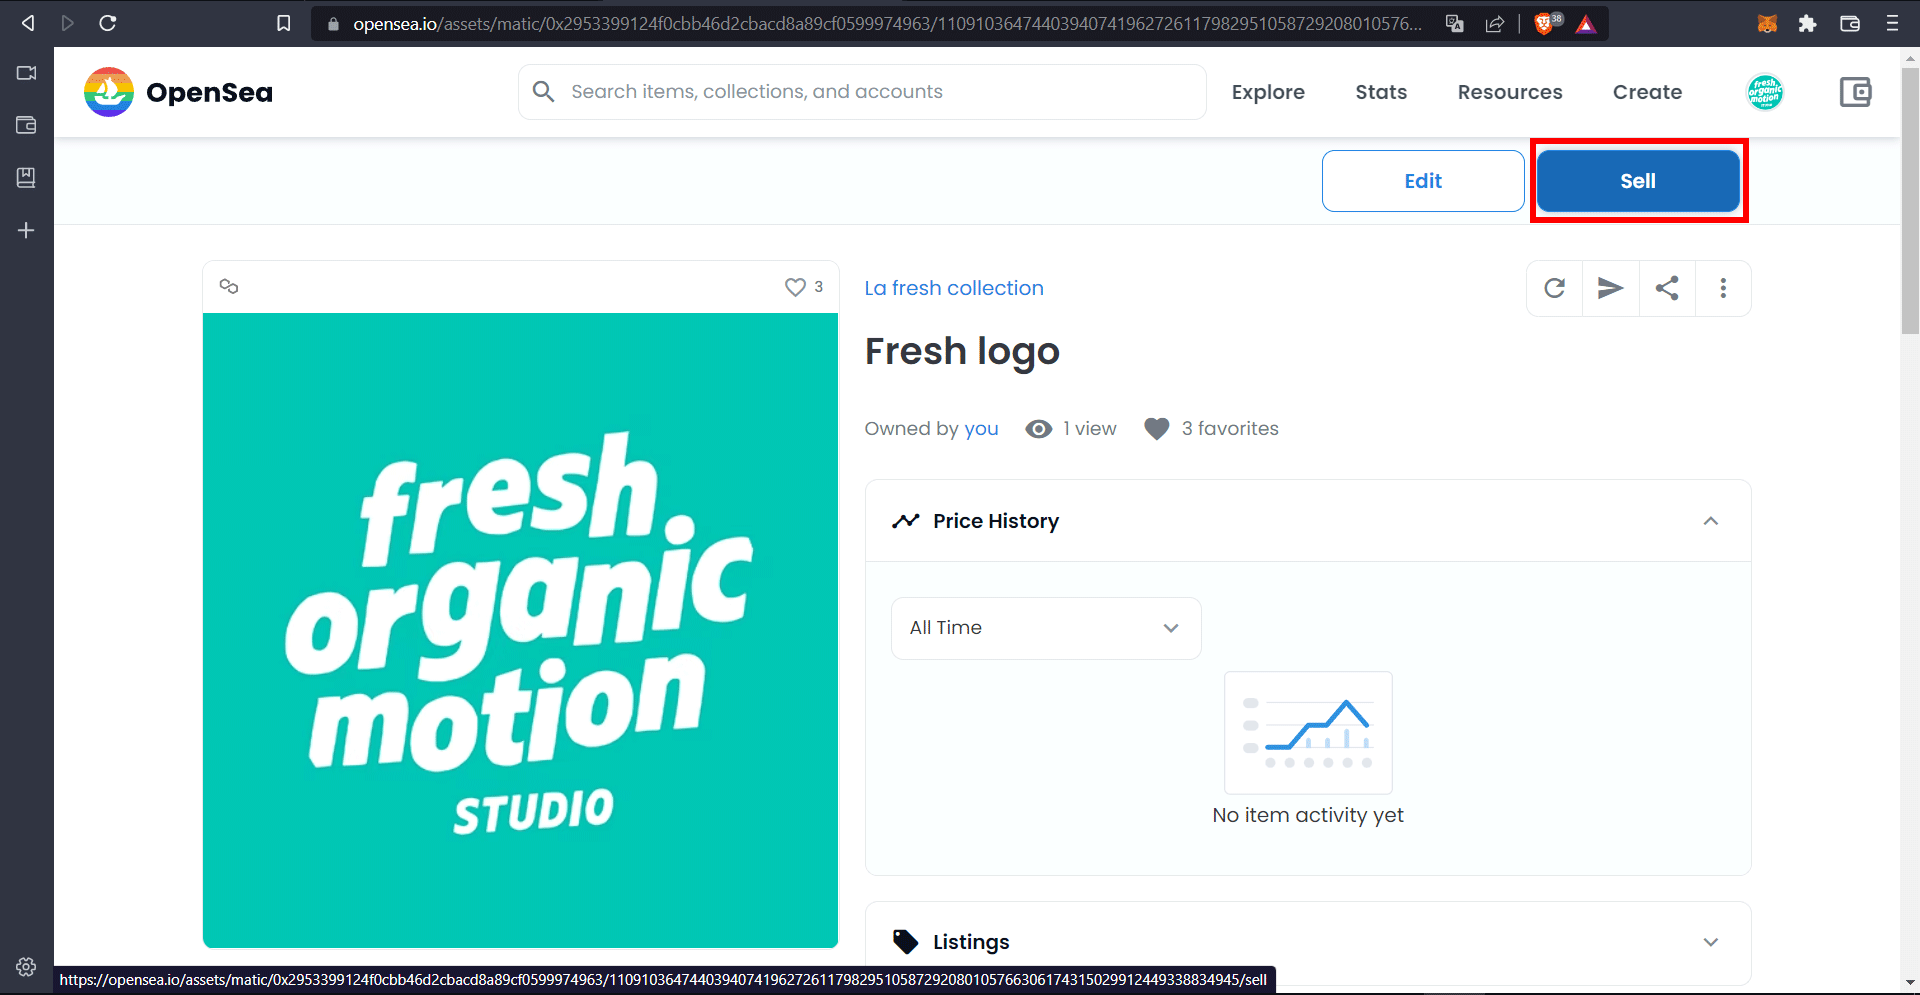
8 - Selling your NFT
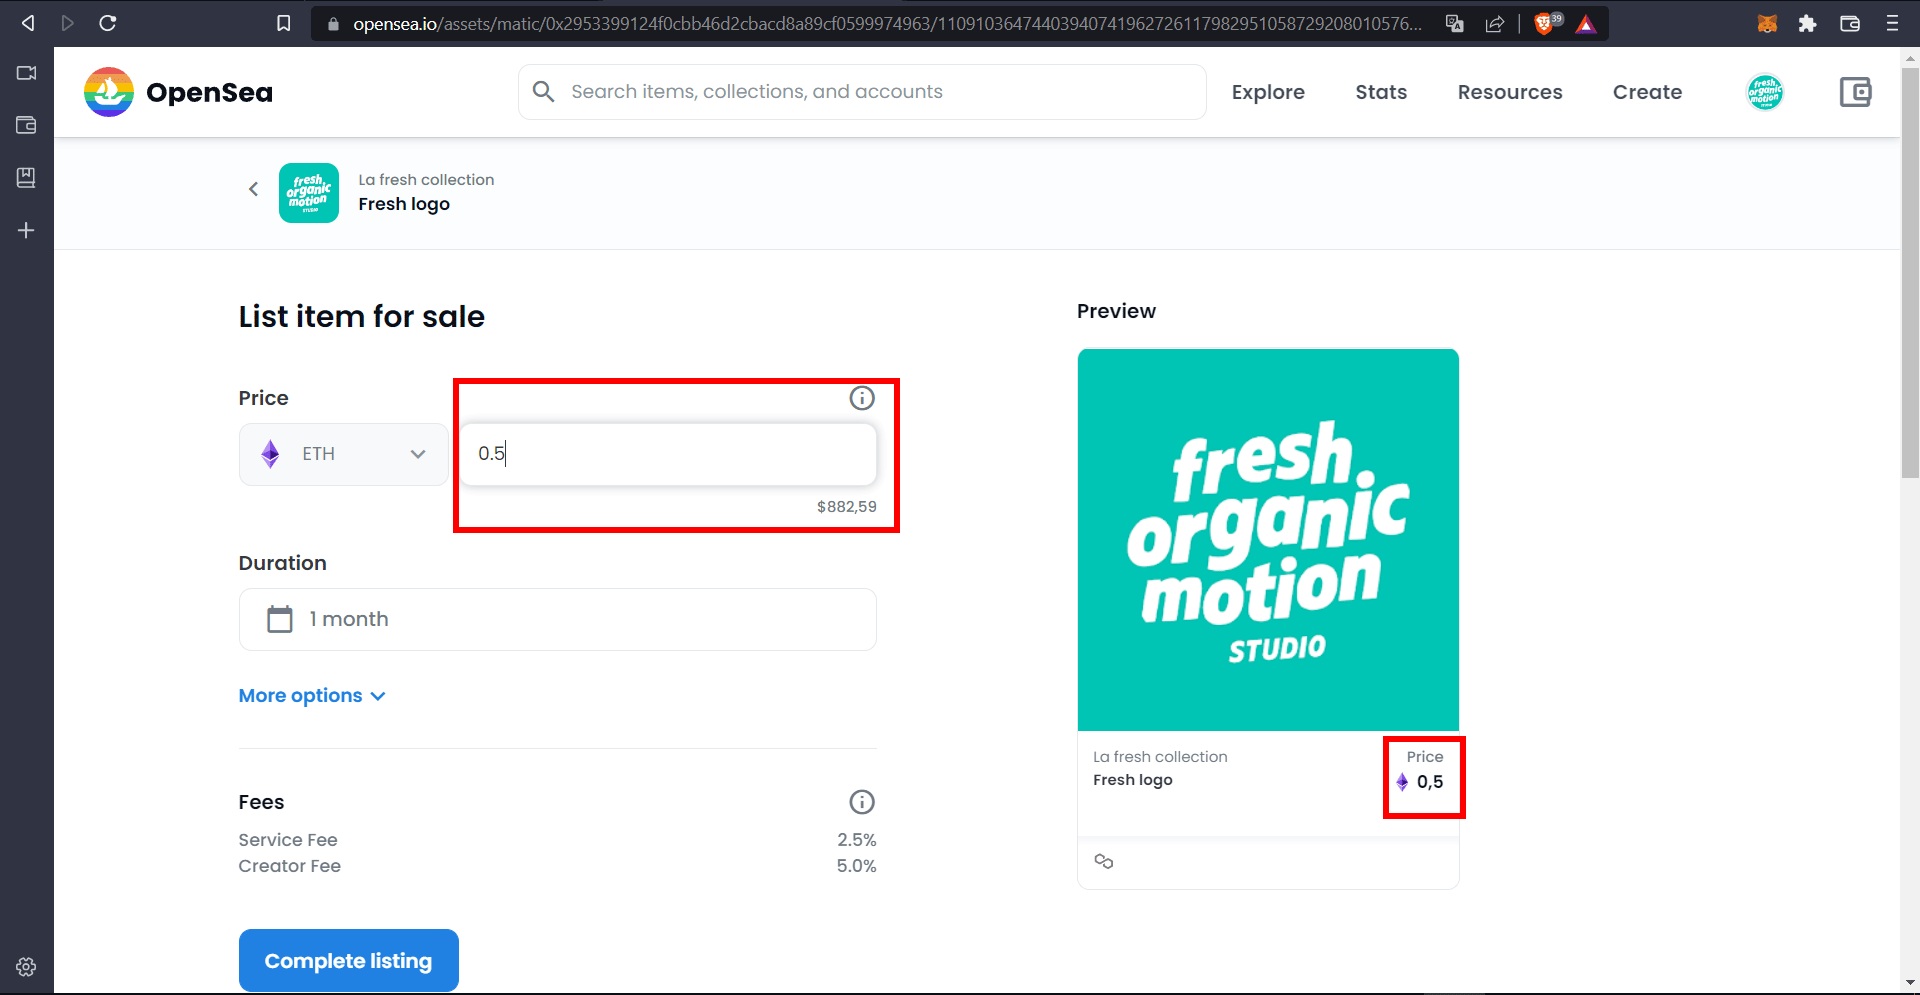
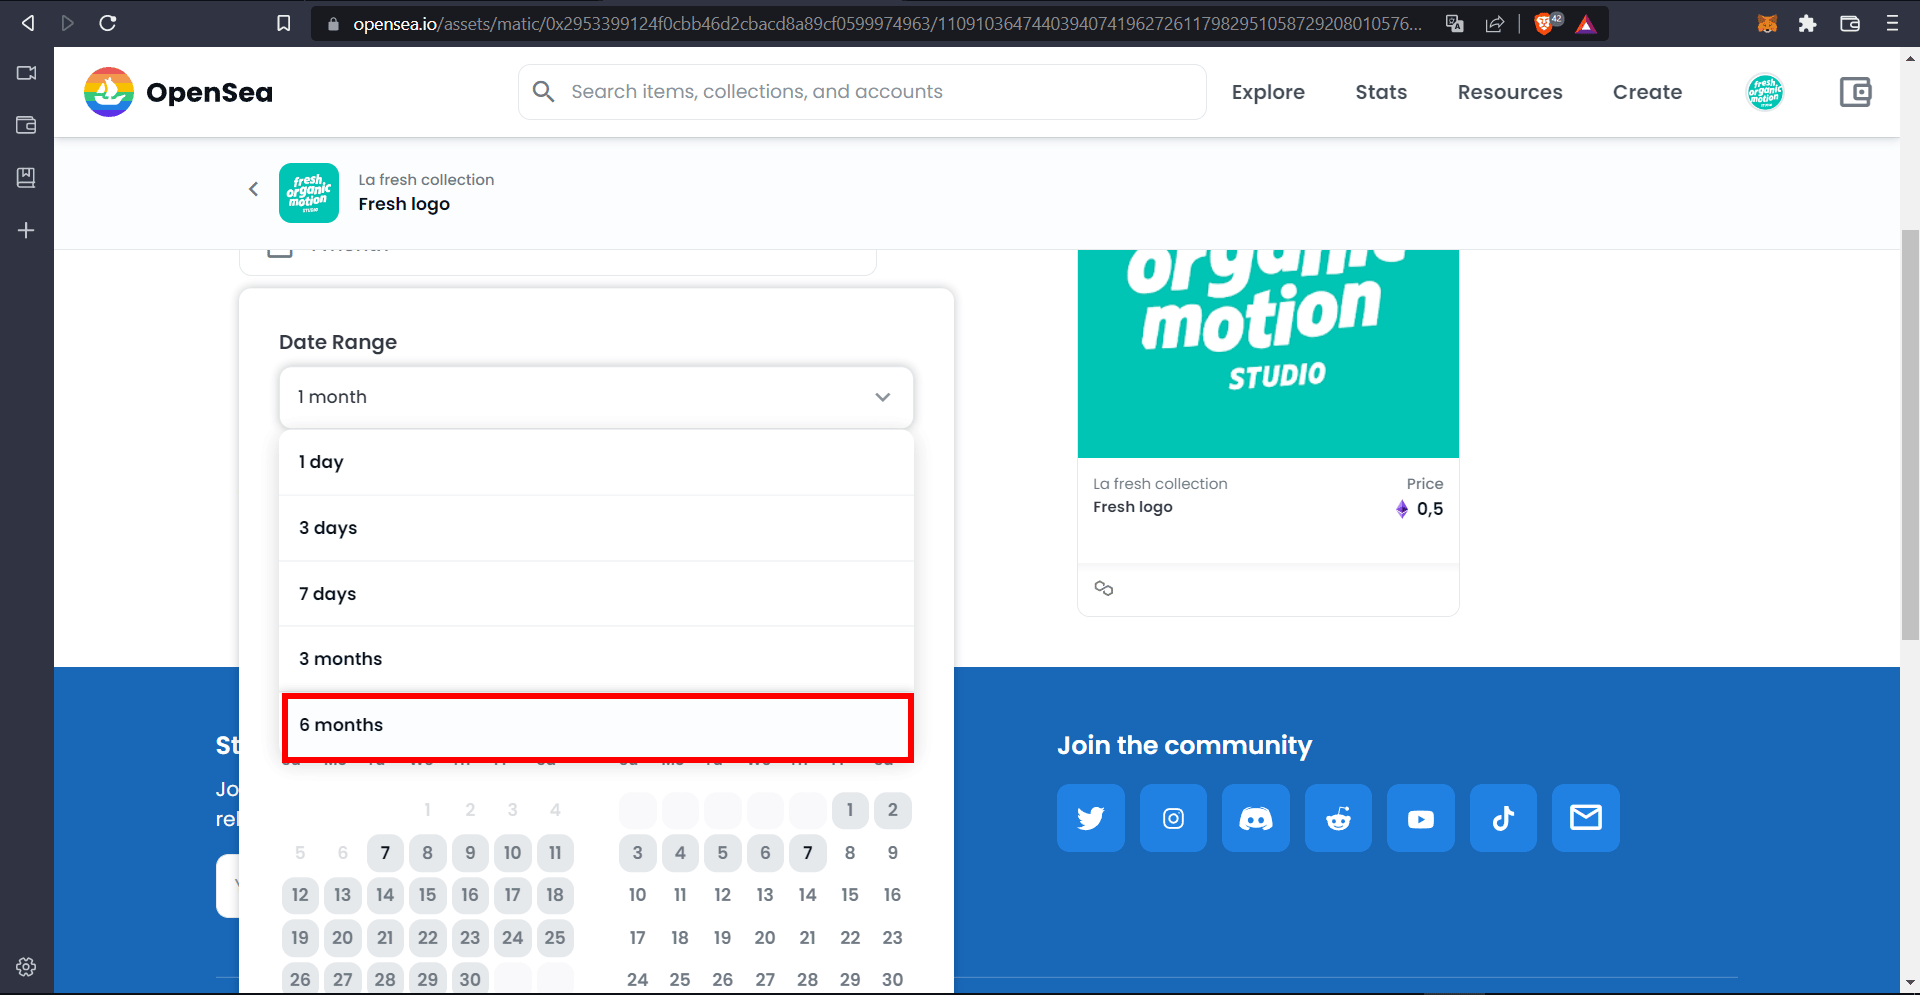
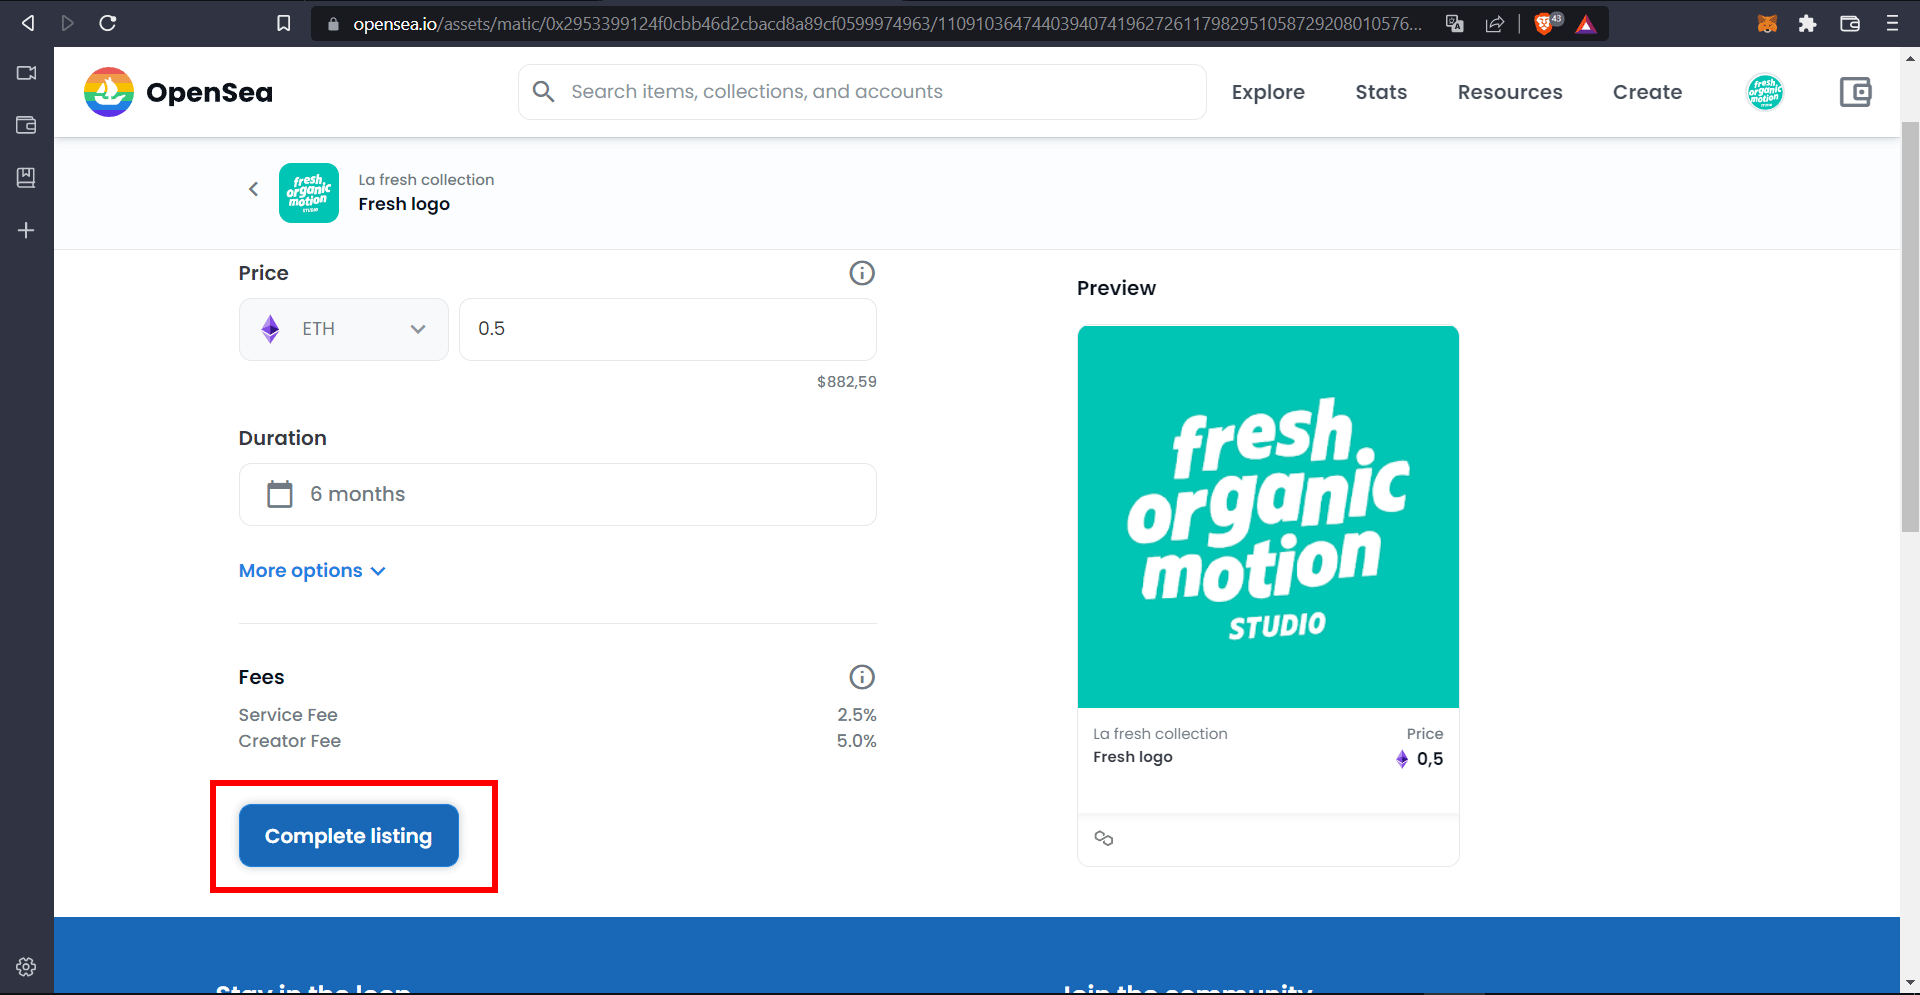
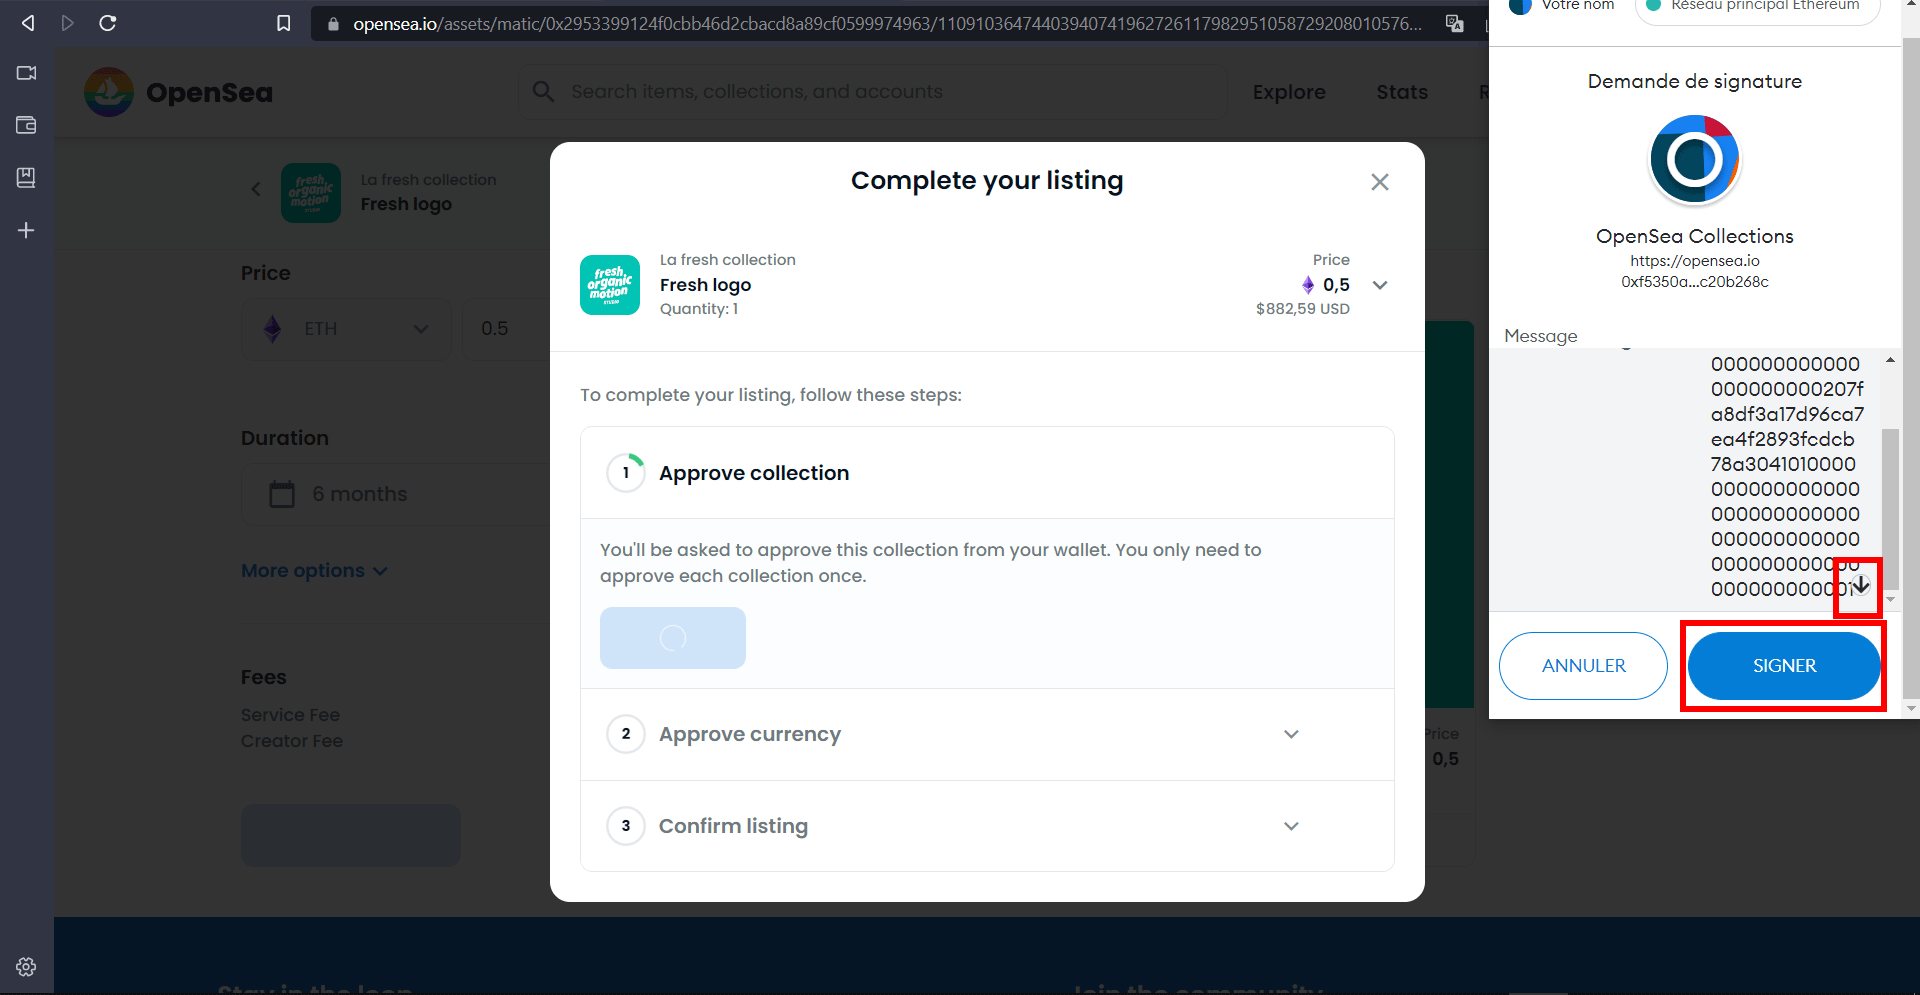
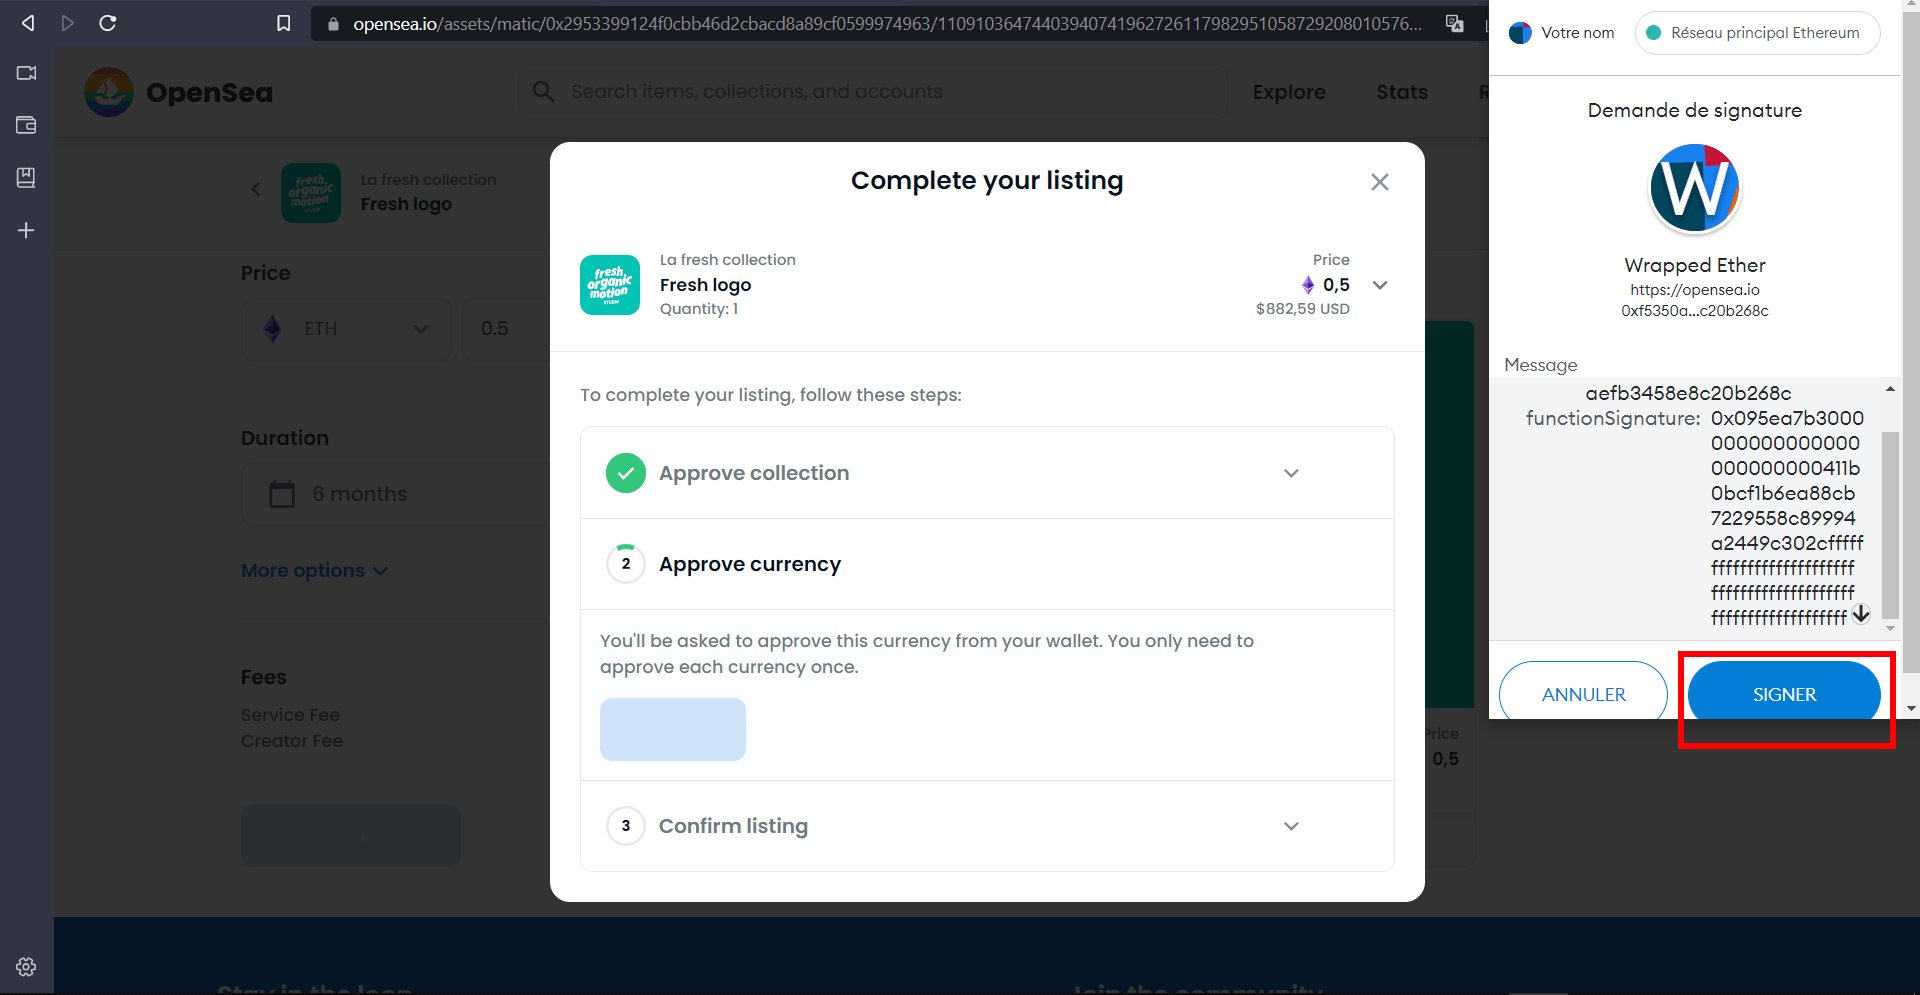
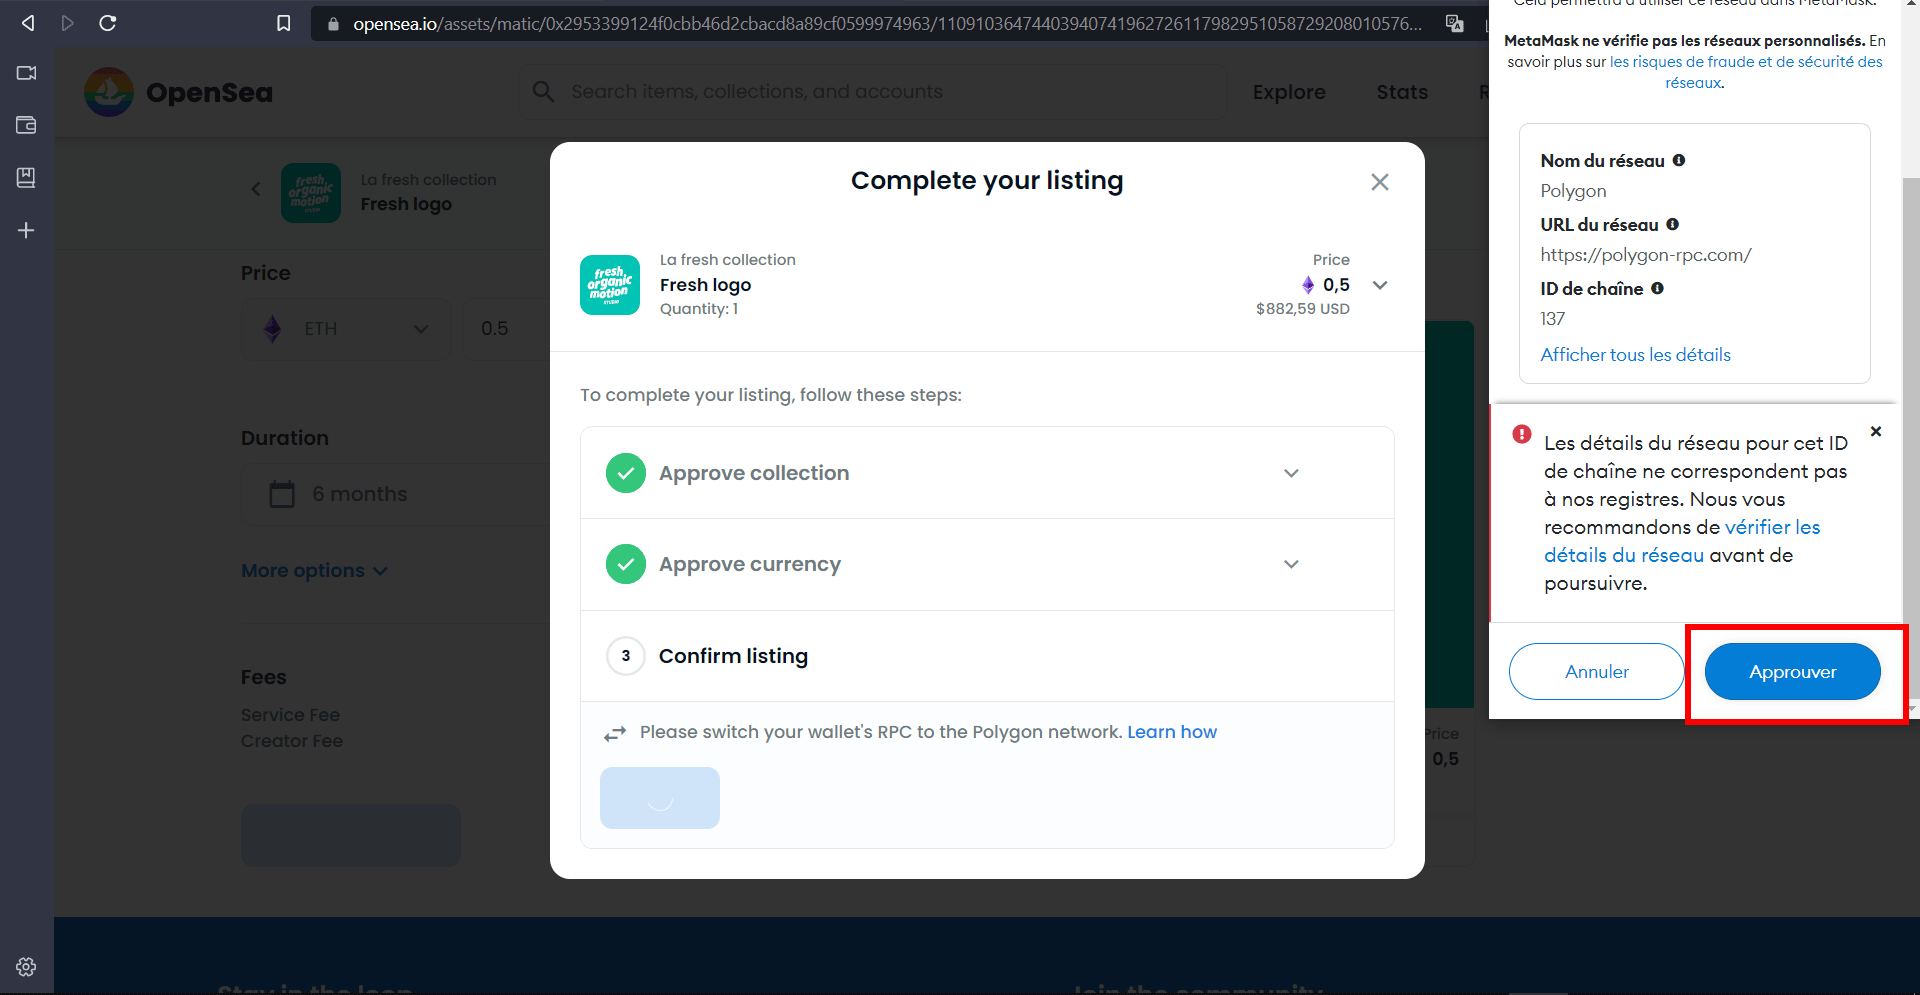
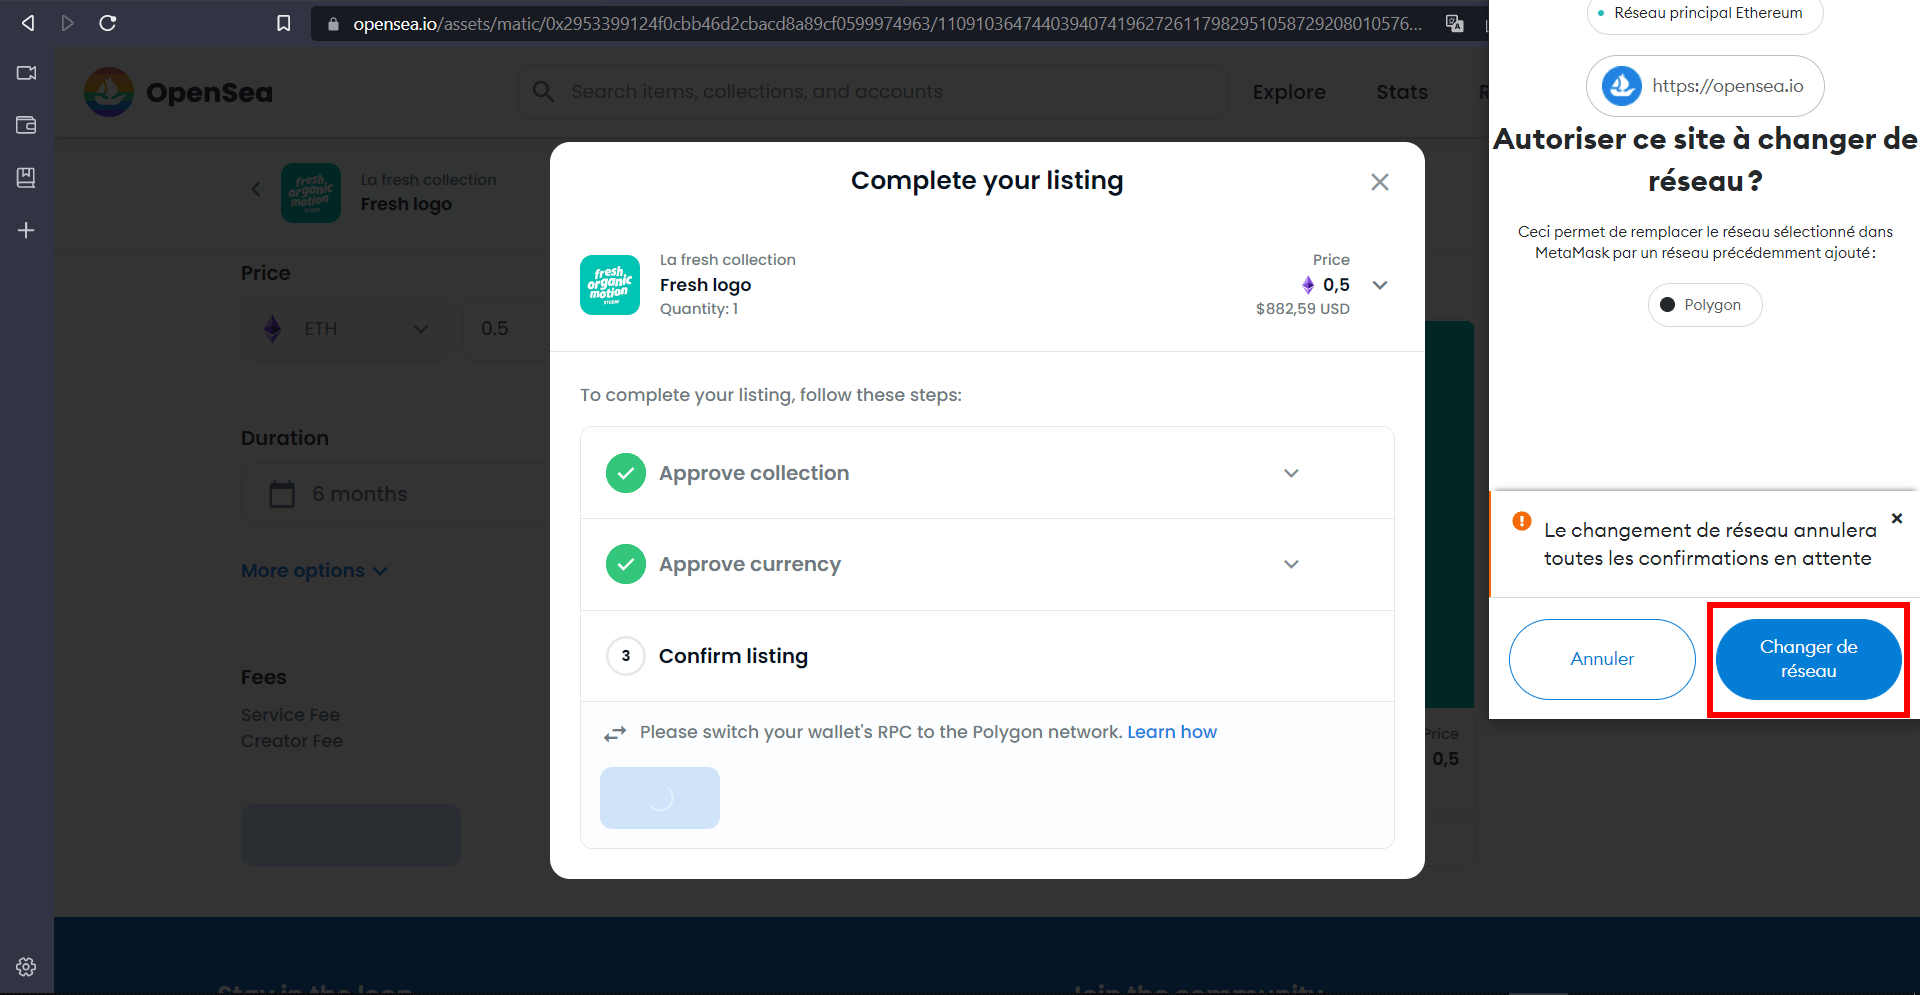
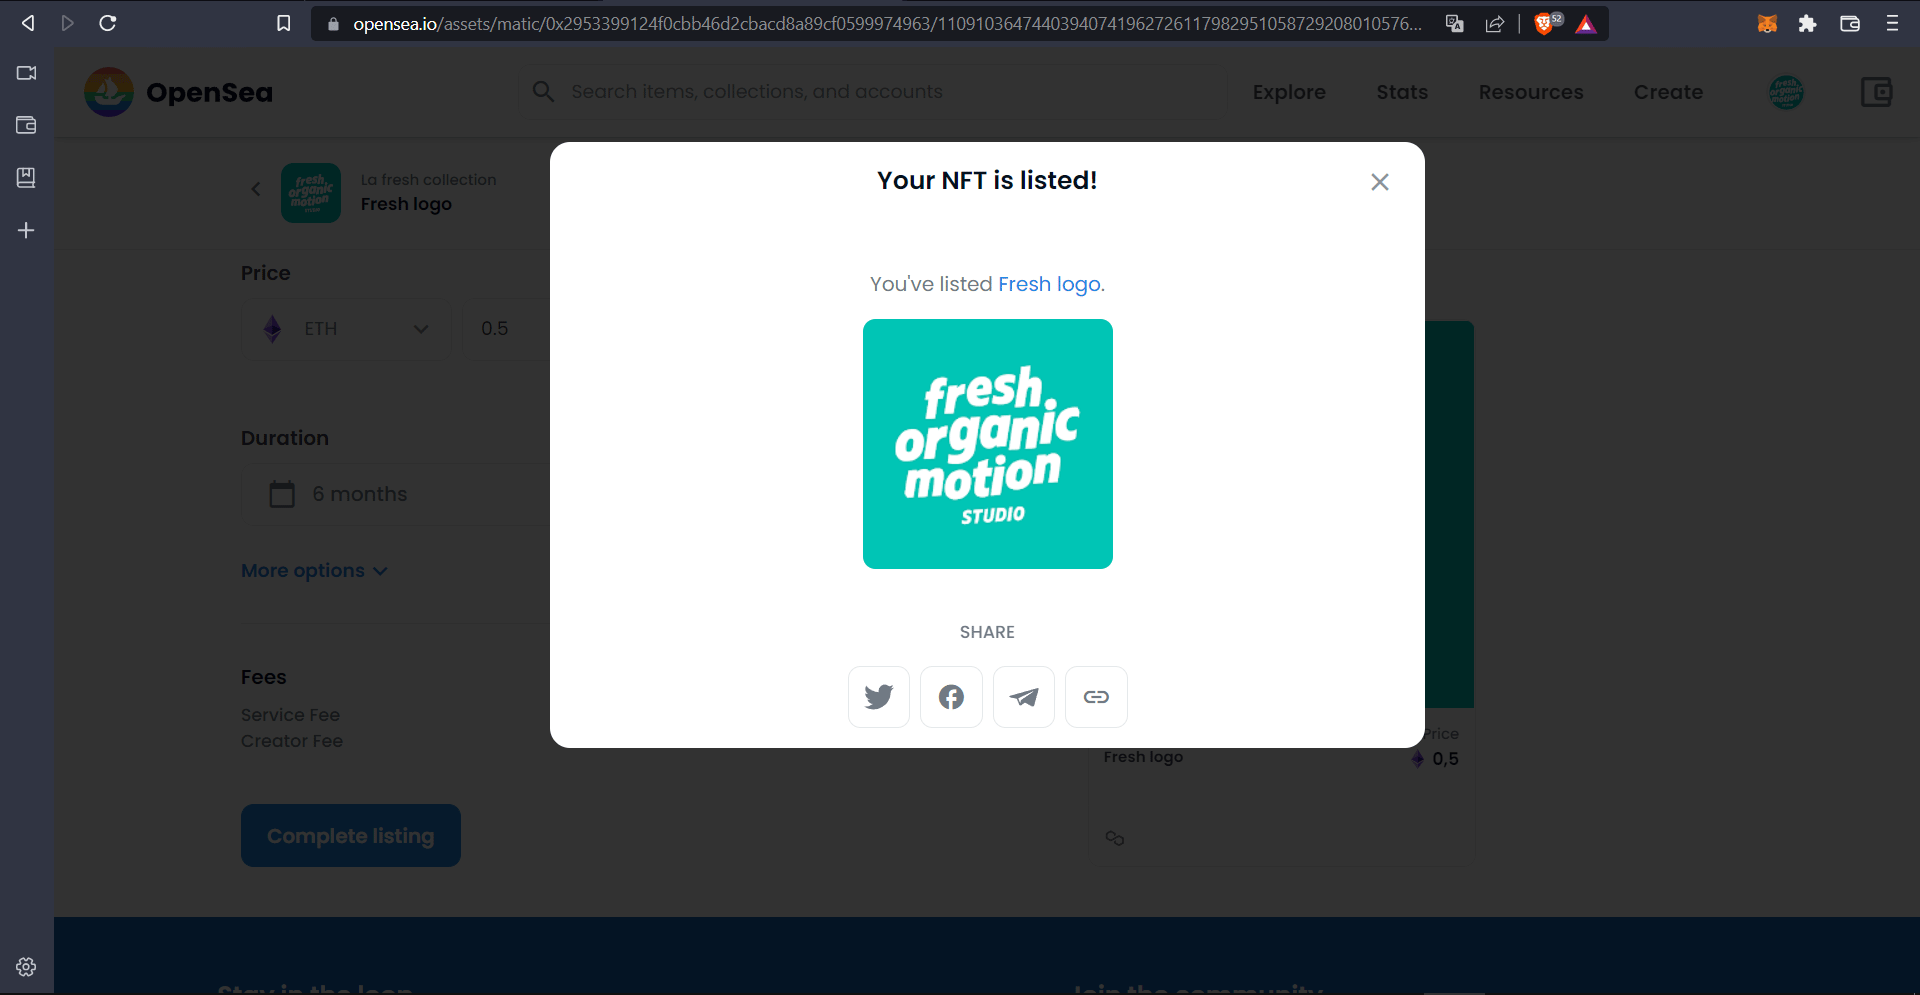
Return to "My Collections".Click on the NFT you've created and want to sell.Click on "Sell".Fill in the price in ETH (the Ethereum crypto) you have the price in dollars on the right-hand side below.Click on "Date Range" then select "6 months", and your NFT will be available for sale for 6 months.Click on "Complete listing".You must validate the steps. Click on "Sign" in MetaMask.Click on "Sign" in MetaMask.Click on "Approve" in MetaMask, there are often errors between OpenSea, approve and follow the steps. You may need to repeat this step.Typically the kind of mistake that doesn't prevent the NFT from going on sale.Your NFT is for sale. You can start your business 3.0. Thank you Fresh Organic Motion!
9 - One more thing - More tips
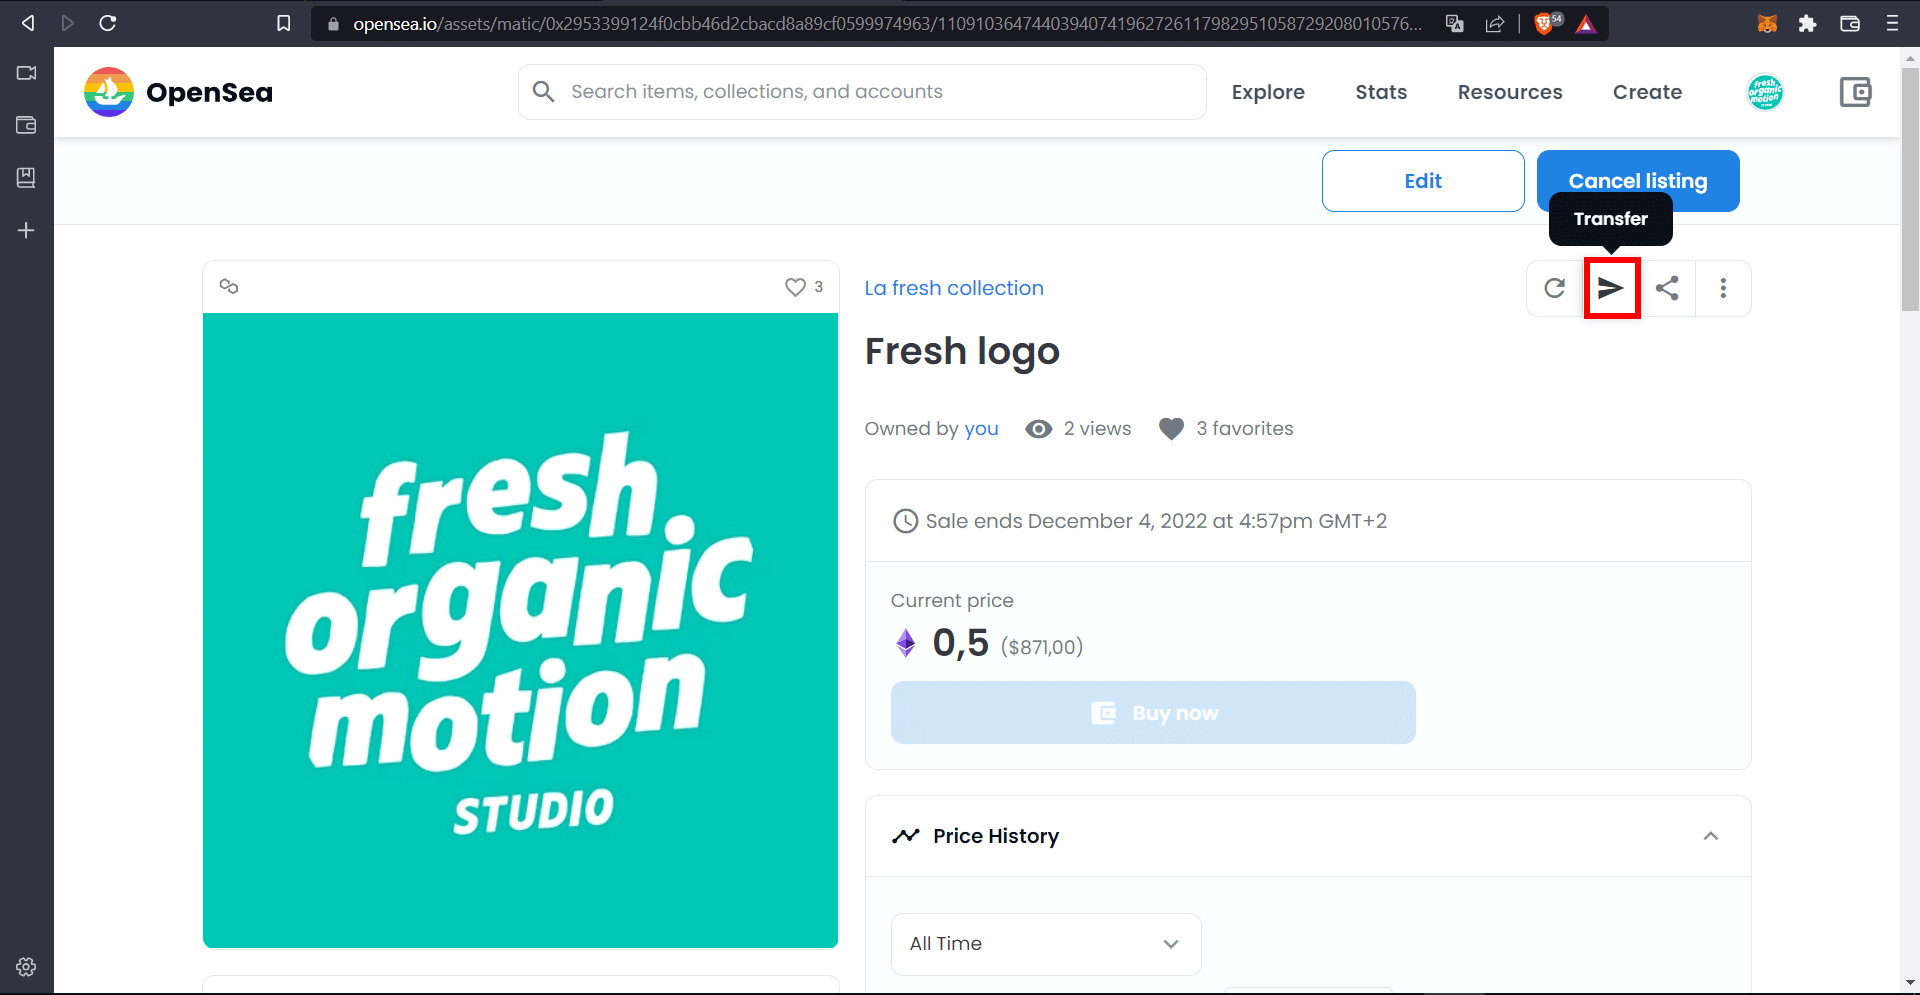
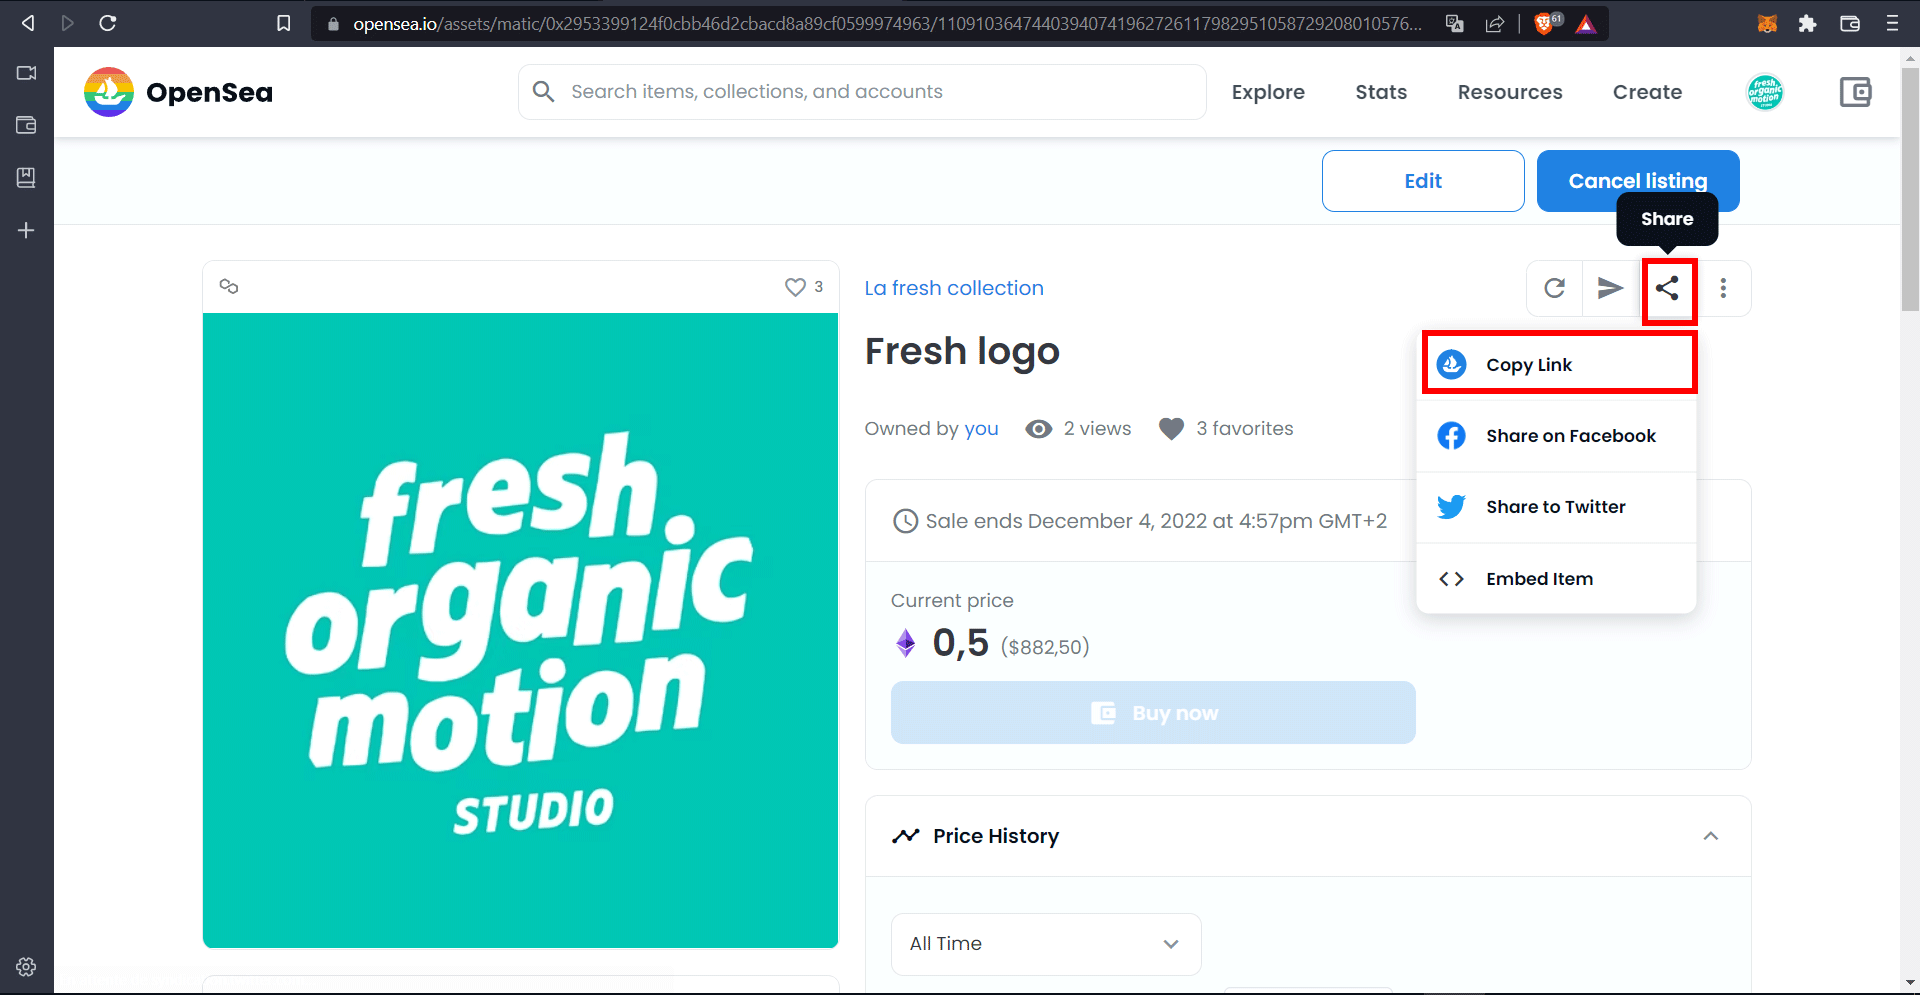
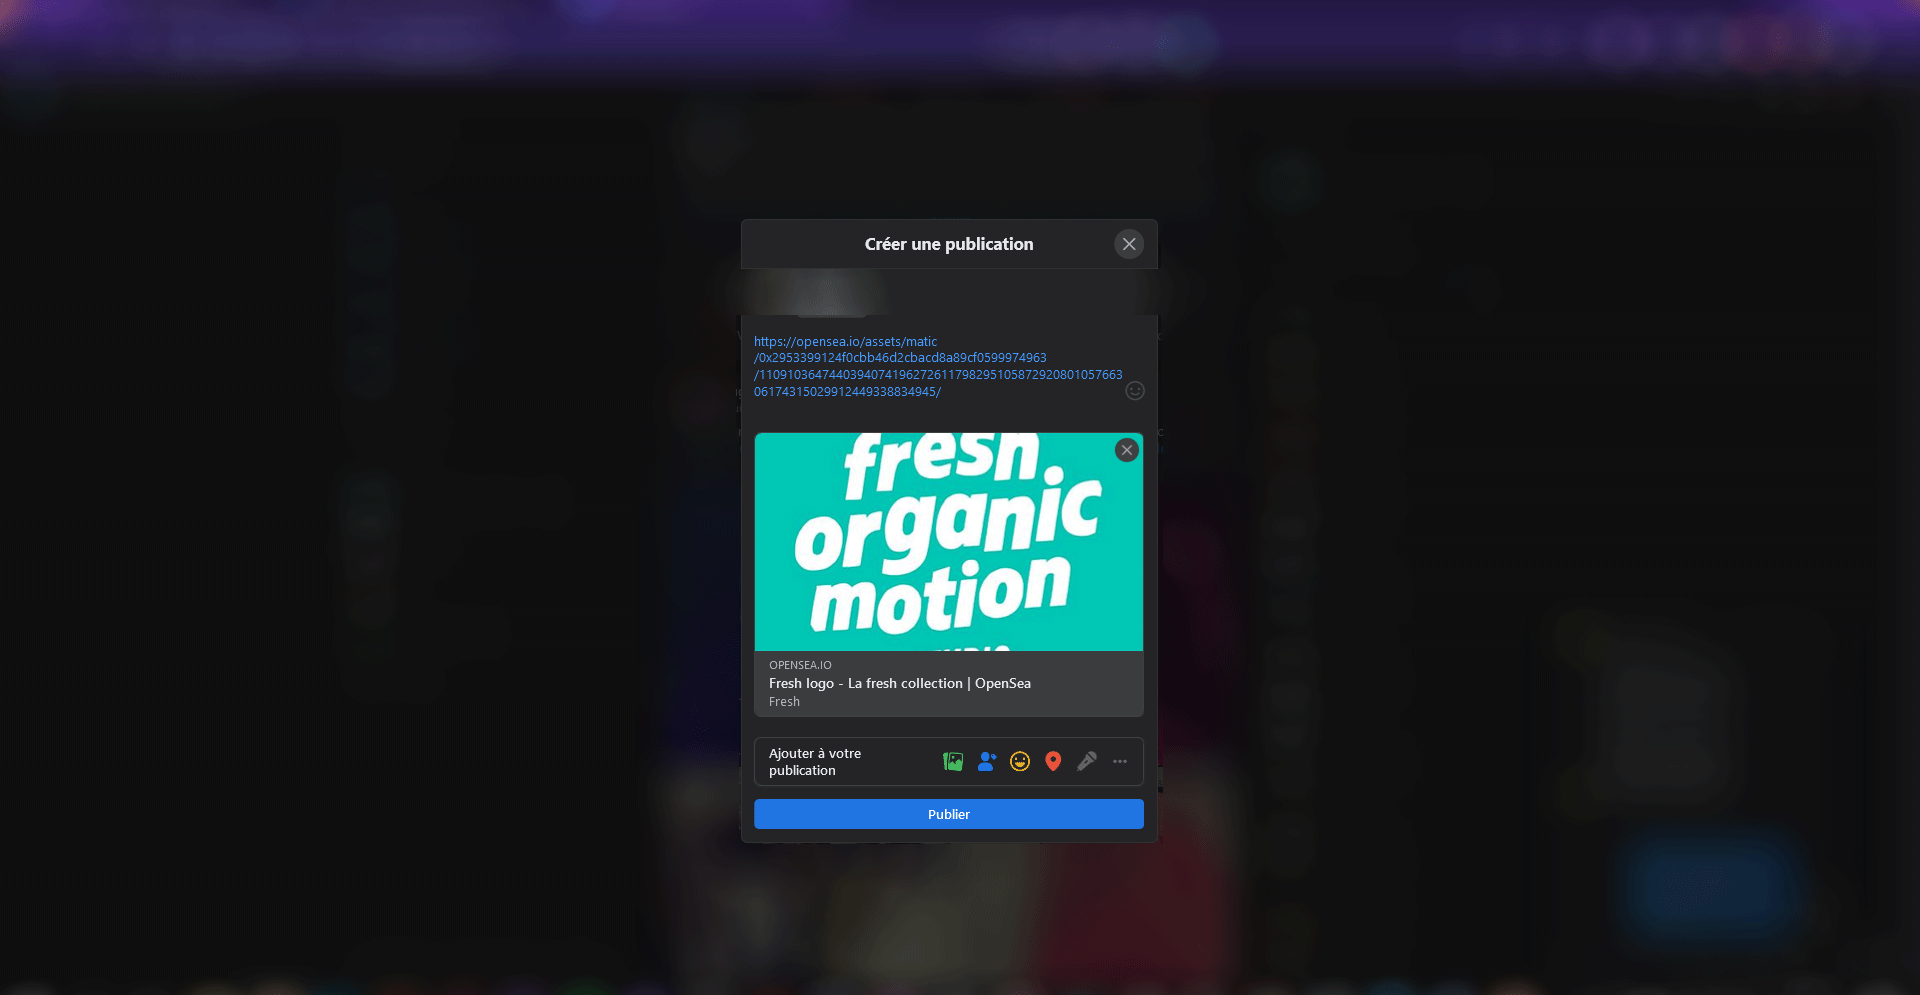
Transfer your NFT (be careful, it's irreversible) free of charge to a friend. Ask for a friend's wallet number and send them your NFT. We exchange NFTs like Pokémon cards in the playground. So contact us and let's swap: See the exchange page here.To put your NFT on Facebook, Instagram, Twitter, Snapchat, Tinder, TikTok... click on "Share", then on "Copy Link".Create a post on Facebook and paste the link copied above.
Contact our studio to create your NFT.
Now you know all about creating and selling NFTs on the Ethereum blockchain. Contact us to create your NFT.
An AI is a technology composed of an artificial neural network fed with thousands of images to train it to produce its own visions, a practice called deep learning. We interrogate it with keywords to find out what it has in mind. The intelligence then produces a precise image. An artist back to life...
The entry price for the creation of an NFT is 150€HT. This one-off price includes the creation of metadatas, the IPFS deposit, the drafting of the smart contract and the sale. The NFT is the image of a work of which you are the author. A simple NFT includes the Opensea smart contract, the image and the sale...
Suno is a website that generates music thanks to its AI. How does SUNO AI generate music? Each week sees its share of new tools powered by artificial intelligence. The years 2022 and 2023 saw the arrival of high-definition images thanks to AI...
Avatars are all the rage, as they are a virtual representation of ourselves. They are embodied by thousands of people on a wide range of platforms. Making your own avatar is essential for exploring virtual worlds such as the metaverse! It's your virtual double who will interact with other people...
Since June 2022, graphic designers and artists have been increasingly asking themselves the question: should I use AI in my creative process? With the arrival of Midjourney version 3, this question takes on even greater importance. Indeed, the technological boom of recent months has been impressive. How do you...
You've probably already heard of NFT, the three letters that have turned the art market upside down. The concept of NFT, which stands for non-fungible-tokens, is the creation of an authenticated token linked to a digital image (PNG, JPEG, GIF). This encryption is based on the same technologies as cryptocurrencies, the blockchain. This ensures that every...
Manage cookie consent
We use cookies to optimize our website and our service.
Functional
Always active
The technical storage or access is strictly necessary for the legitimate purpose of enabling the use of a specific service explicitly requested by the subscriber or user, or for the sole purpose of carrying out the transmission of a communication over an electronic communications network.
Preferences
The technical storage or access is necessary for the legitimate purpose of storing preferences that are not requested by the subscriber or user.
Statistics
The technical storage or access that is used exclusively for statistical purposes.The technical storage or access that is used exclusively for anonymous statistical purposes. Without a subpoena, voluntary compliance on the part of your Internet Service Provider, or additional records from a third party, information stored or retrieved for this purpose alone cannot usually be used to identify you.
Marketing
The technical storage or access is required to create user profiles to send advertising, or to track the user on a website or across several websites for similar marketing purposes.